

Blogs
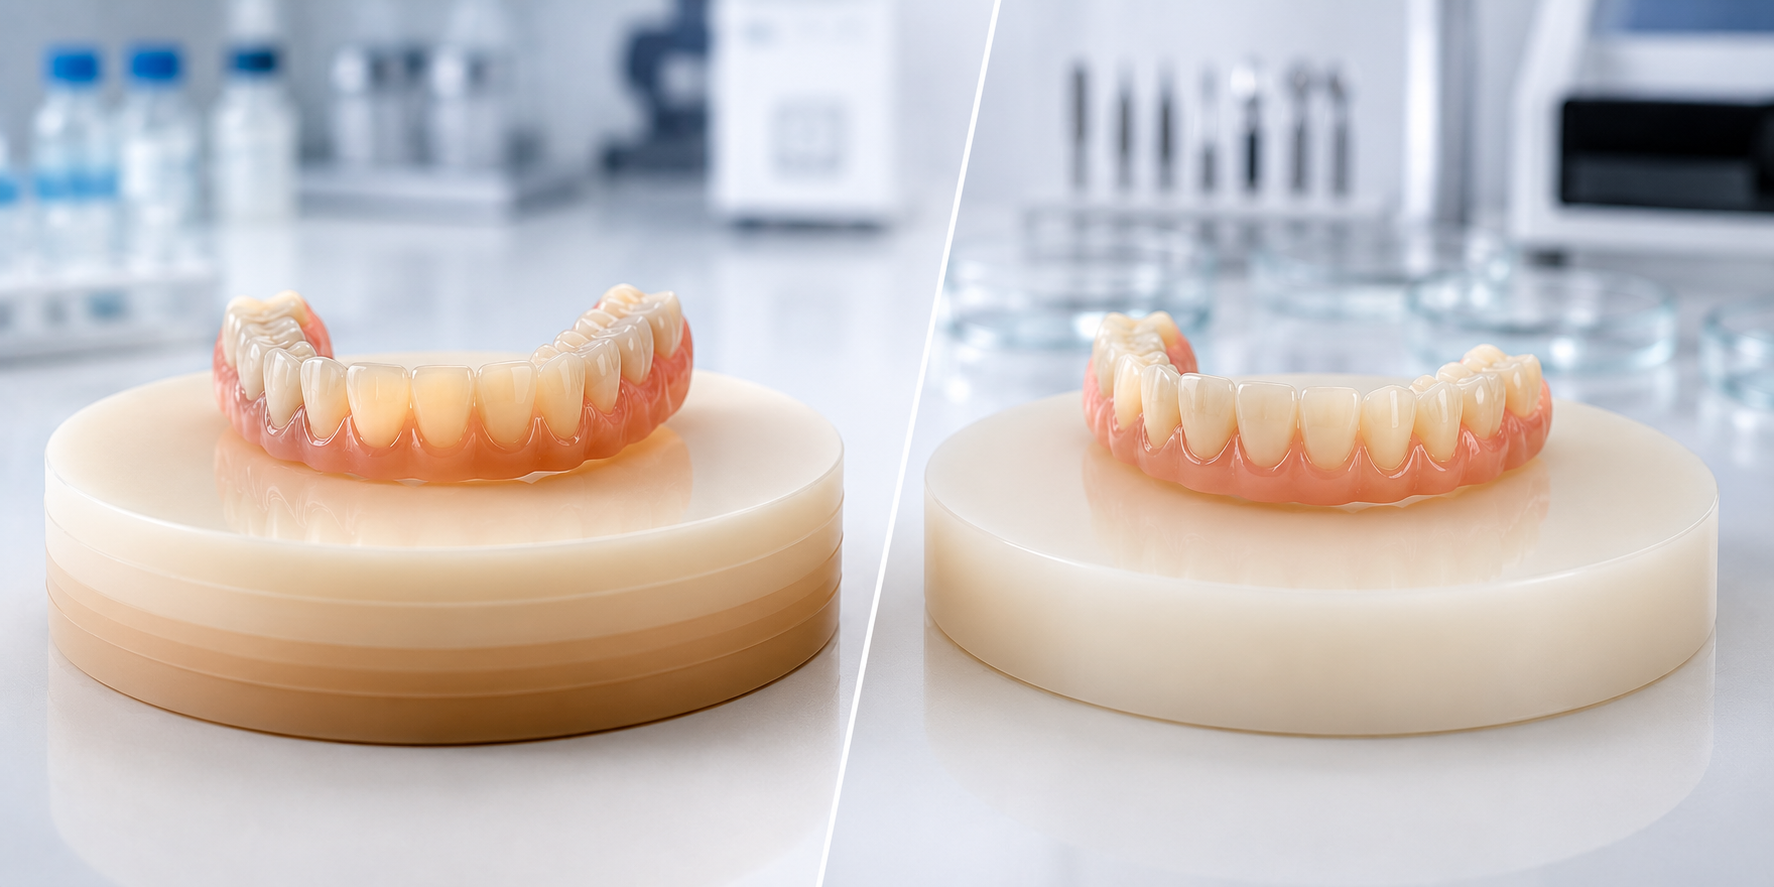

How to Store Orthodontic Model Resin to Maintain Consistent Print Quality?
Print failures in dental 3D printing are rarely caused by the printer. Technicians blame layer delamination, surface roughness, dimensional inaccuracy, and color inconsistency on machine settings and spend hours recalibrating exposure times, lift speeds, and layer heights looking for a fix that was never there. In most cases, the actual cause is much simpler: the resin was stored incorrectly, and its material properties changed before it ever reached the vat. Orthodontic model resin is a precision material. It is engineered to perform within tight tolerances of viscosity, photoinitiator reactivity, and pigment dispersion. Any of those properties can degrade significantly if the resin is exposed to the wrong temperature, light, air, or moisture over time. The printer settings that worked perfectly on the last batch will produce poor results on a new batch stored under different conditions and the difference can be invisible in the bottle. This guide covers every storage variable that affects orthodontic model resin performance, and exactly what your lab needs to do differently to eliminate storage-related print failures. Why Resin Storage Matters More Than Most Labs Realize Dental 3D printing resins are photopolymer materials that cure when exposed to specific wavelengths of light, typically 385 nm or 405 nm. The curing reaction is driven by photo initiators: chemical compounds that absorb light energy and trigger crosslinking of the polymer chains. These photo initiators are sensitive. They respond not just to your printer's UV array, but to ambient UV from fluorescent lighting, sunlight through windows, and even heat-driven degradation that accelerates their decomposition before the resin is used. When photo initiator concentration decreases due to pre-exposure or thermal degradation, the resin requires more light energy to achieve the same degree of cure. A resin that prints perfectly at 2.5 seconds per layer at the start of a bottle may require 3.0 seconds per layer halfway through a batch stored improperly and may produce under cured, dimensionally unstable models regardless of exposure time by the end of a degraded bottle. The model may appear complete on the build plate but fail mechanically during post-processing or lose dimensional accuracy in ways that affect orthodontic fit. Viscosity is the second critical variable. Orthodontic model printing resin is formulated within a specific viscosity range that determines how the resin flows across the FEP film between layers, how bubbles release, and how consistently each layer coats the previous one. Temperature changes alter viscosity directly resin stored in a cold environment thickens, producing uneven layer coating and increased peel forces that cause delamination. Resin stored in excess heat thins, reducing layer differentiation and causing dimensional blurring at fine detail areas like bracket pads and gingival margins. The Five Storage Variables That Determine Resin Performance 1. Temperature Temperature is the single most impactful storage variable for orthodontic model resin. Most dental photopolymer resins specify a storage temperature range of 15–25°C (59–77°F). This range is not conservative marketing language it reflects real material behavior thresholds. Below 15°C, resin viscosity increases to a point where pigment particles and photoinitiator compounds can separate from the polymer base. This separation is not always visible it may appear as subtle cloudiness rather than obvious settling. When this separated resin is used, photoinitiator distribution is uneven across the vat, producing inconsistent cure depth from one layer to the next and dimensional variation across the build platform. Above 30°C, thermal degradation of photoinitiators accelerates. The resin consumes its curing capacity at an elevated rate even without light exposure. Labs that store resin near sintering furnaces, on shelving above heating units, or in rooms that reach high temperatures during summer months are routinely working with degraded material by the time they use it often without realizing the storage conditions are the cause of their print inconsistency. What to do: Store all orthodontic model resin in a temperature-controlled environment between 15–25°C. Never store near furnaces, heating vents, or in direct sunlight. If your lab reaches high temperatures in summer, dedicate a climate-controlled cabinet or small refrigerator (set to 18°C) for resin storage. Allow refrigerated resin to warm to room temperature for at least two hours before use never pour cold resin directly into the vat. 2. Light Exposure Photopolymer resins begin their curing reaction the moment they are exposed to relevant wavelengths of light which includes not just your printer's UV array but fluorescent lab lighting, LED task lighting, and sunlight through windows. Indirect ambient light at low intensity causes partial, uncontrolled pre-cure that degrades the resin's performance progressively over time. This degradation is cumulative. A bottle left open on a bench under standard lab lighting for 30 minutes during a workflow pause accumulates more degradation than the same bottle stored correctly in the dark for a month. Labs that keep bottles open during print runs, pour excess resin back into clear storage bottles, or store resin on open shelving near windows are accelerating material degradation in ways that directly affect print quality. What to do: Store all resin in original opaque bottles or purpose-made UV-blocking amber containers. Keep bottles sealed when not actively in use. During print runs, keep the resin bottle capped between pours. Never store resin in clear containers. For the key ortho model resin specifically, original Keystone packaging is designed for UV protection do not transfer to generic containers. 3. Air and Moisture Exposure Oxygen inhibits photopolymerization this is a known property of acrylic-based photopolymers. When resin is exposed to air during storage, dissolved oxygen gradually accumulates in the liquid, which increases the light energy threshold needed to initiate curing. The practical result is undercuring at exposure settings that previously produced clean prints, requiring upward adjustment of exposure times that then overcure fine details. Moisture contamination from humidity causes a different failure mode: hydrolysis of the polymer base that reduces mechanical strength and increases brittleness of cured models. In high-humidity lab environments common in dental labs that run steam autoclaves or have inadequate HVAC resin stored in partially sealed or frequently opened containers absorbs atmospheric moisture over time. What to do: Seal bottles immediately after each use. For partially used bottles, press out excess air before sealing to minimize the air volume inside the container. In high-humidity environments, consider silica gel desiccant packets in the resin storage area. Never return resin from the vat to the original bottle vat resin has been exposed to light and air and should be treated as a separate, potentially degraded batch. 4. Agitation and Pigment Settling Orthodontic model resins contain suspended pigments that provide the tooth-like or stone-like color used for model visualization. These pigments settle over time the rate depends on particle size, resin viscosity, and storage temperature. A bottle stored undisturbed for several weeks will have pigment concentrated at the bottom and clear polymer at the top. Pouring from a settled bottle delivers inconsistent pigment distribution into the vat, producing models where color varies across the build platform lighter at the top of the build, darker at the base. The orthodontic model printing resin formulation from Keystone is engineered for low settling rates, but settling still occurs over extended storage periods and under temperature fluctuation. Agitation before use is not optional it is a required step in any reliable print workflow. What to do: Invert and gently roll each bottle for a minimum of two minutes before use. Do not shake vigorously vigorous agitation introduces air bubbles that require 30–60 minutes of settling before the resin is usable. For bottles stored longer than two weeks, extend agitation time to three minutes. Inspect the bottle bottom during agitation if pigment deposits remain after two minutes of rolling, the resin has settled significantly and may require extended agitation before the distribution is fully uniform. 5. Shelf Life and Batch Management All photopolymer resins have a defined shelf life from the manufacturing date typically 12–18 months when stored correctly. Beyond this point, photoinitiator degradation may have progressed to the point where reliable curing cannot be achieved regardless of exposure time adjustment. Labs that purchase large quantities to benefit from volume pricing but consume slowly may routinely be printing with expired resin. Batch management is equally important. Different production batches of the same resin product may have slightly different photoinitiator concentrations or viscosity specifications due to manufacturing variation. Running a new batch on the exact same settings as the previous batch without a test print can produce unexpected results particularly for thin features like gingival margins and interdental areas. For labs that also manage zirconia blocks dental and dental zirconia discs inventory alongside resin, the same batch-documentation discipline applies: track batch numbers, note print settings per batch, and test new batches before committing to production runs. What to do: Label every bottle with the date received and date opened. Apply a strict FIFO (first in, first out) inventory rotation never open a new bottle while a previous bottle of the same product remains in stock. For high-volume labs, maintain a simple resin log that records batch number, received date, opened date, and print settings used. When switching to a new batch, run a calibration print before production. Indirect Bonding Tray Resins: Same Rules, Higher Stakes Labs producing indirect bonding trays alongside orthodontic models work with a closely related but distinct resin category. The key ortho ibt resin is formulated specifically for indirect bonding tray applications flexible enough to remove cleanly after bracket bonding while dimensionally accurate enough to transfer bracket positions precisely. Storage failures in IBT resin have higher clinical consequences than in model resin. A dimensionally unstable model is a visualization tool a poorly stored IBT resin that produces bracket positioning errors translates directly into bracket placement errors on the patient. All storage protocols above apply equally to IBT resins, with one additional consideration: IBT resins are typically used in smaller volumes and less frequently than model resins, increasing the risk of exceeding shelf life or printing from settled, temperature-stressed material. Dedicate separate labeled storage for IBT resin, maintain its own batch log, and apply the same agitation protocol before every use regardless of how recently the bottle was last used. Resin Storage and Your Broader Lab Material Discipline Consistent print quality in dental 3D printing is not achieved by optimizing the printer in isolation it is achieved by treating every material input as a variable that must be controlled. The same discipline that produces consistent results with dental 3d resin applies across every material category in a modern dental lab. Labs that have invested in understanding material variables at this level understanding why zirconia blank and zirconia dental blanks from reliable sources outperform generic alternatives in milling consistency, why batch documentation matters for dental zirconia discs, and why sourcing from a consistent zirconia materials distributor USA reduces variability across the production workflow apply the same thinking to resin storage naturally. Material quality control is not department-specific. It is a lab-wide standard. If you are also evaluating your milling material supply, our guide on the difference between 3Y, 4Y, and 5Y zirconia covers the same principle applied to zirconia disc selection understanding what differentiates materials at the formulation level is the foundation of every correct procurement decision. Practical Storage Checklist for Orthodontic Model Resin Use this checklist at your lab as a standard operating procedure for resin storage and handling: Storage conditions Temperature maintained between 15–25°C at all times No storage near sintering furnaces, heating vents, or windows UV-blocking opaque containers used for all resin storage Bottles sealed immediately after each use Humidity controlled or desiccant used in storage area Inventory management All bottles labeled with received date and opened date FIFO rotation enforced — oldest stock used first Batch numbers logged with corresponding print settings Shelf life verified before opening new bottles Expired or suspect resin disposed of, not used in production Pre-use protocol Bottle rolled gently for 2–3 minutes before each use No vigorous shaking — air bubbles allowed to settle before pouring Cold resin warmed to room temperature before use Vat resin never returned to original bottle Calibration print run when switching to new batch Print failures attributed to printer settings are often caused by resin storage. Temperature fluctuation, light exposure, air contact, and pigment settling are all controllable variables and controlling them consistently is what separates labs that hit their first-print success rate targets from labs that spend production time diagnosing failures that should not have occurred. The investment in correct storage is minimal: a temperature-stable cabinet, consistent bottle sealing, a simple batch log, and two minutes of agitation before each print run. The return on that investment is consistent model quality, reliable dimensional accuracy, and the confidence that the print failures you do encounter are equipment or settings issues not material issues that have already been eliminated from the equation. For zirconia blocks and broader dental lab materials procurement guidance, see our guide to materials and strengths of zirconia dental restorations for the same level of material-first thinking applied to your milling workflow.
Learn more
All You Need To Know About Dental Impression Trays
The dental impression tray is one of the most foundational tools in clinical dentistry used in almost every restorative workflow, yet rarely explained in enough technical depth for the labs and clinicians who rely on it daily. Getting the tray selection right determines whether the impression accurately captures the patient's anatomy, whether the material seats and releases cleanly, and whether the resulting cast or digital model has the precision the restoration requires. This guide covers everything dental professionals and lab technicians need to know: how impression trays work, the three main tray types, how to match the tray to the procedure, what materials modern labs use for CAD/CAM-milled custom trays, and how impression workflow connects to the broader zirconia dental blanks and restoration production chain. How Dental Impression Trays Work? A dental impression tray is a rigid or semi-rigid carrier used to hold impression material in contact with the teeth and surrounding oral tissues long enough for the material to set. The result is a negative imprint of the patient's oral anatomy teeth, gingiva, palate, and ridges which is then used to produce a positive stone or digital model for restoration fabrication. The tray serves three mechanical functions simultaneously. It must confine the impression material so it flows uniformly around all anatomical surfaces. It must hold the material dimensionally stable during setting so the impression does not distort. And it must release cleanly from the set material without tearing or deforming the impression at the margins the region most critical for restoration accuracy. Every choice made at the tray selection stage affects all three of these functions. Size, shape, material, perforation pattern, and whether the tray is stock or custom-fitted all determine how well the impression captures the preparation margin and therefore how well the final restoration fits. The Three Main Types of Dental Impression Trays Stock Trays Stock trays are pre-fabricated in standardized sizes and sold ready to use. They are the most widely used impression tray format in general dental practice available in small, medium, large, and extra-large arch sizes for both maxillary and mandibular arches, and manufactured in stainless steel, chrome-plated metal, rigid plastic, or acrylic. Metal stock trays are the most dimensionally stable and reusable after sterilization. Plastic and acrylic stock trays are typically single-use, though some rigid plastic formats are rated for autoclave sterilization. Perforated stock trays provide mechanical retention for alginate and polyvinyl siloxane impression materials through the tray wall, which improves the tray-to-material bond during removal. The limitation of stock trays is fit. A tray that does not conform closely to the patient's arch leaves excess impression material, which increases the risk of dimensional distortion during setting and removal. For full-arch cases where every margin must be captured accurately crown preparations, bridge preparations, full-arch fixed prosthetics stock trays are frequently insufficient for the precision the lab requires. Disposable Plastic Trays Disposable trays are single-use plastic stock trays designed primarily for infection control efficiency. They eliminate the sterilization cycle required for metal stock trays, reduce cross-contamination risk between patients, and lower the per-impression processing time. In high-volume general practices where full-arch accuracy is secondary to speed and throughput routine alginate study models, orthodontic records, whitening tray fabrication disposable trays are a practical default. They are not appropriate for crown and bridge impressions, implant-level impressions, or any case where marginal accuracy determines restoration fit. The dimensional stability of disposable plastic is lower than metal stock trays, and the fit is no more precise than standard stock formats. Custom Impression Trays Custom trays are fabricated from the patient's own diagnostic model, providing a tray that conforms precisely to the individual arch anatomy. The uniform 2–4 mm spacing between the tray and the tissues achieved through custom spacer wax during fabrication — ensures even impression material thickness throughout the impression. Even material thickness is the single most important factor in dimensional accuracy for polyvinyl siloxane and polyether impressions. Custom trays are the clinical standard for: Crown and bridge final impressions Full-arch fixed implant impressions Complete denture final impressions Implant-level open-tray and closed-tray impressions Any case where marginal fit tolerance is less than 50 microns The material used to fabricate the custom tray directly affects its rigidity, accuracy, and clinical performance. This is where CAD/CAM resin technology has significantly upgraded the custom tray workflow for modern dental labs. CAD/CAM Custom Tray Materials: What Labs Are Using Now The traditional method for custom tray fabrication hand-adapting light-cure or heat-activated acrylic over a spacer-waxed model has been largely displaced in modern labs by CAD/CAM-milled custom trays. Digitally designed and milled trays offer superior dimensional accuracy, consistent wall thickness, and reproducible geometry compared to manually formed trays, where thickness variation is operator-dependent. The material choice for CAD/CAM custom trays is purpose-formulated dental impression tray resin Whip Mix VeriTray is a widely used example, engineered specifically for the mechanical demands of impression tray applications. Tray resin must be rigid enough to resist deformation under impression material seating pressure and removal force, biocompatible for oral use, and machinable to a smooth surface that seats cleanly against impression material adhesives. VeriTray is formulated to meet these requirements from a CAD/CAM milling workflow available in standard 98 mm disc format, compatible with open-system mills, and producing trays that maintain dimensional stability through the full impression cycle from seating to removal. For labs running Keystone's resin product range, the key tray resin is an equivalent format purpose-built for custom impression tray production in a digital workflow, with the material properties optimized for tray rigidity, polished edge finish, and impression material adhesion compatibility. Both formats represent a significant upgrade over hand-formed acrylic: the digital workflow produces a tray with consistent geometry that the dentist can trust for critical final impressions, rather than compensating for uneven wall thickness during material application. Comparing custom tray material formats: Property CAD/CAM Tray Resin Traditional Light-Cure Acrylic Vacuum-Formed Thermoplastic Dimensional accuracy High digitally controlled Moderate operator-dependent Low thickness varies Wall thickness consistency Uniform throughout Variable Variable Rigidity High Moderate to high Low to moderate Surface finish Smooth mill-finished Rough requires trimming Smooth Workflow integration CAD/CAM native Manual Manual Production time Fast milled to design Slow multi-step bench Fast but limited accuracy Impression Tray Materials: Matching the Material to the Procedure The tray material and the impression material must be selected together different impression materials require different tray characteristics for optimal performance. Alginate The most forgiving impression material and works with stock trays, perforated or solid. Its dimensional stability is limited it dehydrates and distorts within minutes of removal so the impression must be poured immediately regardless of tray format. Alginate is appropriate for study models, orthodontic records, and whitening tray fabrication. It is not appropriate for crown and bridge final impressions. Polyvinyl Siloxane (PVS) The standard material for crown, bridge, and implant final impressions in most practices. PVS requires a clean, dry field and good tray retention either perforations or tray adhesive. Custom trays with uniform 2–4 mm spacing are strongly preferred for PVS final impressions because the dimensional accuracy of the set impression is directly related to the uniformity of material thickness. Polyether An alternative to PVS for final impressions, offering higher rigidity in the set state and excellent marginal detail reproduction. Polyether is moisture-tolerant during setting but hydrophilic after setting store polyether impressions away from humidity. Like PVS, polyether performs best in a custom tray with even material thickness. Zinc Oxide Eugenol (ZOE) Paste is used for final impressions in edentulous cases specifically for complete denture final impressions where mucosal detail is the priority rather than tooth preparation margin capture. ZOE requires a custom tray fitted closely to the edentulous arch. How Impression Accuracy Connects to the Downstream Restoration Workflow? The impression tray and material are the first step in a production chain that ends with the final restoration seating on the prepared tooth. Every dimensional error introduced at the impression stage compounds through the subsequent workflow: model pouring, die trimming, CAD scanning, design, milling, and sintering. For labs producing restorations from zirconia blocks dental Aidite multilayer zirconia, Upcera, or other precision-milled formats an inaccurate impression is the upstream cause of a poorly fitting crown, regardless of how precisely the disc was milled. A 50-micron impression error at the margin translates directly into a 50-micron fit error at delivery, which may require adjustment, remakes, or cementation compensation. This is why the custom tray format is the correct clinical standard for final impressions in crown and bridge cases. The lab cannot recover accuracy that was not captured in the impression. Asking a lab to mill a precisely fitting crown from an inaccurate impression is asking the milling machine to correct a problem the tray was supposed to prevent. What ZirconiaGuys Stocks for Impression Tray Workflows? As a zirconia materials distributor usa serving dental labs across the country, ZirconiaGuys stocks more than dental zirconia discs Upcera esthetic and functional zirconia alongside impression tray resins, surgical guide resins, model resins, and the full range of CAD/CAM production materials labs need to run complete digital workflows. For labs building or rationalizing their CAD/CAM resin inventory alongside zirconia: Impression tray production: Whip Mix VeriTray and Keystone Key Tray Resin both purpose-formulated, open-system compatible, US-stocked. Surgical guide production: Whip Mix VeriGuide Clear biocompatible, transparent, designed for implant surgical guide applications. Study and diagnostic models: Whip Mix VeriModel range grey, ivory, golden brown, and ortho white formats for different model-reading applications. Splint and night guard production: Whip Mix VeriSplint Clear and Keystone KeySplint Hard and Soft formats. The full range is available from US inventory with same-day or next-day shipping. As covered in our Role of Dental PMMA in Temporary and Long-Term Restorations guide, the digital workflow depends on the right material being available at every production stage not just at the zirconia milling step. For labs evaluating zirconia blank alongside impression tray and resin products, ZirconiaGuys provides consolidated supply from US inventory reducing the multi-vendor overhead that most full-service labs manage today. Dental impression trays are not a commodity item in the restoration production chain they are the first precision decision that determines whether every downstream step delivers the clinical accuracy the patient and dentist expect. Understanding the tray types, matching the material to the procedure, and using the right zirconia blocks and CAD/CAM resin materials throughout the workflow is what separates labs that consistently hit marginal accuracy from labs that spend time adjusting and remaking restorations that didn't have to fail. ZirconiaGuys stocks the full range of impression tray resins, CAD/CAM zirconia blank formats, and dental production materials from US inventory all from a single supplier built specifically for dental lab workflows.
Learn more
PMMA Dental Guide: Why Dentists and Labs Prefer It Today?
Dental workflows have changed dramatically over the past decade. Chairside milling, digital impressions, and CAD/CAM production have replaced most manual fabrication steps and the materials used in those workflows have evolved alongside the technology. PMMA has been part of dentistry since the 1940s, but the material available to labs and dentists today bears little practical resemblance to the bench-mixed acrylic of earlier generations. Modern pre-polymerized PMMA discs are precision-engineered for digital milling, with consistent mechanical properties, controlled residual monomer, and formulations matched to specific clinical applications. Understanding what separates high-quality PMMA from generic acrylic, where it fits in the full material hierarchy, and how to choose the right formulation for each application is practical knowledge that directly affects clinical outcomes and lab efficiency. This guide covers all of it. What Is Dental PMMA and How Is It Made? PMMA stands for polymethyl methacrylate a thermoplastic acrylic polymer that has been used in dental applications for over seventy years. In modern dental labs, PMMA refers specifically to pre-polymerized CAD/CAM discs manufactured under controlled industrial conditions, not to the hand-mixed powder-and-liquid acrylic still used in some traditional workflows. The difference between bench-mixed acrylic and industrial pre-polymerized PMMA is significant. Traditional acrylic is mixed from monomer liquid and polymer powder at the bench and cured at atmospheric pressure in a water bath or flask. This process traps residual monomer at levels of 3–5% or higher a known irritant that causes tissue sensitivity in susceptible patients. The packing and curing process also introduces porosity and dimensional variability that affects fit accuracy. CAD/CAM pmma dental material discs are polymerized under high pressure typically 50 to 200 bar and elevated temperature in industrial autoclaves. This industrial process produces a denser, more homogeneous polymer with residual monomer below 0.5%, near-zero internal porosity, and consistent dimensional properties that enable accurate digital milling. The result is a safer, more machinable, and more predictable material than anything bench mixing can produce. Why Dentists and Dental Labs Prefer PMMA Today? The preference for PMMA in modern dental workflows is not about sentiment for a traditional material it is about specific performance characteristics that no other material class delivers at PMMA's price point and workflow compatibility. Machinability in CAD/CAM systems. PMMA mills cleanly and quickly in all major open-system dental milling machines. Its softness relative to ceramics and zirconia blocks dental formats means faster milling cycles, lower bur wear, and fewer milling errors. A single PMMA disc produces multiple restorations per milling session at a fraction of the time required for ceramic milling. Repairability and adjustability. Unlike dental zirconia discs and ceramic restorations that cannot be added to or structurally repaired, PMMA restorations can be adjusted at the chairside with standard acrylic instruments, extended with cold-cure acrylic, and relined without fabricating a new restoration from scratch. In provisional and removable applications, this adjustability is a core clinical advantage. Biocompatibility. Pre-polymerized PMMA meeting ISO 20795-1 requirements is biocompatible for both short-term provisional and long-term removable applications. The low residual monomer of industrial pre-polymerized discs is well below the threshold associated with tissue sensitivity, making it appropriate for direct tissue contact in denture base applications. Cost efficiency. The per-case material cost of PMMA is significantly lower than ceramics or zirconia blank formats. For temporaries and removable applications where the restoration will be replaced or modified, the economics of PMMA are clearly superior. Labs that calculate total case cost including finishing labor, not just disc acquisition find that quality pre-polymerized PMMA consistently delivers the lowest total cost per provisional unit. For labs sourcing quality pmma dental material from a reliable US supplier, ZirconiaGuys stocks the full Aidite PMMA range denture base, multilayer, and clear formulations from domestic inventory with no international lead times. PMMA for Denture Bases: The Long-Term Application The highest-demand long-term application for PMMA in dental labs is the denture base. Full and partial removable dentures require a base material that sits in direct contact with oral mucosa for extended daily wear sometimes all day, every day for years. The material requirements for this application are stricter than for any temporary restoration: low residual monomer, excellent polishability, dimensional stability over time, and gingival shade accuracy that maintains its appearance across years of use. Pre-polymerized CAD/CAM PMMA meets all four requirements in a way that conventional bench-mixed acrylic cannot consistently deliver. The industrial polymerization process ensures residual monomer stays well within ISO biocompatibility limits. The dense polymer matrix polishes to a high gloss quickly reducing bench finishing time per unit and maintains its surface quality under the abrasion of daily oral use significantly better than porous, bench-cured alternatives. Shade stability is the other critical factor. A denture base that yellows, grays, or shifts shade within the first year of wear creates patient dissatisfaction and requires remake. High-quality pre-polymerized PMMA uses colorfast pigmentation that maintains gingival shade fidelity across the clinical lifespan of the restoration. The aidite denture base pmma disc is the benchmark product in this category for US dental labs formulated specifically for full and partial denture base production with documented biocompatibility, consistent batch-to-batch shade, and polishing behavior that reduces finishing time compared to generic alternatives. PMMA for Temporary Crowns and Bridges: The Provisional Application The highest-volume PMMA application in most dental labs is the temporary crown and bridge provisional. Single-unit and multi-unit temporary restorations are produced at high volume protecting prepared teeth, previewing final esthetic outcomes, and maintaining occlusal relationships during the treatment period between preparation and final restoration delivery. PMMA provisionals are produced in two primary formats for this application: single-shade discs for posterior cases where shade matching is secondary to fit accuracy, and multilayer gradient discs for anterior cases where the temporary must credibly match natural tooth appearance to allow the patient to evaluate the proposed esthetic outcome. The aidite pmma multilayer disc format delivers a dentine-to-incisal gradient within a single blank the same gradient architecture concept used in multilayer zirconia dental blanks, applied to PMMA for provisional restorations. Labs that handle high-volume anterior cases use multilayer PMMA to produce temporaries that require minimal post-milling staining, reducing finishing time on every anterior provisional case. For long-term provisionals worn for three to twelve months during complex treatments full-mouth rehabilitations, implant osseointegration phases, or large-scale esthetic cases high-quality pre-polymerized PMMA is essential. Low-quality PMMA with high internal porosity absorbs staining agents and accumulates biofilm over extended wear, leading to surface degradation and patient complaints well before the treatment timeline requires remake. PMMA Formulation Types: Matching the Disc to the Application Not all PMMA discs are the same product. PMMA is a material class with distinct formulations engineered for distinct clinical applications. The most common mistake labs make with PMMA is treating all discs as interchangeable using denture base formulations for crown and bridge applications, or vice versa. Sourcing from a multilayer pmma disc range that covers all three primary formulations gives labs the flexibility to match material to application correctly on every case. Denture base PMMA — Pigmented with gingival tissue shades. Optimized for tissue contact, biocompatibility, and polishability. Not appropriate for crown and bridge provisionals where tooth-like translucency is required. Available in standard pink, medium reddish-pink, and darker reddish-brown shades to cover the gingival tone range of different patient demographics. Multilayer PMMA — Manufactured with a shade gradient from the cervical end to the incisal end of the disc. Produces tooth-like optical gradation in temporary crowns without post-milling staining in standard A-shade cases. The correct default format for anterior provisional production in any lab running a digital workflow. Clear/transparent PMMA — Formulated for maximum optical clarity. Used for occlusal splints, night guards, orthodontic retainers, and clear appliances. Not appropriate for crown and bridge or denture applications where shade accuracy is needed. PMMA Format Primary Application Key Property Wrong Use Case Denture base Full and partial dentures Gingival shade accuracy Crown and bridge provisionals Multilayer tooth-shade Temporary crowns and bridges Dentine-to-incisal gradient Denture bases Clear / transparent Splints, retainers, clear appliances Optical clarity Any shade-sensitive application PMMA vs. Zirconia: Understanding the Correct Hierarchy The most important material relationship in a modern dental lab is between PMMA and zirconia not because they compete for the same applications, but because they form a sequential production pair in most complex treatment cases. Zirconia blocks and PMMA discs serve completely different clinical functions. PMMA handles every temporary and removable application: provisionals, denture bases, splints, and clear appliances. Zirconia blank formats handle every permanent fixed application: crowns, bridges, and implant-supported restorations. The material hierarchy is clear PMMA is the temporary phase, zirconia is the permanent phase, and they work together rather than against each other in any well-organized lab workflow. Property PMMA Dental Zirconia Flexural strength 80–120 MPa 500–1200+ MPa (grade dependent) Repairability Excellent Not repairable Wear resistance Moderate Excellent Cost per disc Low Moderate to high Primary application Temporaries, dentures, splints Permanent crowns and bridges CAD/CAM machinability Fast, low bur wear Slower, higher bur wear Labs that stock both PMMA and zirconia and use each in its correct application are more efficient and produce better outcomes than labs that try to stretch one material beyond its clinical mandate. As a zirconia materials distributor usa, ZirconiaGuys stocks the full range alongside Aidite PMMA, enabling labs to consolidate their CAD/CAM material supply from a single US inventory source. Common PMMA Mistakes and How to Avoid Them Using the wrong formulation. Denture base PMMA in crown and bridge applications produces opaque, tissue-toned temporaries that look nothing like natural teeth. Match the formulation to the application every time tooth shade for crowns, gingival shade for dentures, clear for appliances. Underestimating long-term provisional requirements. Standard PMMA is designed for weeks. Extended wear provisionals of three months or more require high-quality pre-polymerized discs with documented low porosity. Low-grade PMMA degrades visibly within the first few months of extended wear. Treating PMMA as a substitute for permanent zirconia restorations. PMMA at 80–120 MPa flexural strength will wear, stain, and structurally degrade over the years of service life that zirconia is designed to handle. It is a temporary material, and using it as a permanent restoration creates patient outcomes that reflect that compromise. Dental PMMA is not a legacy material waiting to be replaced it is a precision-engineered material class that fills an irreplaceable role in the modern CAD/CAM workflow. Temporaries, denture bases, splints, and clear appliances all depend on PMMA, and they all depend on getting the formulation right. The labs that produce consistent clinical outcomes with PMMA are the ones that stock the correct formulations, source from suppliers with documented batch consistency, and understand where PMMA ends and dental zirconia discs begin.
Learn more
How Surgical Guides Are Transforming Dental Implant Surgery?
Dental implant surgery has always demanded a level of anatomical precision that separates it from most other restorative procedures. An implant placed 2 millimeters off the planned axis can compromise the final restoration, damage adjacent roots or nerves, or create bone loading angles that accelerate implant failure. For decades, achieving that precision depended almost entirely on the surgeon's skill, experience, and ability to mentally translate a two-dimensional radiograph into a three-dimensional surgical reality. That dependency is now being systematically replaced by digital surgical guides and the shift is one of the most significant changes in implant dentistry in the last twenty years. This guide covers how surgical guides work, what they are made from, how dental labs produce them, and why the resin material selection is as important as the digital planning behind them. It also explains where surgical guides fit in the broader CAD/CAM workflow alongside zirconia blocks and other milled restorative materials that complete the implant treatment chain. What Is a Dental Implant Surgical Guide? A dental implant surgical guide is a custom-fabricated appliance typically clear or translucent that fits precisely over the patient's existing teeth or soft tissue and contains metal sleeves or open channels that direct surgical drills to the exact position, angle, and depth planned digitally. The surgeon follows the guide rather than freehand anatomy, making the physical execution of the surgery a confirmation of the digital plan rather than a real-time judgment call. The workflow that produces a surgical guide begins with a CBCT scan of the patient's jaw, which generates a three-dimensional volumetric dataset of bone anatomy, nerve location, sinus floor height, and existing tooth positions. This dataset is imported into implant planning software platforms like coDiagnostiX, Simplant, or Nobel Clinician where the implant position, diameter, length, and angulation are planned virtually against the actual bone volume available. The surgeon and restorative dentist review the planned position relative to the final prosthetic outcome before the guide is designed around it. The guide is then designed digitally and sent to a 3D printer for fabrication in biocompatible resin. The entire workflow from CBCT scan to printed guide in the hands of the surgeon can be completed in a matter of days when the lab is running a streamlined digital production process. Why Surgical Guides Improve Implant Outcomes? The case for surgical guides is built on a specific, measurable problem: freehand implant placement deviates from the planned position. Clinical studies consistently document entry point deviations of 0.9–1.5 mm and angular deviations of 3–5 degrees in experienced surgeons performing freehand implant placement. For single posterior implants in well-spaced bone, these deviations are manageable. For anterior esthetic cases, full-arch cases, cases with limited bone volume, or cases where the implant axis must align precisely with the planned crown, a 3-degree angular error is clinically significant. Surgical guides reduce these deviations to entry point errors below 0.5 mm and angular errors below 2 degrees in most studies comparing guided versus freehand placement. The reduction in deviation directly translates into clinical benefits: Nerve and Structure Avoidance The inferior alveolar nerve, mental foramen, sinus floor, and adjacent root structures can all be damaged by freehand placement when the surgeon's real-time spatial judgment diverges from the preoperative plan. A well-fabricated guide physically prevents the drill from traveling outside the planned path, converting spatial planning into mechanical constraint. Reduced Chair Time Guided surgery eliminates much of the intraoperative decision-making that extends freehand procedures. The surgeon follows the guide; there is no need to repeatedly pause, recheck orientation, or adjust trajectory mid-drilling. This reduction in operating time reduces anesthetic exposure, patient fatigue, and complication risk associated with prolonged procedures. Flapless Surgery Capability Fully guided surgical protocols enable flapless implant placement inserting the implant through a small punch in the gingiva without reflecting a full mucoperiosteal flap. Flapless surgery reduces surgical trauma, eliminates suturing in straightforward cases, and substantially accelerates patient recovery. Without a surgical guide providing drill guidance through the gingival tissue, flapless placement is not safely achievable. Prosthetically Driven Placement Conventional implant surgery is anatomy-driven; the surgeon places the implant where the bone allows. Guided surgery is prosthetically driven; the implant is placed where the planned restoration requires it to be, within the bone volume available. This distinction is most significant in full-arch and esthetic anterior cases where implant axis directly determines prosthetic outcome. The Resin Behind the Guide: Why Material Selection Matters The precision of a surgical guide is only as good as the material it is printed from. A guide that distorts during printing, warps during post-curing, or creeps dimensionally when it absorbs oral fluids during surgery will place implants at positions that diverge from the digital plan defeating the purpose of guided surgery entirely. For dental labs producing surgical guides, surgical guide dental resin is the material category that defines production quality. The Whip Mix VeriGuide Clear resin is formulated specifically for this application engineered to deliver the dimensional stability, optical clarity, and biocompatibility that surgical guide production requires. Dimensional Accuracy Is the primary requirement. The guide must reproduce the digital design within tolerances of ±0.1 mm or better at the sleeve positions. This demands a resin with low polymerization shrinkage, minimal post-cure warping, and stable dimensions after sterilization. Resins formulated for model printing or tray production do not meet these tolerances when used for surgical guides; the application requires a purpose-engineered formulation. Biocompatibility Is non-negotiable. A surgical guide contacts oral mucosa, bone, and saline irrigation during implant surgery. The material must meet ISO 10993 biocompatibility standards for short-term mucosal contact. Not all 3D printing resins marketed to dental labs carry this certification; labs must verify biocompatibility documentation before using any resin in an application with direct tissue contact. Optical Clarity Enables the surgeon to visually verify seating and confirm that the guide is fully seated on the reference teeth or tissue before drilling begins. A clear or translucent guide allows the operator to check for tissue folds, debris, or incomplete seating that would compromise positional accuracy. Opaque resins eliminate this visual confirmation and introduce a source of placement error. Sterilization Compatibility Matters because surgical guides must be sterilized before entering the operative field. Most surgical guide resins are compatible with cold chemical sterilization (glutaraldehyde, alcohol-based) and some tolerate autoclave sterilization at lower cycle temperatures. Confirm sterilization compatibility against the resin manufacturer's documentation; exposure to incompatible sterilization methods can cause dimensional distortion that makes the guide unusable. How Dental Labs Produce Surgical Guides: The Production Workflow? Understanding the production workflow helps labs optimize their surgical guide output and identify the points where material quality has the most impact on clinical outcome. For labs looking at the full range of 3D printing resin options, the key guide 3d printing resin category covers surgical guide and custom tray applications giving labs the material flexibility to handle both guided surgery production and impression tray fabrication from a compatible product range. Step 1 — CBCT Data Import and Planning The lab receives the CBCT DICOM files and intraoral scan or model scan from the referring dentist or surgeon. These are merged in the implant planning software to overlay the bone volume data with the soft tissue and tooth anatomy. Step 2 — Digital Guide Design The guide body is designed around the planned implant positions, incorporating metal drill sleeves or printed drill channels at the correct position, angulation, and depth stop. The guide adapts to the patient's teeth, mucosa, or a combination of both as the positional reference. Step 3 — Print File Preparation The guide design is exported as an STL file, oriented in the print software for optimal support placement, and sliced for the specific printer and resin combination. Orientation affects dimensional accuracy; the guide should be oriented to minimize support contact on the sleeve surfaces and seating surfaces. Step 4 — Printing The guide is printed in biocompatible surgical guide resin. Layer thickness of 50–100 microns is standard for surgical guide applications. Post-printing, the guide is washed in isopropyl alcohol to remove residual uncured resin from surfaces and internal channels. Step 5 — Post-Curing The washed guide is cured in a UV post-cure unit for the manufacturer-specified time and intensity. Insufficient post-curing leaves residual unreacted monomer a biocompatibility issue. Over-curing can cause brittleness and dimensional distortion. Follow the resin manufacturer's curing protocol precisely. Step 6 — Sleeve Insertion and Quality Control Metal drill sleeves are press-fit or bonded into the printed channels. The guide is verified on the model for fit accuracy before delivery. Any rocking, instability, or gap between the guide and the reference surfaces indicates a fit problem that must be corrected before the guide goes to surgery. Surgical Guides in the Broader Digital Implant Workflow Surgical guides do not complete the implant treatment; they initiate it. The final restorations that complete the implant case are typically milled from zirconia blank and zirconia blocks dental material, bringing the same digital precision that placed the implants to the fabrication of the crowns and bridges that restore function and esthetics. For labs sourcing the full implant restoration material range, zirconia dental blanks from Upcera cover the 3Y, 4Y, and 5Y grade range needed across the full spectrum of implant crown and bridge indications from high-strength posterior bridge frameworks in 3Y to esthetic anterior implant crowns in multilayer 5Y. The relationship between surgical guide accuracy and final restoration fit is direct. When the implant is placed at the planned axis, the CAD/CAM-designed crown or bridge seats passively without the stress that off-axis placement creates at the implant-abutment interface. This is why the material quality of the surgical guide the dimensional accuracy of the resin, the precision of the print has downstream consequences that reach all the way to the final restoration's long-term performance. For labs that also produce the fixed restorations completing the implant case, stocking dental zirconia discs alongside surgical guide resin enables a complete digital implant workflow under one roof from the guide that places the implant to the zirconia crown that restores it. As a zirconia materials distributor usa, ZirconiaGuys stocks both surgical guide resins and the full zirconia disc range from US inventory, enabling dental labs to source the complete implant workflow material chain without international lead times. Surgical guides have shifted dental implant surgery from a procedure dependent on individual surgical skill to one anchored in digital planning and material precision. The accuracy improvements are real, the patient experience benefits are measurable, and the integration with CAD/CAM workflows makes surgical guides a natural part of the same digital production chain that produces zirconia blank restorations, dental zirconia discs, and every other digitally designed restoration in the modern dental lab. For labs looking to add surgical guide production to their capabilities, the material foundation is straightforward: a purpose-formulated biocompatible surgical guide resin, a calibrated 3D printer, and a reliable US supply chain that delivers consistent batch quality on every order.
Learn more
Explore the Importance and Impact of Zirconia Crowns in Dentistry
Zirconia crowns have fundamentally changed what is achievable in restorative dentistry. Before zirconia, dental labs and clinicians faced a persistent compromise: strong materials were ugly and biologically problematic, while esthetic materials were structurally fragile. Metal-ceramic crowns with their dark margins, porcelain-fused-to-metal restorations prone to chipping, and all-ceramic options with limited strength all forced clinicians to trade off appearance against function depending on where the restoration sat in the mouth. Zirconia ended that compromise. Today it is the dominant crown material across virtually every clinical indication anterior esthetic cases, posterior high-load bridges, implant-supported frameworks, and full-arch rehabilitations. Understanding why zirconia crowns have had this impact, and how the material is correctly selected and sourced by dental labs, is the subject of this guide. What Makes Zirconia Crowns Clinically Significant? Zirconia is a crystalline oxide ceramic zirconium dioxide (ZrO₂) stabilized with yttrium oxide that was adopted in dentistry because it solved problems no previous material class could solve simultaneously. Its combination of structural strength, biological safety, chemical stability, and esthetic adaptability is what elevated it from a niche posterior material to the universal standard for permanent crown and bridge restorations. Strength that covers every clinical zone. The flexural strength of zirconia blocks dental grade 3Y-TZP material exceeds 900 MPa roughly double the strength of lithium disilicate and multiple times the strength of feldspathic porcelain. This means zirconia can cover posterior molars under heavy occlusal load, multi-unit posterior bridges with demanding connector cross-sections, and implant-supported frameworks applications that glass-ceramic materials cannot reliably handle. Labs sourcing aidite zirconia discs for high-volume production benefit from a material that performs across this full indication range without requiring different base materials for different case types. Biocompatibility for long-term tissue contact. Zirconia is chemically inert in oral environments. It does not corrode, does not leach metal ions into surrounding tissue, and does not produce the gingival discoloration associated with metal substructures in PFM restorations. For patients with metal sensitivities, zirconia is frequently the only viable permanent crown material. Long-term clinical studies consistently show healthy periodontal tissue response around zirconia margins compared to both metal-ceramic and all-metal alternatives. Optical versatility across the esthetic spectrum. Early zirconia grades were opaque strong but clinically limited to posterior applications where appearance was secondary. The development of high-translucency 4Y and 5Y zirconia grades changed this entirely. Modern esthetic-grade zirconia transmits light in a way that approximates natural enamel, enabling anterior restorations that blend with natural dentition under all lighting conditions. A single material class now serves both the esthetic demands of anterior cases and the structural demands of posterior cases only the grade selection changes. CAD/CAM production efficiency. Zirconia is milled in its pre-sintered state chalk-like and soft from dental zirconia discs in standard 98 mm diameter format. This enables precise digital milling with fast toolpaths, followed by sintering that densifies and strengthens the restoration to its final dimensions. The CAD/CAM workflow eliminates the hand-building variability of feldspathic layering and the multi-step laboratory complexity of PFM fabrication. One material, one milling step, one sintering step consistent, reproducible results at production speed. Zirconia Blanks and Discs: The Foundation of Crown Production Every zirconia crown starts as a zirconia blank a pre-sintered disc of zirconia material from which the restoration is milled. The quality of the blank determines the quality of the crown. Strength properties, shade consistency, translucency behavior, sintering shrinkage accuracy, and surface finish after milling are all determined at the manufacturing stage of the disc, before the lab ever loads a case into the mill. Zirconia dental blanks come in several formats that define the production workflow. White (unshaded) blanks give the lab full manual control over shade through external staining. Pre-shaded blanks are pigmented during manufacturing to match VITA shade values, eliminating or minimizing post-sintering staining on standard A–D shade cases. Multilayer blanks incorporate a cervical-to-incisal gradient of shade and translucency, replicating the optical zonation of natural tooth anatomy within a single disc. For US dental labs evaluating the full range of disc formats and grade options, the upcera dental zirconia blank lineup covers 3Y, 4Y, and 5Y grades in white, pre-shaded, and multilayer formats stocked domestically for fast delivery without international lead times. Reliable domestic sourcing from a trusted zirconia materials distributor USA eliminates the batch variability and extended delivery times that come with direct overseas procurement. The zirconia blocks used for chairside mills rectangular blanks for systems like CEREC share the same material chemistry as disc-format blanks but differ in form factor and compatible equipment. For full-service dental labs running disc-based milling systems, the 98 mm disc format provides the largest usable milling area per blank and the broadest compatibility with open-system mills. The Clinical Impact of Zirconia on Patient Outcomes The adoption of zirconia crowns has produced measurable improvements in patient outcomes across the clinical metrics that matter most to both practitioners and patients. Longevity and survival rates. Clinical studies consistently report 10-year survival rates above 95% for zirconia single crowns and above 90% for 3-unit zirconia bridges. These rates are comparable to or better than PFM restorations, without the chipping risk that plagues the porcelain veneer layer in PFM. Patients receiving zirconia crowns today can expect the restoration to function for their lifetime under normal clinical conditions — a claim that cannot be made for any temporary or provisional material. Patient comfort and acceptance. Zirconia's low thermal conductivity reduces the post-placement sensitivity that patients experience with metal crowns. Its smooth, polished surface does not abrade opposing dentition at the same rate as rough ceramic surfaces. Patients report high acceptance of zirconia restorations both esthetically, because properly shade-matched zirconia is indistinguishable from natural dentition to the untrained eye, and functionally, because correctly fitting zirconia crowns feel natural under occlusal load. Elimination of metal-related complications. The absence of metal substructure eliminates the dark gingival margin shadow common in PFM crowns, eliminates metallic taste complaints, and removes the risk of metal ion hypersensitivity reactions. For patients who have experienced tissue reactions to metal alloys in previous restorations, zirconia is clinically transformative. Implant compatibility. Zirconia has become the dominant material for implant-supported single crowns and short-span bridges. Its biological neutrality makes it the ideal material for restorations in direct proximity to implant components and peri-implant tissue, where metal ion leaching and corrosion are active concerns with metal-containing alternatives. How Zirconia Grade Selection Determines Crown Performance? Not all dental zirconia discs perform identically and within a given product format, the grade selection (3Y, 4Y, or 5Y) determines which clinical performance profile the crown delivers. Matching grade to indication is the most consequential material decision in zirconia crown production. The tt multilayer zirconia format delivers maximum translucency in a gradient disc architecture the correct choice for anterior single crowns where matching highly translucent natural dentition is the clinical priority. The TT formulation pushes the cubic phase fraction toward its maximum, producing incisal opalescence that approximates natural enamel behavior under varied lighting conditions. Labs producing anterior cases where the patient has naturally translucent teeth common in younger patients and in cases adjacent to ceramic veneers need this grade level to avoid restorations that appear flat and artificial. The st multilayer zirconia format offers a super-translucency gradient architecture calibrated for the broader range of everyday anterior and premolar cases where high translucency is important but the extreme incisal opalescence of TT-grade material is not the primary requirement. For labs running high-volume anterior crown production, the ST multilayer format delivers consistent gradient esthetics across standard A–D shades with minimal post-sintering staining, making it the most efficient daily production standard for esthetic cases. For posterior crowns and bridges where structural performance is the primary requirement, monolithic 3Y-TZP in white or pre-shaded format is the correct material. The 900–1200+ MPa flexural strength of 3Y provides the connector cross-section reliability that multi-unit posterior bridges under full occlusal load demand. High-translucency 5Y grades are not appropriate for this indication regardless of esthetic appeal the strength tradeoff in 5Y is real and clinically consequential in posterior bridge applications. Zirconia multilayer discs whether TT, ST, or other gradient formulations consistently outperform flat single-grade discs of the same base composition for anterior esthetic cases. The gradient architecture replicates natural tooth optical zonation in a way that no amount of external staining on a flat monolithic disc can fully replicate. Sourcing Zirconia: What Dental Labs Should Demand from Their Supplier The material quality of a zirconia blank is determined entirely at the manufacturing stage — by the purity of the zirconia powder, the precision of the yttria distribution, the pressing parameters, and the quality control applied to every production batch. Once a disc is manufactured, no amount of careful milling or precise sintering can compensate for poor raw material quality or inconsistent pre-sintering. This is why supplier selection is as important as product selection for zirconia blocks dental procurement. The criteria that separate a reliable zirconia materials distributor USA from a generic import supplier are: Batch documentation — shade specification certificates, mechanical property data, and biocompatibility compliance certificates for every batch, not just on request. This documentation enables labs to track performance across orders and identify drift before it affects clinical production. Domestic inventory — US-stocked products eliminate the 4–8 week lead times and import unpredictability of direct overseas procurement. For labs managing just-in-time inventory, domestic stock availability is a production reliability requirement. Technical support — milling parameters, sintering profiles, and material-specific guidance. Different zirconia formulations require different sintering ramp rates and peak hold temperatures. A supplier that provides accurate, product-specific technical documentation prevents the sintering errors that produce cloudy, undertranslucent restorations from otherwise good disc stock. Consistent grade range — labs running both anterior esthetic and posterior structural production need access to the full grade spectrum from high-translucency 5Y to structural 3Y-TZP, in both white and pre-shaded formats. A supplier that stocks only part of the range forces split procurement that increases ordering complexity and reduces batch consistency across the material inventory. Zirconia crowns matter in modern dentistry because they solved a problem that every previous restoration material only partially addressed. The combination of structural strength, biological safety, esthetic versatility, and CAD/CAM production efficiency in a single material class is what has made dental zirconia discs the default raw material for permanent restorations in modern dental labs worldwide. Selecting the right grade, the right format, and the right supplier are the three decisions that determine whether a lab captures all of that material's clinical potential or compensates for avoidable material selection errors on every case it produces.
Learn more
Why Zirconia Discs Are the Preferred Choice for Dental Restorations?
The shift toward zirconia in dental restorations is not a trend driven by marketing it is a materials science outcome. When dental labs and clinicians compare restoration options on the criteria that actually determine clinical success strength, longevity, biocompatibility, esthetic quality, and workflow efficiency zirconia consistently outperforms the alternatives across the widest range of indications. No other single material class covers posterior structural demand and anterior esthetic requirements with the same reliability. Understanding why dental zirconia has become the dominant restoration material requires looking at both what the material delivers clinically and how the disc format integrates into modern CAD/CAM production workflows. This guide covers both the material advantages that make zirconia the right choice, and the practical disc selection decisions that determine how well those advantages translate into production outcomes. What Zirconia Discs Are and How They Work in CAD/CAM? Zirconia in its natural state is zirconium dioxide a white crystalline ceramic oxide. For dental use, it is stabilized with yttrium oxide (yttria) to prevent destructive phase transformation at room temperature, then processed into pre-sintered disc blanks for CAD/CAM milling. The disc is milled in its chalk-like pre-sintered state, approximately 20–25% oversized to compensate for the shrinkage that occurs during the sintering step. After milling, the restoration is sintered in a furnace to its final dimensions and full mechanical strength. This production sequence is what makes zirconia discs the backbone of modern dental lab operations. The pre-sintered state is soft enough to mill with precision at high speed, while the sintered final product delivers mechanical properties that no other milled dental ceramic can match. The disc format enables digital design, digital milling, and sintering to be performed sequentially producing accurate, consistent, reproducible restorations at a production pace that hand-fabrication workflows cannot approach. Every dental zirconia discs order from a reliable zirconia materials distributor USA should include the full technical specification for the disc yttria content, flexural strength after sintering, sintering profile requirements, and open-system compatibility confirmation. These specifications directly determine clinical suitability and are not interchangeable between products even when they share the same grade designation. The Core Material Advantages That Make Zirconia the Standard Flexural strength that covers every clinical indication. Zirconia's flexural strength range 500 to 1200+ MPa depending on grade is without equal in restorative dentistry. Lithium disilicate (e.max) delivers approximately 400 MPa. PFM ceramic layers deliver 200–400 MPa on a metal substructure. Standard dental porcelain without a substructure delivers 80–120 MPa. Zirconia at its lowest-strength esthetic grade (5Y, ~500–650 MPa) still exceeds every competing ceramic for single-unit applications. At its highest-strength grade (3Y, 900–1200+ MPa), it is the only ceramic material that reliably meets the connector cross-section requirements for multi-unit posterior bridges under full occlusal load. Biocompatibility for long-term tissue contact. Dental zirconia is chemically inert in oral environments. It does not corrode, does not leach metal ions into oral tissue, and does not generate galvanic currents at margins the way metal-containing restorations can. It meets ISO 6872 biocompatibility requirements for dental ceramic and is the standard material for implant-supported restorations where tissue contact is permanent and continuous. Esthetic versatility across the grade range. The early knock on zirconia that it was too opaque for anterior esthetic cases no longer applies to modern formulations. The development of 4Y and 5Y yttria grades, combined with multilayer gradient disc manufacturing, has produced zirconia dental blanks that transmit light in a way that closely approximates natural enamel. Pre-shaded multilayer discs eliminate the external staining step for standard A-D shade cases, and the optical gradient from cervical to incisal produces natural-looking shade transitions directly from the mill. Wear characteristics that protect opposing dentition. One of the less-discussed advantages of modern zirconia formulations is their wear behavior. Early high-strength 3Y zirconia was criticized for excessive wear on opposing natural enamel due to surface roughness after polishing. Modern 4Y and 5Y esthetic grades, polished to a smooth glaze finish, exhibit wear rates that are clinically compatible with natural dentition producing minimal wear on opposing teeth under normal occlusal conditions. Open-system CAD/CAM compatibility. Standard zirconia blocks dental labs use are produced in 98 mm disc diameter the universal open-system format compatible with all major dental milling machines including Roland, Amann Girrbach, Zirkonzahn, VHF, Sirona, and Datron. This compatibility means labs can evaluate and switch products without equipment investment, keeping procurement competitive and workflow flexible. For a detailed breakdown of how zirconia grades compare on strength, translucency, and clinical indication including the 3Y, 4Y, and 5Y classification system explained in ful the Guide to Materials & Strengths of Zirconia Dental Restorations on ZirconiaGuys covers every variable that determines correct material selection. Zirconia Discs vs. Competing Restoration Materials The case for zirconia is strongest when viewed comparatively. Here is how dental zirconia discs stack up against the other materials labs and clinicians regularly evaluate. Zirconia vs. PFM (porcelain-fused-to-metal). PFM restorations dominated for decades before zirconia displaced them as the production standard. PFM delivers acceptable strength through its metal substructure and acceptable esthetics through the porcelain veneer but the combination produces a dark metal margin at the gumline, requires opaque masking layers that reduce translucency, carries corrosion risk from the metal alloy, and is significantly more labor-intensive to prouce than a milled zirconia crown. Modern zirconia blank formats deliver better esthetics, comparable or superior strength, no metal margin, and faster production. PFM has no advantage over zirconia for the majority of crown and bridge cases. Zirconia vs. lithium disilicate. Lithium disilicate (e.max) offers excellent translucency and strong bonding characteristics that make it the preferred choice for thin veneers and minimally prepared anterior crowns where adhesive bonding is the retention mechanism. For occlusal crowns under full occlusal load, zirconia's higher flexural strength is the decisive advantage. For posterior bridges, there is no contest zirconia is the only appropriate ceramic choice. The zirconia blocks dental format handles every indication lithium disilicate covers, plus the posterior structural cases where lithium disilicate is contraindicated. Zirconia vs. PMMA. PMMA (polymethyl methacrylate) is the temporary restoration material correct for provisionals, denture bases, and splints. It is not a competitor to zirconia for permanent restorations. PMMA at 80–120 MPa flexural strength will not survive the years of occlusal loading that a zirconia restoration handles without degradation. The two materials are complementary workflow components: PMMA handles the temporary phase, zirconia delivers the permanent restoration. Material Flexural Strength Posterior Bridge Anterior Esthetics Long-Term Stability 3Y Zirconia 900–1200+ MPa Best choice Requires staining Excellent 4Y/5Y Zirconia 500–800 MPa Short spans only Excellent Excellent Lithium disilicate ~400 MPa Not recommended Very good Good PFM 200–400 MPa ceramic Acceptable Metal margin issue Moderate PMMA 80–120 MPa Temporary only Temporary only Limited White vs. Pre-Shaded Zirconia Blanks: Choosing the Right Format The grade decision (3Y/4Y/5Y) determines structural and optical performance. The format decision white unshaded vs. pre-shaded determines how the disc integrates into the lab's production workflow and how much finishing labor each case requires. White zirconia dental blanks They give the technician complete manual control over shade. The uncolored starting point enables custom staining across any shade range — standard VITA, unusual chromas, or complex characterization effects. White blanks are the right choice for complex cases, unusual shades, or when the technician needs to build precise effects (craze lines, fluorosis, hypocalcification simulation) that pre-shaded discs cannot accommodate without additional surface work. Pre-shaded zirconia dental blanks They are pigmented at the manufacturing stage to match VITA Classic or 3D-Master shade values. For the majority of daily lab production standard A1 through D4 cases pre-shaded discs eliminate the external staining step entirely and deliver consistent results regardless of which technician handles the case. The shade gradient is in the material, not dependent on operator technique. The practical stocking strategy for most labs: white blanks as a secondary stock for complex and custom cases, pre-shaded as the production default for standard shade volume. Labs that standardize on pre-shaded multilayer discs for anterior cases consistently report significant reductions in post-sintering finishing time. Which Zirconia Discs to Stock: Product Selection for US Dental Labs? For US dental labs sourcing from a reliable zirconia materials distributor USA, the product selection decision comes down to matching disc specifications to the production mix of the specific lab. For labs with high posterior bridge volume, explore functional zirconia by Upcera is a proven choice engineered for the strength requirements of multi-unit posterior cases, with consistent pre-sintered density that supports reliable milling performance across long production runs. The functional grade delivers the flexural strength posterior bridges require without the compromises of esthetic-grade formulations that are not designed for structural applications. For labs with high anterior esthetic volume, explore esthetics zirconia discs by Upcera provide the multilayer gradient architecture and VITA-calibrated shade consistency that high-throughput anterior production demands. The four-layer TT-GT gradient eliminates routine staining on standard A-shade anterior cases delivering natural-looking results from the sintering furnace without additional bench work for the majority of daily cases. ZirconiaGuys stocks both product lines from US inventory no international lead times, no import uncertainty. All products ship with full batch documentation including flexural strength data, shade specification certificates, and sintering profile guidelines. What to Verify Before Ordering Zirconia Discs? Sourcing from any zirconia materials distributor USA whether for the first time or switching from an existing supplier the following specifications should be confirmed before committing to production volume: Yttria content and grade designation. Confirm whether the product is 3Y, 4Y, 5Y, or a mixed gradient. The grade determines the strength and translucency properties that make the disc suitable or unsuitable for your specific indications. Published flexural strength. Ask for the manufacturer's technical datasheet showing flexural strength values achieved under ISO 6872 test conditions. Marketing strength claims without ISO test methodology are not reliable for clinical specification decisions. Sintering profile compatibility. Confirm that the disc's required sintering ramp rate and peak temperature are within your furnace's capabilities. Esthetic-grade discs with multilayer gradients are particularly sensitive to sintering schedule deviations. Batch certificate availability. A reliable supplier provides batch-level documentation for every order shade specification, mechanical properties, and biocompatibility compliance per batch. This is the foundation of quality control in any high-volume production environment. Open-system disc diameter. Confirm 98 mm standard format. Non-standard disc dimensions or proprietary adapter requirements limit your milling system flexibility and increase procurement dependency on a single vendor. Zirconia discs have earned their position as the default material for dental restorations through consistent clinical performance across two decades of real-world use. The material delivers where it counts strength that covers every structural indication, optical quality that handles every esthetic requirement, and a CAD/CAM workflow integration that makes production-scale fabrication accurate and efficient. Selecting the right zirconia dental blanks for your lab's specific production mix matched by grade, format, and architecture to the actual cases you run is the decision that converts those material advantages into clinical outcomes and lab efficiency. Source from a reliable US distributor, verify specifications against your indications, and stock both functional and esthetic grades to cover your full production range without material compromise.
Learn more
All About Acrylic Resin: Uses, Benefits, and More
Acrylic resin is one of the most widely used materials in dentistry yet most discussions about it either stay surface-level or focus on industrial applications that have little relevance to dental lab workflows. For dental professionals and lab technicians, acrylic resin is not an abstract chemistry concept. It is the material inside every denture base, every temporary crown, every occlusal splint, and every 3D-printed dental appliance in daily production. Understanding what it is, why it performs the way it does, and how to select the right formulation for each application directly affects the clinical quality and efficiency of everything a dental lab produces. This guide covers acrylic resin specifically through the lens of dental laboratory use what differentiates CAD/CAM-grade PMMA from bench-mixed acrylic, where each formulation fits in the clinical workflow, how acrylic resin compares to dental zirconia discs and ceramic alternatives, and how to build a rational acrylic resin inventory for a full-service dental lab. What Is Acrylic Resin? The Chemistry Behind the Material Acrylic resin is the collective name for a family of polymers derived from acrylic acid, methacrylic acid, or their derivatives. In dentistry, the most clinically relevant member of this family is polymethyl methacrylate PMMA formed by polymerizing methyl methacrylate (MMA) monomer into long polymer chains. The properties of the final material depend primarily on how that polymerization is carried out: the temperature, pressure, initiator system, and degree of conversion all affect the mechanical and biological characteristics of the finished product. The distinction that matters most in a dental lab context is the difference between bench-polymerized acrylic and industrially pre-polymerized acrylic. Conventional acryclic resin denta applications bench-mixed denture acrylic, cold-cure temporary material, chairside repair resin are polymerized at atmospheric pressure with chemical or heat initiation. Industrial pre-polymerized PMMA, used in CAD/CAM disc form, is polymerized under 50–200 bar of pressure at elevated temperature. That pressure difference is what fundamentally separates the two material classes in terms of residual monomer content, porosity, mechanical consistency, and clinical performance. Bench-polymerized acrylic typically retains 3–5% residual monomer unreacted MMA that can leach into oral tissue, causing sensitivity responses in susceptible patients. Industrial pre-polymerized PMMA achieves residual monomer below 0.5%, well within ISO 20795-1 biocompatibility thresholds. The higher-pressure polymerization also eliminates most porosity, producing a denser, more homogeneous polymer matrix that mills more cleanly, polishes more easily, and maintains its surface quality longer under intraoral conditions. Types of Acrylic Resin Used in Dental Labs Acrylic resin in dentistry is not a single product it is a material class with distinct formulations for distinct clinical applications. Using the wrong formulation for an application is one of the most avoidable sources of suboptimal clinical outcomes in dental laboratory production. PMMA denture base resin is formulated with gingival-tone pigmentation and optimized for tissue contact. Its primary requirements are biocompatibility (low residual monomer), dimensional stability after milling and polishing, and shade accuracy that matches natural gingival tissue across patient demographics. The key denture base resin is the standard for digital denture workflows pre-polymerized to industrial standards, compatible with all major open-system mills, and documented to meet ISO 20795-1 denture base polymer requirements. Multilayer PMMA for crown and bridge provisionals is formulated with a dentine-to-incisal shade gradient. This gradient architecture replicates the optical zonation of natural tooth anatomy warmer, more saturated chroma at the cervical transitioning to cooler, more translucent appearance at the incisal edge within a single pre-shaded disc. Labs using multilayer PMMA for anterior temporaries eliminate the external staining step on standard A-D shade cases, reducing finishing time significantly per unit. Hard splint acrylic is a high-hardness PMMA formulation used for occlusal splints, night guards, and bruxism appliances. This formulation prioritizes surface hardness and dimensional accuracy over translucency or shade matching. Milled hard splint acrylic delivers superior occlusal accuracy compared to pressure-formed thermoplastics because the restoration is designed from a digital model and milled to a precise occlusal scheme rather than vacuum-formed over an analog cast. Cold-cure and auto-polymerizing acrylic remains in use for chairside repairs, denture relines, and custom impression trays. This bench-mixed format is not a CAD/CAM material it is a manual chairside material that serves repair and adjustment functions that pre-polymerized discs cannot address. Understanding where cold-cure acrylic fits relative to milled PMMA prevents labs from inappropriately substituting one for the other. Dental Resin 3D Printing: Where Acrylic Chemistry Meets Digital Production The fastest-growing segment of acrylic resin use in dental labs is photopolymer resin for 3D printing a category that has expanded dramatically alongside the adoption of desktop and professional dental 3D printers. Dental resin 3d printing products are formulations of acrylic-based monomers and oligomers that cure rapidly under ultraviolet or visible light, layer by layer, to produce dental appliances, models, surgical guides, and provisional restorations. While the chemistry shares the same acrylic monomer foundation as PMMA, 3D printing resins are distinct products with distinct formulation requirements. Photopolymer resins must cure at specific wavelengths (typically 385 nm or 405 nm) within defined layer thickness parameters for the printer's build platform. They must also meet biocompatibility requirements appropriate to their specific application a model resin used only for diagnostic casts has different requirements than a splint resin or a try-in restoration that contacts oral tissue. The key clinical categories of dental 3D printing resin in current lab use include model resins for study casts and implant planning models, surgical guide resins for implant placement guides, splint and night guard resins, try-in restorations for checking shade and fit before final fabrication, orthodontic model resins, and temporary crown and bridge resins for direct printing of provisionals. Each category requires a specifically formulated resin cross-category substitution produces unreliable results and potential biocompatibility issues. The zirconia blocks dental workflow and the 3D printing resin workflow are increasingly complementary rather than competing. Labs run milled zirconia for permanent fixed restorations and 3D-printed resin for the surrounding workflow infrastructure diagnostic models, surgical guides, provisional restorations, and custom trays creating a fully digital production pipeline where both material categories contribute at their respective strength points. Key Benefits of Acrylic Resin in Dental Applications Understanding why acryclic resin dental formulations remain the standard for specific applications despite the expansion of dental zirconia discs, ceramic, and composite alternatives comes down to a set of clinically relevant properties that no other material class combines at acrylic's cost and accessibility. Repairability Acrylic resin is the only dental restoration material that can be chairside-repaired using the same material class as the original restoration. A fractured denture base, a broken provisional crown, a cracked splint all can be repaired with cold-cure acrylic at the chairside without fabricating a new restoration. Zirconia blank and ceramic restorations, by contrast, cannot be repaired when fractured they must be remade. This repairability is clinically significant in removable prosthetics, long-term provisionals, and any application where chairside modification is expected. Adjustability Acrylic resin can be ground, added to, and polished at the chairside with conventional laboratory burs and acrylic instruments. Occlusal adjustments, margin refinements, contact point modifications all are straightforward with acrylic in ways that ceramic and zirconia dental blanks are not. For provisional restorations that serve as the clinical template for the final restoration design, this adjustability is a core functional requirement. Biocompatibility in Tissue-Contact Applications Pre-polymerized, industrial-grade PMMA with residual monomer below ISO 20795-1 thresholds is biocompatible for long-term tissue contact the standard for denture bases that sit against oral mucosa all day. This biocompatibility profile, combined with the material's light weight and tissue-like esthetic character, makes PMMA the correct material for removable prosthetics regardless of the increasing strength of ceramic alternatives. Cost Efficiency Acrylic resin discs and 3D printing resins are significantly lower in per-unit material cost than ceramic or dental zirconia discs. For temporary restorations with defined functional lifespans typically 2–12 weeks for provisionals, 3–12 months for long-term temporaries material cost per unit is a legitimate procurement factor. The lower material cost of acrylic supports competitive pricing on provisional workflows without sacrificing material quality when the correct formulation is sourced from a reliable supplier. CAD/CAM Machinability PMMA is one of the most machinable materials in the CAD/CAM portfolio. Its pre-sintered softness relative to zirconia produces clean chip formation, minimal tool wear, fast milling cycles, and smooth surfaces that require minimal post-processing. A milled PMMA provisional crown takes a fraction of the milling time required for a zirconia blank of equivalent size a workflow efficiency that matters significantly in high-volume lab production. Acrylic Resin vs. Zirconia: A Clear Division of Indications The most important framework for dental labs working with both materials is understanding that acrylic resin and dental zirconia are not competing materials they are complementary materials with clearly separated primary indications. Dental bonding resin and other acrylic-based materials cover the temporary and removable spectrum: provisionals, denture bases, splints, orthodontic appliances, surgical guides, and diagnostic models. Zirconia blocks whether zirconia blank format for chairside mills or disc format for lab mills cover the permanent fixed restoration spectrum: crowns, bridges, implant-supported frameworks, and full-arch reconstructions. The two material categories serve different points in the same treatment workflow, and labs that stock and use both correctly are more efficient and produce better outcomes than labs that attempt to use one material class across all applications. As a zirconia materials distributor usa, ZirconiaGuys stocks the full range of both material categories acrylic resin formulations including Keystone's dental resin range and the complete Upcera and Aidite zirconia dental blanks and disc lineup from US inventory. Labs sourcing both CAD/CAM material categories from a single US supplier reduce ordering overhead, maintain consistent batch documentation, and access technical support across the full workflow from provisional to permanent. How to Select the Right Acrylic Resin Formulation? The most common acrylic resin selection error in dental labs is treating it as a single product category. The following framework maps clinical applications to the correct formulation: For full and partial denture bases — use industrial pre-polymerized PMMA denture base discs in gingival shades. Confirm ISO 20795-1 compliance and documented residual monomer levels below 0.5%. For anterior temporary crowns — use multilayer pre-shaded PMMA discs that match your shade system. Pre-shaded multilayer eliminates staining on standard A-D shade cases and is the most time-efficient format for high-volume anterior provisional production. For posterior temporary crowns — use single-shade PMMA in the appropriate tooth shade. Multilayer gradient adds cost without esthetic benefit in posterior cases where shade precision is secondary to fit and occlusal accuracy. For occlusal splints and night guards — use hard splint PMMA specifically formulated for this application. Standard crown-and-bridge PMMA is not hard enough for long-term splint applications under bruxism loading. For surgical guides — use biocompatible surgical guide resin formulated for the appropriate printer wavelength. Guide resin must meet biocompatibility requirements for tissue contact during surgical procedures. For orthodontic models — use dimensional-accuracy model resin. Model resins are not biocompatible for intraoral use and should not be substituted for splint or provisional resins. Acrylic resin remains one of the most clinically indispensable material categories in dental laboratory production not because it is the strongest or most durable material available, but because it is the right material for a specific and large set of clinical applications where repairability, adjustability, biocompatibility, and cost efficiency are the determining requirements. Understanding the distinction between formulations, matching each to its correct indication, and sourcing from suppliers who document batch quality and meet ISO standards is what separates labs that use acrylic resin effectively from those that compensate for material selection errors through extra labor and remakes.
Learn more
Top 8 Materials Used in Modern Dental Labs
The materials a dental lab stocks define what it can produce, how fast it can produce it, and how consistently it can deliver clinical-quality outcomes. Material selection is not a procurement decision that happens once it is an ongoing operational choice that directly determines case quality, remake rates, bench time per unit, and ultimately, the lab's competitive position in an increasingly demanding market. Modern dental laboratories run on a core set of materials that have been refined over decades of clinical use and CAD/CAM development. Some are ceramic. Some are polymer. Some are metal. Each has a clearly defined role, a specific set of clinical indications, and performance characteristics that make it the right choice for some cases and the wrong choice for others. Understanding all eight gives any dental professional lab technician, prosthodontist, or practice owner a complete picture of what the modern dental lab production floor actually runs on. 1. Zirconia — The Dominant CAD/CAM Ceramic Zirconia is the highest-volume CAD/CAM milling material in the modern dental lab and has been since it displaced PFM as the standard for fixed restorations in the 2010s. No other material combines the flexural strength range (500–1200+ MPa depending on grade), biocompatibility, chemical stability, and esthetic versatility of the current zirconia family. It covers every fixed restoration indication from high-load posterior bridges to translucent anterior veneers with distinct grades engineered for each point on that spectrum. The material is available as dental lab materials in three primary grade classifications. 3Y-TZP (three mole percent yttria) delivers 900–1200+ MPa flexural strength for posterior bridge and high-load applications. 4Y zirconia provides 600–800 MPa with significantly higher translucency the daily production standard for anterior and premolar cases. 5Y zirconia pushes translucency to its maximum at 500–650 MPa reserved for anterior esthetic cases where shade matching to highly translucent natural dentition is the overriding clinical priority. Disc formats: Zirconia blocks dental labs rely on come in two primary formats: flat single-composition (white unshaded or pre-shaded) and multilayer gradient. Flat white zirconia blank discs give full manual shade control through external staining. Pre-shaded multilayer discs embed the VITA-compatible shade gradient internally, eliminating the staining step for standard A–D shade cases and reducing bench time significantly at volume. For labs running the full range of anterior and posterior cases, stocking both formats is the correct strategy. Disc formats and sourcing: The standard diameter for dental lab milling is 98mm, compatible with all major open-system mills. As a trusted zirconia materials distributor usa, ZirconiaGuys stocks aidite zirconia discs for dental labs including the full Aidite multilayer and pre-shaded range, as well as upcera dental zirconia across 3Y, 4Y, and 5Y grades — all from US inventory with no international lead times. Clinical indications: Posterior bridges (3Y), anterior crowns (4Y/5Y multilayer), premolar crowns (4Y), implant-supported restorations (grade by zone), full-mouth rehabilitation frameworks. 2. PMMA — The Provisional and Removable Standard PMMA (polymethyl methacrylate) is the second-highest-volume CAD/CAM milling material in most dental labs and the exclusive material class for temporary restorations, denture bases, and occlusal appliances in digital workflows. It is not a competitor to dental zirconia discs it is the provisional phase that precedes the final zirconia restoration in every full treatment workflow. Pre-polymerized CAD/CAM PMMA discs are manufactured under industrial pressure and temperature conditions that produce a denser, more homogeneous polymer matrix than anything bench-mixed acrylic can deliver. Residual monomer content drops below 0.5% — well within ISO 20795-1 biocompatibility thresholds and dimensional stability improves significantly over conventional flask-and-pack processing. Formulation types: Denture base PMMA carries gingival tissue pigmentation for full and partial denture bases. Multilayer PMMA incorporates a dentine-to-incisal shade gradient for temporary crown and bridge provisionals. Clear PMMA formulations serve occlusal splints, night guards, and clear appliances. Each formulation is optimized for its specific application using denture base PMMA for crown provisionals or clear PMMA for denture bases are both material selection errors that produce poor clinical results. Clinical indications: Temporary crowns and bridges (2–8 weeks), long-term provisionals (3–12 months), CAD/CAM full and partial denture bases, implant-supported temporaries during osseointegration, occlusal splints and night guards. 3. Lithium Disilicate — Precision Esthetics for Single Units Lithium disilicate (most commonly encountered as IPS e.max) occupies a specific, well-defined position in the dental lab materials ecosystem: maximum esthetic integration for single-unit anterior restorations where the clinical priority is optical matching to highly translucent natural dentition. Its flexural strength of approximately 400 MPa is lower than all zirconia grades but higher than feldspathic porcelain, making it appropriate for single-unit crowns and veneers under moderate occlusal load. The material's optical properties are its defining clinical advantage. Lithium disilicate transmits and scatters light in a way that produces exceptional depth of color and natural-looking translucency the standard against which esthetic zirconia grades are benchmarked. For anterior single crowns adjacent to natural teeth with high translucency, lithium disilicate and 5Y zirconia are the two materials worth evaluating, with the final choice depending on preparation design and bonding requirements. Clinical indications: Anterior single crowns, veneers, inlays, onlays. Not appropriate for posterior bridges of 3+ units or high-load posterior single crowns where 3Y or 4Y zirconia is the structurally safer choice. 4. PEEK — High-Performance Polymer for Framework Applications PEEK (polyether ether ketone) has entered dental lab production as a metal-free alternative for removable partial denture frameworks, implant-supported bars, and orthodontic appliances. Its flexural strength of 80–170 MPa, combined with its tooth-like elastic modulus and excellent biocompatibility, makes it uniquely suited for applications where metal frameworks have traditionally been used but metal-free solutions are clinically preferred. PEEK does not corrode, does not generate allergic responses in metal-sensitive patients, and can be milled from pre-fabricated discs in standard CAD/CAM equipment. The material's tooth-like color also eliminates the greyish translucency problem associated with metal frameworks under thin tissue or mucosa. Labs that handle patients with documented metal allergies or who specify metal-free full workflows should stock PEEK alongside their standard dental zirconia and PMMA inventory. Clinical indications: Removable partial denture frameworks, implant-supported bars and telescopic crowns, long-term provisional frameworks, orthodontic retention appliances. 5. Cobalt-Chrome (Co-Cr) Alloy — The Metal Framework Standard Despite the growth of PEEK and milled titanium, cobalt-chrome alloy remains the dominant material for cast and sintered removable partial denture frameworks in labs that handle high volume removable prosthetics. Its mechanical properties flexural strength of 600–900 MPa, high hardness, and excellent fatigue resistance make it the benchmark for metal frameworks that must remain dimensionally stable under repeated loading across years of clinical service. In modern labs, Co-Cr frameworks are produced by one of three methods conventional lost-wax casting, selective laser sintering (SLS) from Co-Cr powder, or milling from pre-fabricated Co-Cr blanks. The SLS and milling routes integrate directly into digital lab workflows, eliminating the manual casting steps that introduce the most variability in conventional framework production. Zirconia dental blanks and Co-Cr discs can both be processed in the same digital design workflow the material and fabrication route diverge only at the manufacturing stage. Clinical indications: Removable partial denture frameworks, metal-ceramic crown and bridge substructures, implant bars and custom abutments requiring high fatigue resistance. 6. Composite Resin Chairside and CAD/CAM Versatility Composite resin serves dual roles in modern dental production: as a chairside direct restorative material placed by the clinician, and as a pre-fabricated CAD/CAM block for indirect lab-milled restorations. The CAD/CAM composite category represented by products like Vita Enamic (polymer-infiltrated ceramic network) and resin nano-ceramic blocks occupies the gap between pure PMMA provisionals and full ceramic crowns. CAD/CAM composite blocks deliver flexural strength in the 150–200 MPa range with an elastic modulus closer to natural dentin than either zirconia or lithium disilicate. This elastic compliance is clinically advantageous in cases where stress absorption at the restoration-tooth interface is a design priority full-coverage crowns on structurally compromised teeth, for example, where the flex of the restoration reduces fracture risk at the margin. Clinical indications: Single-unit crowns and onlays in moderate-load cases, inlays, veneers, implant crowns where elastic modulus matching to surrounding bone and tissue is clinically preferred. 7. 3D Printing Resins — The Fastest-Growing Material Category 3D printing resins have become a significant share of modern dental lab materials inventories in labs that have adopted digital light processing (DLP) or stereolithography (SLA) printing workflows. The category covers a wide range of formulations: model resins for diagnostic casts, surgical guide resins for implant placement guides, splint resins for hard and soft night guards, tray resins for custom impression trays, and most recently permanent crown resins with mechanical properties approaching composite blocks. Keystone dental products represent one of the most complete 3D printing resin ranges available to US labs, covering model, splint, tray, ortho, guide, and denture base applications within a single brand ecosystem. Labs running DLP or SLA printing workflows benefit from consistent brand compatibility matching resin formulations to print profiles validated for the same manufacturer reduces the calibration and troubleshooting overhead that comes with mixing resin brands across applications. The material's throughput advantage over milling is most significant for high-volume model and guide production a DLP printer can produce multiple models simultaneously overnight, with no operator intervention, at a per-unit material cost below any comparable milled alternative. Clinical indications: Diagnostic models, surgical guides, custom impression trays, orthodontic models, hard and soft splints, provisional crowns (permanent resin grades), denture bases (printable PMMA grades). 8. Titanium The Implant and Framework Metal Titanium — primarily Grade 4 commercially pure and Grade 5 (Ti-6Al-4V alloy) — is the implant material and the metal substructure choice for implant-supported restorations where maximum biocompatibility is the clinical requirement. Its combination of low density, high strength-to-weight ratio, corrosion resistance in oral fluids, and exceptional osseointegration performance makes it the universal standard for implant fixtures and a preferred material for implant bars and custom abutments. In dental lab production, titanium is processed as pre-milled blanks for custom abutments and implant bars, or as a received component (the implant fixture itself) onto which lab-fabricated crowns and superstructures are mounted. Milled titanium abutments from pre-fabricated blanks are standard in labs handling implant-level work the precision of CAD/CAM milling produces abutment margins and platform geometries that casting cannot consistently replicate. Clinical indications: Implant fixtures (placed surgically), custom abutments, implant bars for full-arch restorations, metal-ceramic substructures requiring maximum biocompatibility. How to Build a Complete Material Inventory for Your Dental Lab? A well-stocked modern dental lab doesn't require every material on this list it requires the right materials for its case mix. The following framework guides inventory decisions based on production focus: Full-service lab (fixed + removable + implant): 3Y and 4Y/5Y zirconia in flat and multilayer formats, PMMA in denture base and multilayer crown formulations, lithium disilicate for anterior esthetic cases, Co-Cr for removable frameworks, titanium components for implant work, and 3D printing resins for models and guides. Fixed-only CAD/CAM lab: Zirconia as the primary milling material across 3Y, 4Y, and 5Y grades. PMMA multilayer for temporaries. Composite or lithium disilicate for select anterior cases. 3D resin for models and surgical guides. Removable-focused lab: PMMA denture base as the primary material. Co-Cr or PEEK for partial denture frameworks. 3D model resin for diagnostic casts and articulation. Sourcing all zirconia dental blanks, PMMA, and 3D resins from a US-based zirconia materials distributor usa eliminates international lead time uncertainty and ensures consistent batch documentation the foundation of reproducible quality across production runs. The eight materials covered in this guide represent the complete production palette of a modern dental laboratory. Zirconia anchors the fixed restoration workflow. PMMA handles provisionals and removables. Lithium disilicate serves the esthetic anterior niche. PEEK and Co-Cr cover metal-free and traditional framework applications. Composite resin bridges the gap between temporaries and ceramics. 3D printing resins are transforming model, guide, and appliance production. Titanium is the implant and custom abutment standard. Understanding each material at the level of its mechanical properties, clinical indications, and production workflow requirements is what separates labs that consistently hit quality targets from labs that compensate for material selection errors through extra labor and remakes. The right material in the right application is the foundation of every efficient, consistent dental lab.
Learn more
Top Tips for Using Dental PMMA Discs in Milling Machines
PMMA is one of the most forgiving CAD/CAM materials to mill until it isn't. Labs that are new to PMMA milling typically discover the same problems in the same sequence: rough tissue surfaces that take longer to polish than expected, micro-chipping at margins on thinner restorations, bur wear that outpaces what the material's softness would suggest, and occasional warping on full-arch cases that exit the mill dimensionally inaccurate. None of these are material failures. They are workflow failures problems that trace back to incorrect parameters, wrong tooling selection, or skipped setup steps that experienced PMMA labs have long since standardized. This guide covers the practical techniques, parameter decisions, and quality checks that produce clean, accurate, ready-to-finish PMMA restorations consistently from every production run. Whether you are milling temporary crowns, denture bases, occlusal splints, or full-arch provisionals, the same core principles apply and getting them right from the start eliminates the most common sources of rework in PMMA production. Understand the PMMA Disc You Are Using Before You Mill The single most common source of PMMA milling problems is running a disc on parameters calibrated for a different PMMA formulation. PMMA is not one material it is a class of acrylic polymer that encompasses meaningfully different formulations depending on the application. Denture base PMMA, multilayer crown and bridge PMMA, clear splint PMMA, and high-impact PMMA for full-arch cases all have different hardness values, chip formation behavior, and optimal cutting parameters. A multilayer pmma disc for temporary crowns has gradient hardness built into its architecture — the cervical zone is formulated to a different composition than the incisal zone. Running uniform cutting parameters that are calibrated for a monolayer disc can produce inconsistent surface quality across the gradient layers, particularly at the layer transition zones where chip formation behavior changes slightly. Most CAM software handles this automatically when the disc type is correctly specified, but manual parameter entry should reflect the specific disc formulation, not a generic PMMA default. Always confirm the following before milling a batch: The disc formulation matches what is specified in the CAM file. Swapping a multilayer disc for a monolayer without updating the software causes toolpath depth and speed errors that are not always immediately obvious but consistently degrade surface quality. Check that the disc is mounted in the correct orientation. Multilayer discs are directionally coded cervical-to-incisal orientation must match the CAD design's expectation, or the shade gradient will be reversed in the finished restoration. Verify the disc has been stored correctly. PMMA absorbs moisture from the air. A disc that has been left unsealed in a humid lab environment mills differently chipping more readily and producing a rougher milled surface than a disc stored in its sealed packaging until use. Set Milling Parameters for PMMA Specifically Not by Default Most milling machines arrive with preset material libraries that include a PMMA profile. These presets are a reasonable starting point, but they are rarely optimized for the specific disc product you are running. The three parameters that most directly affect PMMA milling quality are spindle speed, feed rate, and step-over distance. Spindle speed for PMMA should typically run in the range of 20,000–30,000 RPM for finishing passes. PMMA is a thermoplastic it melts rather than fractures under heat. Running spindle speeds too low generates heat at the tool tip through friction rather than dissipating it through chip formation. The result is a smeared, slightly translucent surface in the milled area material that has partially melted and re-solidified rather than cutting cleanly. If your milled PMMA surfaces look waxy or slightly glazed, spindle speed is the first parameter to check. Feed rate directly controls chip load per tooth and determines whether the material is cut cleanly or torn. Too slow a feed rate on PMMA produces built-up edge on the bur — material adhesion that degrades surface finish progressively through the milling cycle. Too fast a feed rate increases the risk of vibration-induced chipping on thin margins. The optimal range varies by bur diameter and disc hardness, but a good starting point for 2 mm finishing burs on standard PMMA is 800–1200 mm/min. Adjust in 10% increments and evaluate surface quality with each change. Step-over distance on finishing passes determines how visible the scalloping pattern is on curved surfaces. For tissue surfaces of denture bases and the axial walls of crown temporaries, a step-over of 0.05–0.08 mm typically produces a surface finish that requires minimal polishing. Step-over above 0.15 mm leaves visible machining marks that add significant polishing time particularly on concave tissue surfaces where access is limited. Use the Right Burs and Replace Them on Schedule PMMA is soft relative to zirconia blocks dental ceramics, but it is abrasive in a different way. The continuous chip formation in PMMA production loads bur flutes with acrylic debris that builds up and causes the same degradation in cut quality as a worn cutting edge. Labs that track bur life by unit count and replace on schedule consistently produce better PMMA surface quality than labs that run burs until visible failure. For aidite pmma dental discs, the recommended tooling is standard two-flute PMMA burs in 2 mm roughing and 1 mm finishing diameters for most crown and bridge temporaries. Denture base cases with large tissue surface areas benefit from a 2 mm ball-nose finishing pass that covers more surface area per pass and reduces total milling time without sacrificing finish quality. Replace PMMA burs every 20–25 disc units for standard crown and bridge work. For full-arch denture base cases which subject burs to significantly longer continuous cutting paths reduce the interval to 10–15 full-arch cases. Running worn burs on PMMA produces the characteristic rough, fibrous milled surface that requires extensive polishing to resolve. The bur cost per case is a fraction of the additional polishing labor cost it avoids. A few tooling rules that consistently improve results: Never use zirconia burs for PMMA milling. The geometry differs zirconia blank cutting tools are designed for the different chip formation mechanism of ceramic. Running ceramic-optimized burs on PMMA produces poor chip evacuation, heat buildup, and rapid bur loading. Keep separate bur sets for PMMA and ceramic milling and do not cross-use them. Check bur runout before milling critical cases. A bur with even 0.01 mm runout produces a visible vibration artifact on the milled surface of thin-walled PMMA temporaries. Runout check takes 30 seconds and eliminates a common source of unexplained surface quality variation. Control the Milling Environment: Dust, Temperature, and Fixturing PMMA generates fine acrylic dust during milling that accumulates rapidly in the milling chamber. Unlike dental zirconia discs and zirconia ceramic dust, PMMA dust is lightweight and electrostatically charged it adheres to chamber walls, sensors, and spindle housings, and migrates further through the machine than ceramic dust in the same conditions. Clean the milling chamber after every PMMA session, not at end-of-day. Acrylic dust that sits in the chamber between sessions is picked up by air circulation during the next milling cycle and redeposited on the disc surface during cutting — producing contamination artifacts on the milled surface that look like smearing or micro-inclusions. A 2-minute chamber clean between cases costs less than the polishing time required to remove contamination artifacts. Temperature affects PMMA milling quality more than most labs account for. In cold lab environments below 18°C, PMMA becomes more brittle and chips more readily at thin margins. In warm environments above 28°C, the material's thermoplastic behavior is more pronounced and smearing is more likely. Keep lab temperature stable in the 20–24°C range for consistent PMMA milling results. If your lab runs warm in summer months, this one environmental adjustment often resolves milling quality variation that technicians have been attributing to disc quality or machine calibration. Fixturing security is critical for full-arch PMMA cases. A denture base disc held in an adapter that has even slight play will vibrate during the long cutting paths of a full-arch milling cycle. The vibration produces consistent surface irregularities across the tissue surface that are difficult to distinguish from parameter-related issues. Before any full-arch PMMA case, confirm the adapter fit is secure and that the disc seating is fully engaged. Post-Milling: Separation, Cleanup, and Polishing Sequence How you handle PMMA restorations after they exit the mill affects final quality as much as the milling parameters themselves. The separation step is where most of the edge chipping in PMMA cases occurs not during milling. Separate PMMA restorations from sprues using a fine disc or oscillating saw rather than bending or snapping. PMMA is more brittle at sprue attachment points than its bulk flexibility suggests, and mechanical separation by flexing almost always produces a fracture that propagates unpredictably. Cut the sprue cleanly, then trim the attachment point with a tungsten carbide bur at low speed. For labs sourcing aidite dental materials including the full Aidite PMMA range the post-milling polishing sequence consistently recommended by Aidite is: coarse pumice slurry at low lathe speed to address machining marks, followed by fine pumice, followed by acrylic polishing compound to final gloss. Rag wheel at medium speed for final polish. This three-step sequence produces clinical-grade surface finish in approximately 10–15 minutes per unit when the milled surface is clean from a correctly parameterized milling cycle. For multilayer PMMA crown cases, avoid aggressive grinding of the tissue surface during cleanup. Grinding through the incisal layer into the body layer of a multilayer disc reverses the shade gradient at that point producing a visible shade anomaly that requires a remake to correct. Confine any post-milling surface work to the margin areas and leave the main anatomical surfaces as-milled. Stocking PMMA and Zirconia Together: The Full CAD/CAM Material Strategy PMMA milling efficiency is not just about individual case parameters it is about how PMMA fits into your broader material workflow. Labs running both PMMA temporaries and permanent dental zirconia discs for fixed restorations benefit from a coordinated stocking strategy that treats both material classes as part of the same production system. For US dental labs looking to consolidate their CAD/CAM material supply, ZirconiaGuys stocks the complete Aidite PMMA range multilayer, denture base, and clear formulations alongside zirconia dental blanks, zirconia blocks from Upcera and Aidite, and accessories from US inventory. Labs can also buy aidite zirconia blocks wholesale usa directly through ZirconiaGuys with no international lead times, consistent batch documentation, and full technical support for both PMMA and zirconia milling parameters. The key material stocking principle for labs running both workflows: treat PMMA as your temporary production standard and zirconia as your permanent production standard, and stock both with the same quality discipline. A zirconia materials distributor usa relationship that also covers your PMMA supply consolidates vendor management, simplifies inventory tracking, and ensures that both material classes are supported by the same technical documentation chain.
Learn more