

Blogs
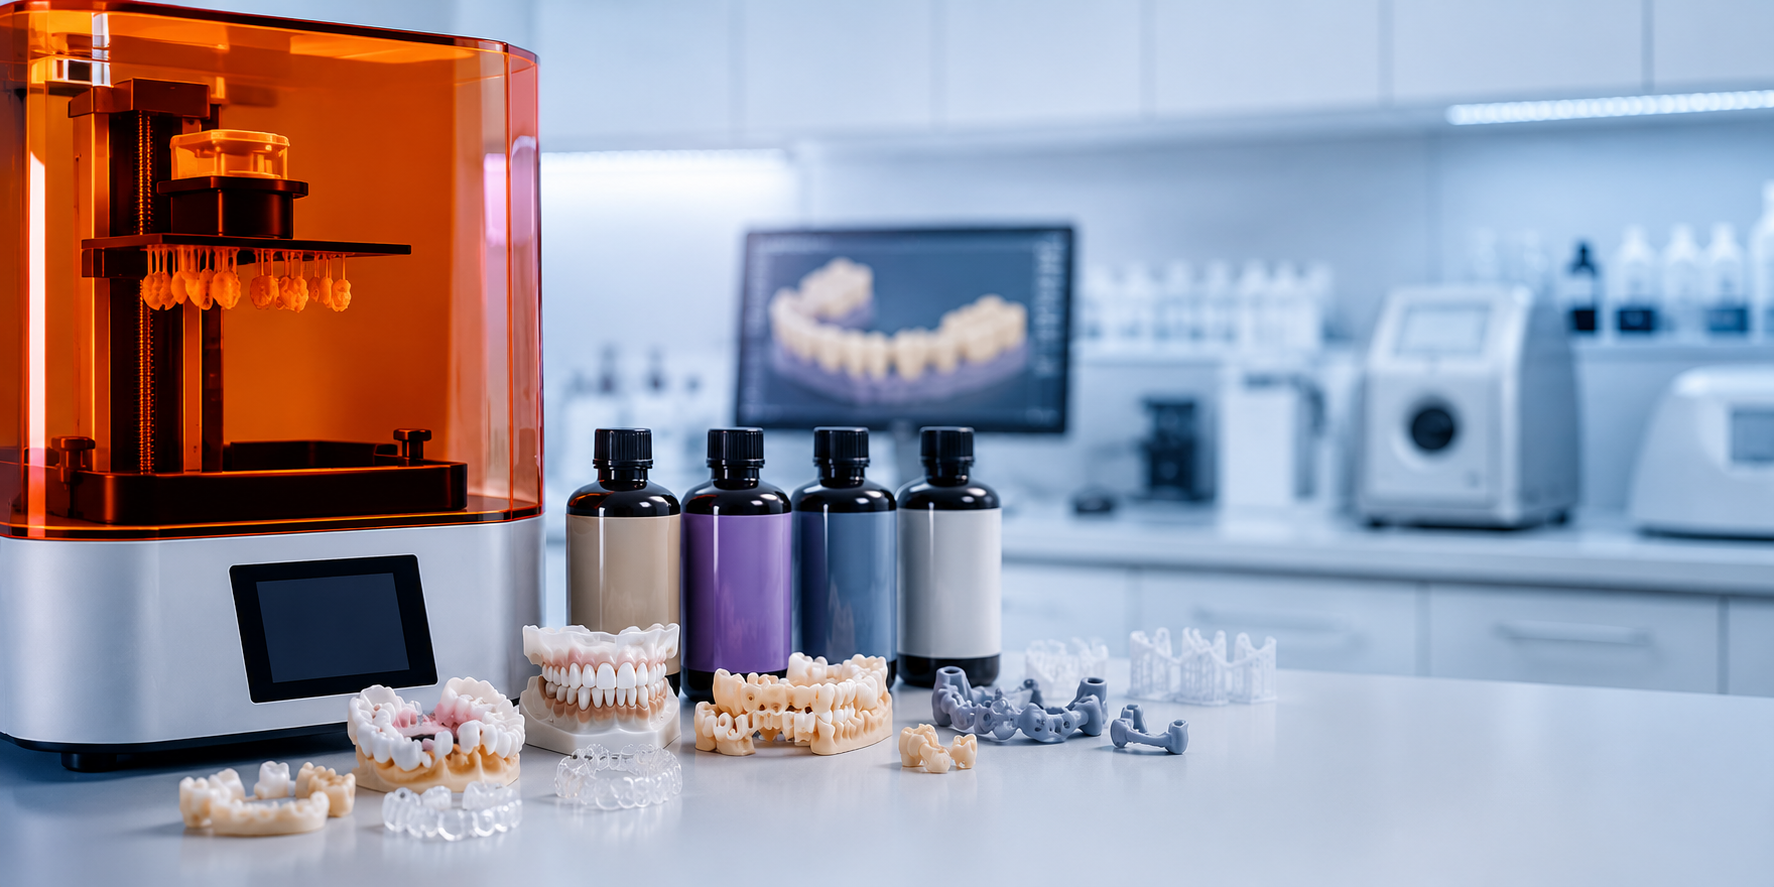

What Are the Main Applications of PMMA Disc in Dental Labs?
PMMA polymethyl methacrylate is the most widely used CAD/CAM milling material in dental laboratories outside of zirconia. It machines quickly, finishes cleanly, costs a fraction of ceramic per disc, and covers a broad range of applications that no other single material class can match. Yet despite its ubiquity, most discussions of PMMA reduce it to "temporary crowns" and leave the rest of the story untold. The full picture is significantly more useful than that. PMMA discs serve at least six distinct clinical applications in a modern dental lab workflow, each with its own formulation requirements, processing protocols, and performance expectations. Understanding each application and which PMMA format is correct for each is the difference between a material you stock generically and a material you deploy strategically. This guide covers all of it. What Makes PMMA Suitable for Dental Lab Applications? Before examining the applications individually, it is worth understanding why PMMA is well-suited to dental use in the first place. Not all PMMA is the same the industrial pre-polymerized PMMA used in CAD/CAM dental discs is a fundamentally different material from bench-mixed acrylic, and the distinction matters clinically. CAD/CAM PMMA discs are manufactured by polymerizing the monomer under high industrial pressure typically 50 to 200 bar at elevated temperature in controlled autoclaves. This process eliminates most residual monomer from the polymer matrix, reducing residual monomer content to below 0.5% compared to 3–5% in bench-mixed acrylic. The result is a denser, more homogeneous material that is safer for tissue contact, more predictable to mill, and more consistent in mechanical performance than anything produced at the lab bench. The properties that make pre-polymerized CAD/CAM PMMA suitable for dental applications are: biocompatibility within ISO 20795-1 thresholds, flexural strength in the 80–120 MPa range, ease of milling with standard tooling at production speed, polishability to a high-gloss surface finish, repairability using conventional chairside acrylic techniques, and shade formulation flexibility across gingival tissue tones, tooth shades, and optical clarity. No single material delivers all of these properties together PMMA covers temporary and removable applications in the same way that dental zirconia discs cover permanent fixed restorations. They are complementary materials, not competing ones. Application 1: Temporary Crowns and Bridge Provisionals Temporary fixed restorations are the highest-volume PMMA application in most dental labs. Every prepared tooth requires a provisional while the permanent restoration typically a zirconia blank or ceramic crown is being fabricated. The temporary must protect the preparation, maintain the patient's occlusion, and preview the esthetic outcome of the final restoration. Material quality at the PMMA disc level directly determines how well the temporary fulfills all three functions. For standard anterior and posterior single-unit temporaries, single-shade PMMA discs in tooth shades (A1, A2, A3) cover the majority of cases efficiently. For anterior cases where shade gradient matters particularly in the anterior esthetic zone where the temporary will be visible and evaluated by the patient before the permanent crown is placed multilayer PMMA discs that transition from a dentin-like cervical zone to a more translucent incisal zone deliver significantly better optical results without requiring post-milling staining. The aidite pmma dental discs range covers both formats offering a consistent, well-documented PMMA formulation that machines cleanly, polishes efficiently, and delivers predictable shade accuracy across production batches. For labs that produce anterior temporaries at volume, the batch-to-batch shade consistency of a branded, well-sourced PMMA is not a luxury it is the difference between a reproducible standard and an unpredictable result on every case. For multi-unit bridge provisionals, PMMA's repairability is a critical workflow advantage. If a 4-unit bridge temporary fractures at a connector during the provisional phase which is not uncommon, especially in cases with limited preparation height the lab or clinician can repair it with chairside cold-cure acrylic without fabricating a new restoration from scratch. No ceramic material offers this option. This repairability is one of the strongest arguments for PMMA in complex provisional workflows. Application 2: Long-Term Provisionals in Complex Treatment Cases Not all PMMA temporaries are worn for two to six weeks. In full-mouth rehabilitation cases, implant-supported reconstructions, cases requiring occlusal vertical dimension changes, or orthodontic-restorative combination treatments, provisionals may be in place for three to twelve months or longer. This extended service demand changes the material requirements significantly. The aidite pmma multilayer disc format is engineered for exactly this application combining the gradient shade architecture needed for esthetic anterior cases with a pre-polymerization quality that maintains surface integrity over extended intraoral service. Lower-quality PMMA with higher residual porosity will absorb stain, accumulate biofilm, and roughen in surface texture over a multi-month provisional period. The patient notices. The lab gets the call. Long-term provisionals also serve as diagnostic restorations. The patient wears the provisional for weeks or months and provides feedback on shape, length, phonetics, lip support, and esthetics before the permanent restorations are fabricated. In this workflow, the PMMA temporary is not a placeholder it is a clinical tool for refining the final design. The quality of the PMMA disc used determines whether that tool produces reliable diagnostic information or introduces its own variables through material inconsistency. For labs working with restorative dentists on complex full-arch cases, stocking a high-quality long-term PMMA format alongside the standard single-shade provisional disc is a direct investment in case quality. The material cost difference between a standard provisional disc and a premium long-term PMMA format is trivial compared to the value of a diagnostic provisional that performs correctly for six months. Application 3: Full and Partial Denture Bases PMMA denture base production is the application where CAD/CAM milling has most dramatically improved both quality and efficiency compared to conventional techniques. Traditional flask-and-pack denture base processing is a multi-step, highly operator-dependent workflow that introduces dimensional variability at every stage: mixing, packing, curing, and deflasking. CAD/CAM denture base PMMA eliminates all of those variables. The lab scans the patient's master model, designs the denture base digitally in exocad or equivalent software, mills the base from a pre-polymerized PMMA disc, polishes it, and delivers a dimensionally accurate, fit-confirmed result. The dimensional accuracy of the milled base is determined by the scan, the design, and the milling parameters not by flask compression or mixing ratio. This is a fundamental quality improvement. The aidite denture resin blocks are specifically formulated for this application pigmented in gingival tissue shades that match natural oral mucosa across the patient demographic range, with pre-polymerization quality that delivers low residual monomer content for long-term tissue contact biocompatibility. For labs that produce high volumes of CAD/CAM dentures, the polishing behavior of the PMMA disc is as important as the milling behavior Aidite's denture base formulation polishes to clinical-grade gloss in significantly less time than generic alternatives, which translates directly into throughput improvement on a per-case basis. Partial denture base frameworks in PMMA rather than traditional cobalt-chromium cast metal are also becoming more common in labs that run fully digital workflows. All-acrylic partial frameworks sacrifice some rigidity compared to cast metal, but for patients who require metal-free prosthetics or for cases where a transitional partial is needed before a definitive solution, PMMA partial frameworks milled from denture base discs provide a functional, esthetic, and biocompatible solution. Application 4: Occlusal Splints and Night Guards Hard PMMA is the standard material for CAD/CAM-milled occlusal splints and for good reason. Conventional pressure-formed splints are fabricated by heating a thermoplastic sheet over a plaster model under vacuum. The result is a splint of variable thickness, questionable occlusal accuracy, and limited adjustability. Milled PMMA splints are designed digitally from a scanned model to a precise thickness and occlusal scheme, milled to that specification, and delivered with a level of accuracy that vacuum-forming cannot replicate. The aidite clear dental pmma discs are formulated specifically for this application optimized for optical clarity, smooth milled surface finish, and the hardness required for occlusal splint service. A night guard needs to be hard enough to resist wear from bruxism forces while remaining adjustable with standard acrylic instruments for occlusal equilibration at the delivery appointment. Clear PMMA meets both requirements. The optical clarity also matters clinically patients are more accepting of clear splints than opaque ones, particularly for daytime wear. Splint applications also extend to sports guards, bite registration devices, and orthodontic retainers all of which are produced more accurately and efficiently from milled clear PMMA than from conventional thermoforming. As dental practices increasingly adopt intraoral scanners and send digital impressions directly to labs, the demand for digitally designed and milled PMMA appliances in this category will continue to grow. Application 5: Diagnostic Models and Study Casts PMMA discs in appropriate formulations are used for milling diagnostic models and study casts a less commonly discussed application but one that is growing in labs that have adopted fully digital workflows for complex case planning. In a digital-first workflow, the lab receives a digital scan rather than a physical impression, designs and mills a diagnostic model in PMMA or resin, and uses that model for wax-up verification, articulation, or patient communication. PMMA models are more durable than conventional plaster casts, do not chip or fracture during handling, and can be archived without degradation. For complex restorative cases involving multiple quadrants, the ability to mill an accurate PMMA model from a digital file and use it as the physical basis for case planning is a significant workflow advantage. This application uses a different PMMA formulation than crown and bridge or denture base work typically a neutral ivory or beige shade that reproduces model detail clearly under lab lighting. The formulation priority is dimensional accuracy and surface detail reproduction, not shade matching or tissue color accuracy. PMMA Discs and Zirconia: How They Work Together in a Full-Service Lab Understanding PMMA applications is incomplete without understanding how PMMA and zirconia divide clinical responsibilities in a full-service CAD/CAM dental lab. PMMA covers every temporary, removable, and appliance application. Zirconia blocks dental and ceramic materials cover every permanent fixed restoration. These material classes are not interchangeable they are designed for different phases of treatment and different performance requirements. For every case that moves from provisional to permanent, there is a PMMA phase and a zirconia phase. The temporary crown is PMMA. The final crown is milled from zirconia dental blanks 3Y for posterior strength priority, 4Y or 5Y multilayer for anterior esthetic priority. Labs that stock both material classes and use each in its correct application run more efficient workflows, produce better clinical outcomes, and have fewer remakes than labs that try to extend either material beyond its intended indication. ZirconiaGuys stocks the full Aidite PMMA range denture base, multilayer, and clear formulations alongside Aidite and Upcera zirconia blocks in all grades and formats, from US inventory. As a dedicated zirconia materials distributor USA with no international shipping lead times, ZirconiaGuys provides full batch documentation, technical support for milling and sintering parameters, and consistent supply for labs that need to run both PMMA and zirconia workflows from a single trusted source.
Learn more
Exploring the Benefits of 3D Pro Multilayer Zirconia Blocks in Dentistry
Dental labs in the United States are under more production pressure than ever. Case volumes are rising, turnaround expectations are shortening, and referring dentists are becoming increasingly specific about esthetic outcomes particularly for anterior cases where shade accuracy and translucency directly determine whether a case passes or comes back for adjustment. The material you mill from is the single most controllable variable in that equation. Get the disc right, and the downstream workflow becomes faster, more predictable, and more consistent. Get it wrong, and you spend that time compensating through extra staining, extra polishing, and eventual remakes. Multilayer dental zirconia discs have shifted the baseline for what dental labs should expect from a production disc. Not all multilayer products deliver on that promise equally, however. This guide focuses on what sets Aidite's 3D Pro multilayer zirconia apart from standard multilayer alternatives covering the material architecture, the clinical performance data, the workflow benefits, and the practical reasons US dental labs are standardizing on it. What Makes a Multilayer Zirconia Block Different from Standard Zirconia? To understand the 3D Pro advantage, it helps to first understand what multilayer architecture actually means in a zirconia disc — because the term is used loosely across the industry, and not all multilayer products are engineered the same way. A standard (monolithic) zirconia blank is manufactured with uniform composition throughout. The yttria content, crystal phase ratio, translucency, and shade are identical from the cervical end of the disc to the incisal end. When you mill a crown from a standard disc, every zone of the crown has the same optical character — which means the cervical, body, and incisal all look the same before any staining is applied. A multilayer zirconia blank is manufactured with a gradient of composition built into the disc during pressing and sintering. The cervical zone contains more opaque, higher-chroma material that replicates the saturated dentin at the base of a natural tooth. The body zone transitions to a balanced translucency. The incisal zone contains the highest-translucency formulation, replicating the opalescent quality of natural enamel. This gradient is not painted on or applied — it is part of the disc's physical structure, distributed across its depth in distinct layers that are fused during manufacturing. The clinical difference is significant. When a multilayer disc is correctly oriented in the milling machine and the CAD toolpath is aligned with the internal zones, the milled crown exits the sintering furnace already carrying a natural shade gradient — cervical warmth, body balance, incisal translucency — without any external stain application. For standard A-shade cases, this eliminates the staining step entirely and reduces post-sintering bench time dramatically. The Aidite 3D Pro Architecture: What Sets It Apart The 3d pro zirconia disc from Aidite uses a proprietary three-dimensional multilayer gradient — the "3D" designation refers to the fact that the gradient is distributed across three dimensions within the disc, not simply as a two-layer top-bottom transition as in lower-tier multilayer products. Most entry-level multilayer zirconia discs operate on a simple two-zone model: a cervical zone and an incisal zone, with a single transition between them. This two-zone architecture produces visible demarcation when the crown is milled at an angle to the disc axis a common issue in posterior cases where tooth orientation in the arch does not align cleanly with the disc's vertical gradient. Aidite's 3D Pro architecture addresses this by engineering the gradient to transition gradually across multiple zones typically four to five distinct compositional layers with smooth, controlled transitions between each. The result is a disc where shade and translucency change predictably regardless of milling orientation, and where the gradient remains visually coherent even when the toolpath cuts across layer boundaries at an angle. This engineering directly reduces one of the most common complaints about multilayer discs: inconsistent gradient appearance across a multi-unit case where different units are milled from different positions in the disc. With the 3D Pro architecture, labs report consistent shade gradients from the first blank to the last across the full disc. Clinical Performance: Strength and Translucency Data The aidite 3d pro zirconia blocks are engineered to a 4Y-equivalent mixed tetragonal-cubic formulation in the body and cervical zones, transitioning toward 5Y-equivalent cubic-dominant phase in the incisal zone. This phase gradient produces the following typical performance range: Flexural strength by zone: Cervical zone: 700–800 MPa within 3Y/4Y structural range, suitable for connector regions in short-span anterior bridges Body zone: 600–750 MPa standard 4Y range, covers the majority of crown occlusal surface demand Incisal zone: 500–650 MPa 5Y-equivalent, appropriate for incisal edges where esthetic priority outweighs structural requirement Translucency by zone: Cervical: Low-moderate replicates dentin opacity and warm chroma Body: Moderate-high balanced esthetic-structural zone Incisal: Very high approaches 5Y flat disc translucency in the top layer This performance profile makes the 3D Pro disc appropriate for anterior single crowns, anterior 3-unit bridges, premolar single crowns, and anterior implant crowns. It is not designed for posterior bridges of 3 or more units, where a monolithic 3Y disc is the structurally correct choice. Sintering parameters: Peak temperature 1480–1530°C, ramp rate ≤5°C/min, hold time per manufacturer specification. Deviating from these parameters — particularly running accelerated sintering cycles reduces incisal zone translucency and risks microcracking at interlayer interfaces. Workflow Benefits: Where Labs Save Time with 3D Pro Multilayer The production efficiency case for multilayer zirconia blocks dental labs rely on is measurable, not theoretical. Here is where the 3D Pro format delivers tangible time savings in daily lab workflow. Elimination of staining on standard A-shade cases. Pre-shaded 3D Pro discs are calibrated to VITA Classic A-D shade values from the factory. For the majority of anterior single-crown cases in standard A shades — which represent 70–80% of most labs' anterior production volume — the restoration exits sintering with the correct shade gradient without any external stain application. The only post-sintering step required is glaze firing for surface finish. Reduced shade matching variability across multi-unit cases. When a 3-unit anterior bridge is milled from a pre-shaded multilayer disc, all three units carry the same internal gradient from the same disc batch. External stain protocols introduce unit-to-unit variability that even skilled technicians struggle to eliminate perfectly. The pre-shaded multilayer format standardizes the shade baseline before any bench work begins. Faster case communication with prescribing dentists. Because the shade gradient of the 3D Pro format is consistent and documented, labs can communicate expected shade outcomes to prescribing dentists with greater confidence. Shade prescription documentation from the disc manufacturer supports the communication rather than relying entirely on the technician's interpretation of a shade tab match. Lower bur wear versus higher-hardness monolithic discs. The mixed-phase composition of the 3D Pro disc produces a pre-sintered blank that machines with lower cutting resistance than dense 3Y monolithic discs. Labs running high anterior case volumes report meaningfully lower bur replacement frequency on the 3D Pro format compared to standard single-grade 3Y discs. Why US Labs Specifically Benefit from Aidite 3D Pro The aidite 3d pro multilayer zirconia blocks usa supply through ZirconiaGuys addresses a specific challenge that US dental labs face when sourcing multilayer zirconia: consistency between the product spec and what arrives on the production floor. Direct import purchasing from overseas manufacturers introduces batch variation risk that is difficult to manage when the lab has no direct relationship with the supplier's QC process. A disc batch that performs correctly in one shipment may shift in shade calibration, sintering behavior, or layer transition definition in the next — without any visible change to the product packaging or documentation. ZirconiaGuys sources Aidite 3D Pro from authenticated supply channels and holds US inventory, which means labs receive the same product specification that the manufacturer documents — not a parallel market equivalent. Batch certificates are available on request, enabling labs to verify specification compliance for each production run. For labs that have experienced shade drift or inconsistent translucency with previous multilayer sources, this documentation chain is the practical solution. Additionally, US inventory eliminates the lead time uncertainty of direct import. Most dental labs cannot afford to hold 6–8 weeks of disc inventory as a buffer against international shipping delays. Same-day or next-day shipping from US stock means labs can maintain lean inventory without risking production interruptions. Choosing the Right Format: Pre-Shaded vs. White 3D Pro The 3D Pro multilayer disc is available in both pre-shaded and white formats, and understanding which format serves each application is essential for getting the most out of the disc. For labs sourcing aidite zirconia discs for dental labs in high-volume anterior production, the pre-shaded format is the correct default. It eliminates the staining step on standard cases, reduces per-case bench time, and produces consistent gradient quality across the full disc without operator-dependent variation. The pre-shaded format is the reason multilayer zirconia dental blanks have become the default anterior disc format in high-throughput labs — it standardizes the single most variable step in the anterior crown production workflow. The white 3D Pro format is the right choice when: The case requires a shade outside the standard VITA A-D range The prescribing dentist has specified a custom characterization effect (craze lines, hypocalcification, fluorosis replication) The lab technician prefers full manual shade control for complex esthetic cases where the natural gradient architecture of the disc provides the structural foundation but the shade outcome requires custom built-up staining Practical stocking guidance for US labs: Stock pre-shaded 3D Pro in A1, A2, A3, and A3.5 as your anterior production standard — these four shades cover the overwhelming majority of anterior crown cases. Stock white 3D Pro in a single size as your custom case and complex esthetic fallback. This two-format approach gives the lab full esthetic flexibility while standardizing the high-volume workflow on the pre-shaded format. What to Look for in a Zirconia Materials Distributor USA Sourcing multilayer zirconia from the right zirconia materials distributor usa matters as much as the product specification itself. The key criteria are not complicated, but they are frequently overlooked when labs prioritize price over supply reliability. Authenticated supply chain. Confirm that the distributor sources directly from the manufacturer or through an authorized distribution channel — not through parallel market or gray market imports where product specification cannot be guaranteed. US inventory. Distributors that hold US stock eliminate international lead times and give labs the ability to maintain lean inventory without production risk. Same-day or next-day shipping capability is the practical standard for a functional lab supply relationship. Batch documentation. Reliable distributors provide batch certificates on request, enabling labs to track specification compliance across orders and identify any drift before it affects clinical production. Technical support. Sintering profile guidance, milling parameter recommendations, and troubleshooting support for shade consistency issues are the difference between a transactional supplier and a supply partner that contributes to lab production quality. Consistent pricing on the full Aidite range. Labs that produce both fixed and removable restorations benefit from sourcing zirconia blocks alongside PMMA, stain and glaze, and other Aidite CAD/CAM materials from a single US supplier. The consolidation reduces ordering overhead and ensures consistent batch documentation across the full material range. The Aidite 3D Pro multilayer zirconia block is not a marginal upgrade over standard multilayer alternatives — it is a fundamentally better-engineered disc that delivers measurable workflow improvements on every anterior case it produces. The three-dimensional gradient architecture, the pre-shaded format that eliminates staining on standard cases, the consistent shade performance across the full disc, and the authenticated US supply chain through ZirconiaGuys combine to make it the most practical choice for US dental labs serious about anterior esthetic production quality. For labs evaluating their current anterior disc stock, the question is straightforward: how much time per case is your current disc costing you in post-sintering staining, shade correction, and gradient inconsistency between units? The answer to that question is the value of switching to the 3D Pro format.
Learn more
PMMA Discs for Dental Labs: A Comprehensive Guide
Dental labs running CAD/CAM workflows go through PMMA every day. It mills fast, finishes cleanly, and covers a wider range of applications than any single alternative. Yet most labs stock PMMA the same way they stock paper towels by habit, without fully evaluating whether the formulation matches the application or whether a better product exists at the same price point. That gap between routine purchasing and informed material selection is where avoidable production problems originate. This guide covers everything a dental lab needs to know about PMMA discs: what the material actually is, how the different formulation types differ from each other, which applications each format is designed for, what to look for in a supplier, and how PMMA fits into a broader material workflow alongside dental zirconia discs and zirconia restorations. If your lab uses PMMA, this is the reference you should have had from day one. What Is CAD/CAM PMMA and Why Does It Outperform Conventional Acrylic? PMMA polymethyl methacrylate is a thermoplastic acrylic polymer that has been used in dentistry for over 80 years. The critical distinction for modern dental labs is between conventional bench-mixed acrylic and CAD/CAM-grade pre-polymerized PMMA discs. These are not the same material despite sharing the same polymer chemistry. Conventional acrylic is mixed from powder and liquid monomer at the bench, packed into a flask, and cured under atmospheric pressure. The result is a material with residual monomer content of 3–5% or higher, significant internal porosity from trapped air, and dimensional variability dependent on technician skill and curing conditions. Residual monomer is both a biocompatibility concern it is associated with tissue irritation and allergic response in sensitive patients and a mechanical liability, as it acts as a plasticizer that reduces hardness and increases the material's susceptibility to staining. CAD/CAM PMMA discs are manufactured by polymerizing the monomer under industrial high-pressure conditions typically 50 to 200 bar at elevated temperature. This process drives polymerization to near-completion, producing a material with residual monomer below 0.5%, near-zero internal porosity, and consistent mechanical properties throughout the disc. The dense, homogeneous polymer matrix that results is what gives CAD/CAM PMMA its superior machinability, lower staining tendency, better surface finish, and more reliable dimensional accuracy compared to anything produced by bench mixing. For a lab running a digital workflow, this distinction translates directly into production outcomes. CAD/CAM PMMA mills to tighter tolerances, polishes to a higher gloss in fewer steps, maintains its surface quality over longer provisional wear periods, and produces fewer fit complications than equivalent applications in conventional acrylic. It is not simply a more convenient format it is a meaningfully better material. PMMA Disc Formulation Types: Matching the Material to the Application PMMA is a material class, not a single product. The four primary formulation types serve distinct clinical applications with different optical, mechanical, and biological requirements. Using the wrong formulation for the application is the most common and most avoidable PMMA selection error in dental labs. Denture base PMMA is formulated for tissue-contact applications — full dentures, partial denture bases, and removable prosthetics. The key properties are gingival shade accuracy, biocompatibility, and dimensional stability under long-term tissue contact. Denture base discs are pigmented to replicate the pink-red tones of gingival anatomy across a range of patient tissue colors. The residual monomer content of quality denture base PMMA must meet ISO 20795-1 biocompatibility requirements, as the material sits against oral mucosa all day. The aidite denture base pmma disc is formulated specifically for this application — engineered for low residual monomer, consistent gingival shade accuracy across batches, and the polishability that long-term removable prosthetics require. Multilayer tooth-shade PMMA is formulated for temporary crown and bridge provisionals — the highest-volume PMMA application in most dental labs. These discs are manufactured with a gradient of shade and translucency from the cervical end (higher chroma, more opaque, dentin-like) to the incisal end (lower chroma, more translucent, enamel-like). This gradient replicates the natural optical zonation of a tooth within a single blank, enabling temporaries that look natural directly from the mill without post-milling staining in standard A–D shade cases. Clear PMMA is formulated for applications where optical clarity is the primary requirement — occlusal splints, night guards, clear retainers, and orthodontic appliances. Clear PMMA discs must deliver high light transmission with minimal internal haze or color. They are not suitable for crown and bridge provisionals, where tooth-shade coloration is required, and should not be used as a substitute for tooth-shade PMMA in those applications. Single-shade opaque PMMA covers posterior single-unit provisionals and diagnostic models where shade precision is secondary to fit accuracy and occlusal stability. These discs offer the fastest milling cycle and lowest per-unit material cost in the PMMA range. How to Select the Right Denture Base PMMA Disc For labs producing full and partial dentures in a CAD/CAM workflow, denture base PMMA selection involves three evaluation criteria that generic or unbranded discs frequently fail to satisfy consistently. Shade Consistency Across Batches The gingival shade of a denture base is one of the most visible esthetic elements a patient evaluates. If the shade of the "standard pink" disc drifts between your current order and the next, you are re-shade-matching every case rather than trusting a production standard. Quality denture base PMMA comes with batch documentation that verifies shade specification consistency. Labs that do not request and review this documentation are accepting avoidable variability into their production workflow. Residual Monomer Documentation Biocompatibility documentation confirming ISO 20795-1 compliance should be available for every denture base PMMA product you stock. For patients with documented acrylic sensitivity, this documentation is not optional — it is the basis of the clinical decision to use the material. Suppliers who cannot provide it are not supplying lab-grade material. Milling and Polishing Behavior The best indicator of denture base PMMA quality in a production environment is how much polishing time it requires to reach clinical-grade surface finish. Quality pre-polymerized PMMA reaches high gloss in 10–15 minutes with standard pumice and polishing compound. Generic PMMA commonly requires 20–30 minutes and still produces a less consistent result. This difference compounds across every denture in a production run. Multilayer PMMA Discs for Temporary Crown and Bridge Production The multilayer pmma disc is the highest-value format in the PMMA range for most full-service dental labs. Its gradient architecture — cervical to incisal shade and translucency gradient — enables natural-looking temporary crowns without any post-milling staining in standard A–D shade cases, delivering a direct reduction in finishing labor that compounds significantly across anterior provisional volume. The clinical workflow advantage is straightforward: the technician designs the crown, orients the blank correctly in the mill to align the CAD design with the disc's internal gradient zones, mills, separates, polishes, and delivers. No stain mixing, no firing cycle, no waiting. For a lab producing 15–20 anterior temporaries per week, eliminating the staining step across those cases saves meaningful bench time every production cycle. Correct blank orientation is essential. Every multilayer PMMA disc is directionally coded — an arrow or marking indicates the gingival-to-incisal axis. Mounting the blank backwards places incisal-grade translucent material at the cervical margin and opaque dentin-like material at the incisal edge, producing a temporary that looks artificial regardless of how well the margins fit. This orientation check takes ten seconds and eliminates the most common multilayer PMMA production error. For longer-wear provisionals three to six months in implant or full-mouth rehabilitation cases specify multilayer PMMA from a manufacturer whose pre-polymerization quality produces low internal porosity. Low-porosity PMMA maintains its surface finish and resists staining accumulation over extended provisional periods. High-porosity generic PMMA visibly roughens and discolors in the first few months of long-term provisional wear, generating patient complaints and early remake requests. Provisional Application Recommended Format Typical Wear Period Key Requirement Single anterior crown Multilayer pre-shaded 2–6 weeks Shade gradient, fast finish Multi-unit bridge provisional Multilayer or single-shade 2–8 weeks Fit accuracy, shade uniformity Long-term provisional High-quality pre-polymerized multilayer 3–12 months Low porosity, stain resistance Posterior single crown Single-shade or multilayer 2–6 weeks Occlusal accuracy, cost efficiency Full-arch provisional Multilayer full-arch disc 3–12 months Shade uniformity, structural integrity Aidite PMMA in a Full-Service Lab Workflow For labs that run both provisional fixed restorations and removable prosthetics, the aidite pmma multilayer and denture base formats together cover the complete PMMA application range within a single consistent supplier relationship. This consolidation matters more than it might seem: when your multilayer tooth-shade disc and your denture base disc come from the same manufacturer with the same batch documentation standards, quality control becomes a single workflow rather than two parallel processes. Aidite's PMMA range is engineered for open-system CAD/CAM compatibility — standard 98 mm disc diameter with adapter compatibility for Roland, Amann Girrbach, Zirkonzahn, VHF, and all major open-system mills. No proprietary locking. No system-specific disc codes. The same disc works in whatever mill your lab runs. As a dedicated zirconia materials distributor usa serving US dental labs, ZirconiaGuys stocks the full Aidite PMMA range from domestic inventory no international shipping lead times, no import uncertainty. Labs that consolidate both their PMMA and their zirconia blocks supply through ZirconiaGuys also benefit from consistent batch documentation across the full material range, simplified ordering, and technical support from a team that works with dental labs daily. Clear PMMA: Applications, Selection Criteria, and Common Mistakes The aidite clear pmma disc covers the optical clarity applications occlusal splints, night guards, clear retainers, and diagnostic study models where transparency is the primary material requirement. The key selection criterion for clear PMMA is optical consistency: the disc must deliver uniform clarity from center to edge with no internal haze, cloudiness, or color cast that would be visible in a 2–3 mm thick milled splint. Generic clear PMMA discs frequently show internal optical inconsistency visible as localized cloudiness or slight tinting that produces splints that look lower quality than the patient expects and the lab intends. The most common clear PMMA mistake is using it as a substitute for tooth-shade PMMA in crown and bridge provisionals. Clear PMMA produces restorations that transmit ambient light without coloration, making the preparation visible through the temporary not acceptable clinically for any anterior provisional. Always specify the correct formulation for the application, regardless of what is currently in stock. For milled splints and night guards, clear PMMA consistently outperforms vacuum-formed thermoplastics in dimensional accuracy and surface finish. The milled product is designed from a digital model to a precise occlusal scheme. The vacuum-formed alternative reproduces model geometry passively. For labs running digital workflows, milled clear PMMA is the correct material for this application. PMMA and Zirconia: How They Work Together in a CAD/CAM Workflow PMMA and zirconia are not competing materials they are complementary, with clearly defined non-overlapping primary indications. Understanding this division of labor is what separates labs that run efficient dual-material workflows from labs that misapply one material in the other's indication. PMMA covers every temporary and removable application. Dental zirconia discs cover every permanent fixed application. The parallel workflow is: mill the temporary in PMMA while the permanent zirconia restoration is being produced, deliver the temporary, then deliver the final zirconia blank-based crown or bridge when it exits sintering. The temporary's esthetic outcome informs the shade and shape specification for the final restoration making the PMMA provisional not just a placeholder but a clinical evaluation tool. Labs that also stock zirconia dental blanks from Upcera or Aidite benefit from having both material streams under one supplier relationship. The same ordering process, the same documentation standards, and the same technical support covers both the PMMA provisional and the zirconia blocks dental production that follows it. For zirconia blocks procurement alongside PMMA, ZirconiaGuys stocks the full Upcera and Aidite zirconia range 3Y, 4Y, and 5Y grades in flat white, pre-shaded, and multilayer formats from US inventory at production-volume pricing. Getting PMMA right in a dental lab is not complicated but it does require treating it as a material class with distinct formulations for distinct applications, rather than a single commodity product. Denture base PMMA for removable prosthetics. Multilayer tooth-shade PMMA for anterior temporary fixed restorations. Clear PMMA for splints and clear appliances. Each formulation optimized for its application, sourced from a supplier whose batch consistency means your production standard is reliable order after order. ZirconiaGuys stocks the full Aidite PMMA range from US inventory, alongside the complete Upcera and Aidite zirconia range serving as a single-source US supplier for both material streams in a full-service dental lab workflow.
Learn more
What Is a Surgical Guide for Dental Implants?
Dental implant placement looks deceptively straightforward in a diagram. A titanium fixture goes into the jaw at a specific angle, in a specific position, to a specific depth and a crown follows. In practice, the bone beneath the gingiva is invisible to the naked eye, the anatomy varies significantly between patients, and a placement error of even one or two millimeters can compromise the final restoration, damage adjacent structures, or require revision surgery. Precision matters in implant dentistry more than in almost any other restorative procedure. The surgical guide exists to solve this problem. It is a patient-specific device that constrains the drill path during implant surgery physically guiding the clinician's instrumentation to the position, angle, and depth determined during digital planning. This guide does not replace clinical skill. It transfers the precision of digital planning into the surgical environment, where biological and anatomical complexity makes freehand placement inherently less accurate. Understanding what surgical guides are, how they are made, and what materials they require is essential knowledge for any dental lab operating in the implant workflow. What Is a Dental Implant Surgical Guide? A dental implant surgical guide is a custom-fabricated appliance that fits over the patient's teeth, soft tissue, or bone and contains one or more metal sleeves called drill bushings or guide tubes positioned at the planned implant site. During surgery, the clinician inserts the drill through the bushing, which constrains the drilling angle and positions the drill at the precise location determined during preoperative digital planning. The guide is fabricated from a digital workflow that begins with intraoral scanning or impression-taking to capture the soft tissue anatomy, combined with a cone beam CT scan (CBCT) that captures the underlying bone volume, density, and structure. These two data sets the surface scan and the volumetric CBCT are merged in implant planning software. The clinician then plans the virtual implant position within this merged dataset, optimizing placement for bone volume, emergence profile, proximity to anatomical structures, and the planned restorative outcome. Once the implant positions are finalized and approved, the surgical guide design is exported from the planning software and sent to the dental lab or in-office fabrication unit for manufacturing. The guide is either 3D printed from biocompatible resin or milled from a PMMA blank, depending on the lab's equipment and the clinical requirements of the case. The guide fits over the patient's existing dentition, residual ridge, or bone surface providing a stable, indexed reference that makes the planned implant position physically reproducible in the surgical field. Types of Dental Implant Surgical Guides Surgical guides are classified by their support mechanism how the guide is stabilized in the mouth during surgery. Each support type has distinct clinical indications and fabrication requirements. Tooth-supported guides rest on the remaining natural dentition adjacent to the implant site. They are the most accurate guide type because natural teeth provide stable, rigid support with precise positional indexing. Tooth-supported guides are the standard choice for partially edentulous patients with adequate adjacent dentition. They are straightforward to design, require no additional fixation hardware, and are well-suited to single-implant and short-span multiple-implant cases. Mucosa-supported guides rest on the soft tissue of the edentulous ridge. They are used when no adjacent teeth are available for support typically in fully edentulous patients who are not yet in final dentures, or in cases where the existing denture is used as the guide foundation. Mucosa-supported guides carry inherent accuracy risk because soft tissue can compress and shift under load, introducing positional variability during drilling. Fixation pins are commonly used with this guide type to stabilize the guide against tissue movement during surgery. Bone-supported guides are placed directly on the exposed cortical bone after full-thickness flap elevation. They eliminate the variable of soft tissue compression entirely and are therefore used in cases where maximum positional accuracy is required — typically full-arch immediate-load cases, complex multi-implant reconstructions, or patients with severely resorbed ridges. Bone-supported guides require surgical exposure to place and are more technically demanding to fabricate accurately from imaging data alone. Static vs. dynamic guidance is a separate classification that cuts across support type. Static guides physically constrain the drill through a fixed bushing once fabricated, the implant position is locked into the guide. Dynamic navigation systems use real-time tracking to guide freehand drilling with visual feedback on a monitor. Static guides are the dominant format in dental lab production because they integrate directly into existing CAD/CAM fabrication workflows. Materials Used for Surgical Guide Fabrication The material selection for surgical guide fabrication directly affects fit accuracy, biocompatibility, sterilizability, and dimensional stability during the surgical procedure. Two primary fabrication methods are in widespread use: 3D printing from photopolymer resin and CAD/CAM milling from PMMA blanks. 3D-printed surgical guides are the most common format in modern digital implant workflows. The guide is designed digitally and printed from a biocompatible, light-curing resin using SLA (stereolithography), DLP (digital light processing), or MSLA (masked SLA) printing technology. The primary advantage of 3D printing for surgical guides is geometric freedom the printing process can produce the undercuts, tissue-contact contours, and complex indexing geometries that milling cannot achieve. Print accuracy has improved substantially with modern desktop printers, making 3D-printed guides clinically reliable for standard implant cases. The surgical guide dental resin used for 3D-printed guides must meet specific clinical requirements: biocompatibility for intraoral use, sufficient rigidity to resist deformation under drilling forces, dimensional stability through autoclave sterilization cycles, and adequate translucency to allow visual verification of seating during placement. Not all 3D printing resins meet these requirements. Dedicated surgical guide resins are formulated specifically for this application with higher modulus of elasticity than standard model resins and biocompatibility certification for temporary intraoral contact. Milled PMMA surgical guides are produced by CAD/CAM milling from pre-polymerized PMMA discs. Milling produces excellent fit accuracy from the smooth, homogeneous PMMA matrix and is well-suited for tooth-supported guides where the indexing surfaces can be milled precisely from a digital model. Milled guides are slightly less geometrically flexible than printed guides but deliver outstanding dimensional stability and are easier to polish to a smooth, tissue-compatible surface finish. How the Lab Produces a Surgical Guide: Step by Step For dental labs in the implant workflow, surgical guide production is a digital fabrication process that begins with receiving the finalized guide design file from the clinician or planning bureau. The key guide resin used in printed surgical guide production is classified as a dedicated implant guide material distinct from model resins, splint resins, and tray resins in its mechanical and biocompatibility requirements. Labs that stock a range of Keystone dental resins for different 3D printing applications should maintain surgical guide resin as a separate SKU from their model and splint materials. Step 1 — Receive and verify the design file. The implant planning software exports an STL or similar file representing the surgical guide geometry with drill tube positions. Verify that bushing diameters match the implant system specified and that the guide design includes adequate indexing surfaces for the support type. Step 2 — Orient and support for printing. Surgical guides require careful support placement to maintain accuracy at the drill tube locations. Tube orientations should be supported to prevent Z-axis deflection during printing. Most guide resins have recommended layer thicknesses and exposure settings — always print per the resin manufacturer's validated parameters. Step 3 — Post-process correctly. Surgical guide resins require thorough post-cure at specified wavelength and duration to achieve full mechanical properties. Under-cured guides will deform under drilling forces. Wash cycles in IPA or dedicated cleaning solution must be completed before post-curing to remove uncured resin from internal surfaces, particularly inside the drill tube recesses. Step 4 — Insert metal guide sleeves. After printing and post-cure, metal drill bushings are press-fit or bonded into the guide tube recesses. Bushing dimensions must match the implant system's drill protocol — confirm compatibility with the specific implant brand before fabricating. Step 5 — Check fit on the model. Seat the guide on the printed or physical model before delivery and verify complete, passive seating. Any rocking, gap, or resistance indicates a fabrication issue that must be resolved before the guide goes to surgery. For tooth-supported guides, use the key model resinl resin printed working model as the verification reference the accuracy of guide fit evaluation is only as good as the accuracy of the model it is verified against. Step 6 — Package for sterilization. Surgical guides must be sterilized before clinical use. Confirm that your guide resin is rated for the sterilization method specified by the clinician most surgical guide resins support chemical (Cidex) sterilization, but not all support autoclave cycles. Provide the clinician with the resin's sterilization protocol documentation. Accuracy in Guided Implant Surgery: What the Evidence Shows The clinical rationale for using surgical guides is supported by a consistent body of published literature. Studies measuring the deviation between planned and actual implant positions in guided versus freehand surgery show meaningful accuracy advantages for guided placement across both angular deviation (the tilt difference between planned and placed implant axis) and positional deviation at the implant shoulder and apex. Angular deviation in freehand implant placement is typically reported in the range of 4–6 degrees. Guided placement using tooth-supported static guides reduces this to 1.5–3 degrees in most published series. Coronal positional deviation — the distance between the planned and actual implant shoulder position — is typically 1–2 mm freehand and 0.5–1 mm with guided placement. These accuracy differences translate directly into restorative outcomes. Angular deviation of more than 3–4 degrees from the planned position can require restorative compensations angled abutments, non-standard components, or emergence profile compromises that add cost and complexity to the prosthetic phase. In the anterior zone, where implant angulation directly determines crown emergence and esthetic integration, the difference between guided and freehand placement accuracy is clinically significant. Surgical Guides in the Context of the Full Implant Workflow The surgical guide is one component of the implant workflow — not the entire workflow. For dental labs that supply implant-related materials and services, understanding the surrounding workflow helps identify where material selection decisions connect. For labs that serve as a zirconia materials distributor USA supplying both implant guide materials and final restoration materials, the workflow connection is direct: the surgical guide determines implant position, and implant position determines the restorative challenge for the final crown. Accurate guided placement reduces the complexity of the prosthetic phase, which reduces remake risk on the final zirconia crown. The final implant crown is typically fabricated from one of two materials depending on the esthetic zone. For posterior implant crowns, high-strength monolithic zirconia blocks dental grade material (3Y-TZP) is the standard choice — delivering the flexural strength and wear resistance that posterior implant-supported restorations require under functional load. For anterior implant crowns, zirconia dental blanks in 4Y or 5Y multilayer format provide the translucency needed to match adjacent natural dentition in the esthetic zone. Labs that stock both surgical guide resins and a full range of zirconia blank and dental zirconia discs from a single US supplier are positioned to serve the complete implant case from the planning-phase guide through to the final delivered crown without the supply chain fragmentation that comes from managing multiple vendors for adjacent material categories. Surgical guides represent one of the clearest examples of digital dentistry delivering measurable clinical improvement over conventional freehand technique. The accuracy advantage is documented, the fabrication workflow is well-established, and the material requirements are specific enough that correct resin selection matters as much as correct design. For dental labs building out or expanding their implant service offering, stocking the right surgical guide dental resin alongside high-quality zirconia blocks for final restoration fabrication positions the lab to serve the complete implant case from planning through permanent delivery.
Learn more
Choosing the Right Composite Instruments for Restorative Dentistry
The outcome of a composite restoration is determined by two things: the quality of the material and the precision of the instruments used to place, shape, and finish it. Most clinicians invest significant time selecting the right composite resin shade, opacity, filler particle size, viscosity, and then pick up whatever instruments are available in the tray without applying the same level of thought. That mismatch is one of the most common sources of avoidable finishing problems, surface irregularities, and restorations that require more chair time than they should. This guide covers the full instrument workflow for composite restorations from initial placement through final polish with practical guidance on how to match instrument selection to the specific requirements of the material being used and the clinical situation being treated. Understanding the logic behind instrument selection produces better restorations in less time, with less rework. Why Instrument Selection Matters as Much as Material Selection Every composite restoration moves through three phases: placement and adaptation, contouring and shaping, and finishing and polishing. Each phase has distinct instrument requirements, and using instruments designed for one phase in another introduces problems that compound through the rest of the workflow. A placement instrument used for finishing leaves drag marks in the surface. A finishing bur used too early on uncured composite removes material rather than shaping it. A brush that is too wide for the area being worked creates surface streaking that requires additional finishing steps to correct. The instrument is not just a handle for moving material it is a precision tool whose geometry, surface coating, stiffness, and tip design all affect the clinical outcome. The selection of the right composite resin for teeth is the starting point but instrument selection is what determines whether the material performs to its potential. A high-quality nanofilled composite placed with poorly matched instruments will produce a worse surface outcome than a standard hybrid composite placed and finished with the correct tool sequence. Instrument investment is as important as material investment in restorative dentistry. Phase 1: Placement and Condensation Instruments Placement instruments serve two functions: carrying composite from the dispensing tip to the preparation, and adapting the material to the cavity walls without voids. The geometry of the working tip determines how well it performs both functions. Flat-bladed placement instruments are the standard for initial composite placement in both anterior and posterior cases. The flat, paddle-like working end allows the operator to press the composite against the preparation walls and eliminate air voids at the composite-tooth interface. Non-flexible blades are preferred for this application a stiff blade transmits placement pressure accurately to the composite, ensuring adaptation at cavity margins where bonding failure begins if air entrapment is not eliminated. Surface coating on the blade is critical. Uncoated stainless steel instruments cause composite to stick and pull back when the instrument is withdrawn, dragging material away from margins and creating voids. Titanium-nitride-coated or PTFE-coated instruments prevent this tug-back, enabling clean separation between the instrument and the composite surface after each placement pass. Condensers feature blunt or rounded working ends for compacting composite in posterior preparations. In occlusal preparations with internal line angles and narrow boxes, the rounded condenser tip reaches areas that a flat paddle cannot access. Condensers are particularly important in proximal box preparations where composite must be adapted against the matrix band before the contact area can be built. Using a flat placement instrument in this zone consistently leaves marginal gaps at the gingival floor of the proximal box the most common failure point in posterior composite restorations. Key placement instrument checklist: Non-stick surface coating (titanium nitride, PTFE, or resin-coated) Non-flexible blade for accurate pressure transmission Flat-ended paddle for occlusal and facial surfaces Rounded condenser tip for proximal boxes and internal angles Keep blades clean during placement wipe with alcohol gauze between increments Phase 2: Contouring and Shaping Instruments After each composite increment is placed and cured, contouring instruments shape the material to match the natural tooth anatomy. The working end geometry required varies significantly between anterior and posterior cases, and between different zones within the same restoration. Composite carvers are the primary shaping instruments. Thin-bladed carvers with pointed or chisel-shaped tips are essential for anterior work they access the interproximal embrasures, define incisal edge anatomy, and create the facial-lingual line angles that give anterior restorations their natural appearance. Without thin-bladed access to these zones, interproximal composite will be over-contoured and the restoration will look bulky from the facial view. For posterior composites, carvers with rounded or ball-shaped tips recreate occlusal anatomy. The key functional requirement here is that the instrument must be able to form cusp tips and developmental grooves without dragging material away from the surrounding surface. A tip that is too large for the groove being formed will displace material from adjacent cusp slopes. Match the carver tip size to the anatomical feature being created. Brushes are the most versatile contouring tools and the most commonly misused. The correct application of artist brushes in composite contouring involves two distinct uses: smoothing layer interfaces during incremental placement, and surface blending on the final increment before final cure. Both applications require the brush to be pre-wetted with a resin modeling agent not adhesive, not bond to prevent dry bristles from drawing composite material off the surface through capillary action. Brush size selection matters. A fine-tip brush for embrasure work and tinting. A medium-width flat brush for facial surface blending. A wide flat brush for full-surface smoothing on large anterior restorations. Using a wide brush in a narrow embrasure leaves streaking that requires additional finishing. Using a fine brush across a large facial surface leaves parallel tracks in the composite that mirror the brush stroke direction. Burnishers smooth and blend composite layer transitions and surface contours. Despite the name, composite cannot be burnished in the same sense as metal the instrument is used to flatten surface irregularities, close surface porosity, and blend the transition between composite and enamel margins. Ball-burnishers are the standard format for this application. The rounded tip follows surface contours without catching at margin transitions the way angular instruments do. For labs procuring zirconia dental blanks alongside composite materials, the same principle of format-specific tool matching applies just as a wrong instrument phase disrupts composite placement, using the wrong disc grade for the restoration type disrupts the zirconia workflow. Phase 3: Finishing and Polishing Instruments Finishing removes gross surface irregularities and shapes the final anatomy. Polishing refines the surface to clinical gloss. These are distinct phases requiring different instruments treating them as a single step is the most common cause of composite restorations that look clinically acceptable in the operatory but develop early staining and surface roughness in service. Finishing diamonds and carbide burs perform the initial surface refinement at low speed under water cooling. Coarse finishing diamonds (25–40 micron) remove bulk irregularities and gross flash at margins. Fine finishing diamonds (8–15 micron) refine surface contour without removing significant tooth structure. The critical rule: finish before polishing. Attempting to polish a surface that still has machining scratches from the placement and contouring phase produces a glossy surface with visible micro-scratches that stain rapidly. Flexible finishing discs (aluminum oxide or silicon carbide) are the standard for facial surface finishing on anterior restorations. The flexibility of the disc backing enables it to follow natural tooth contours without creating flat spots. Work through the grit sequence coarse to fine to extra-fine without skipping steps. Each step removes the scratches from the previous step. Skipping a grit level leaves the scratch pattern of the coarser step visible under the final polish. Polishing points and cups are the final step. Silicone-impregnated rubber points and cups loaded with diamond or aluminum oxide polishing paste produce the high-gloss surface that characterizes a well-finished composite. The polishing instrument should be used with light, sweeping pressure at low speed high pressure generates frictional heat that softens the composite surface and creates smear rather than polish. Interproximal finishing strips are required for any proximal surface that contacts adjacent teeth. A restoration that is perfectly finished on the facial and occlusal surfaces but has unfinished proximal flash or rough proximal margins will accumulate biofilm and irritate the interproximal papilla regardless of how polished the visible surfaces are. Include interproximal strips as a standard step in every posterior composite finishing sequence. Matching Instrument Choice to Composite Material Type Not all composite resin for teeth behaves the same way under instruments, and instrument selection should account for the specific material being used. The filler particle size, filler loading, viscosity, and matrix chemistry all affect how the material responds to placement, contouring, and finishing instruments. Microhybrid composites (filler particles 0.4–1 micron) are the most forgiving under instruments. They adapt well to placement instruments, carve cleanly, and polish readily with standard finishing and polishing sequences. The broad filler particle range provides surface smoothness adequate for most clinical applications. Nanofilled composites (filler particles 20–75 nanometers) deliver the highest achievable surface polish but require more careful instrument management during placement. The low viscosity of some nanofilled formulations makes them prone to tug-back on uncoated instruments non-stick coatings are more critical with these materials than with microhybrids. During finishing, nanofilled composites reach higher gloss with fewer polishing steps, but over-finishing removes the surface layer that contains the finest filler particles and exposes a rougher subsurface. Bulk-fill composites have higher viscosity and require stiffer, more robust condensers for posterior placement. The material's self-leveling behavior reduces the adaptation effort required at cavity walls but does not eliminate the need for careful marginal adaptation at the gingival floor of proximal boxes. Carving bulk-fill material requires less pressure than conventional composites the material is softer before curing and responds to lighter instrument contact. As a dedicated zirconia materials distributor USA, ZirconiaGuys understands that the full restorative workflow from zirconia blocks dental for permanent fixed restorations to composite instruments and materials for direct restorative cases depends on matching the right material to the right tool at every step. The same precision that determines which zirconia blank grade is appropriate for a posterior bridge determines which instrument geometry is appropriate for a specific composite placement scenario. Instrument Maintenance: The Factor Most Clinicians Underestimate Composite instruments degrade in performance faster than most clinicians recognize. Scratched or pitted blade surfaces cause composite sticking regardless of the original coating. Bent or deformed tips change the pressure distribution geometry. Worn polishing instruments lose their abrasive particle loading and produce diminishing results that the operator often compensates for by applying more pressure which generates heat and damages the composite surface. Establish a regular inspection and replacement schedule for composite instruments. Placement instruments and carvers should be inspected for surface damage after every autoclave cycle the heat cycling of sterilization accelerates coating degradation. Replace instruments when the surface coating shows visible pitting or when composite begins sticking during use. For labs and clinicians sourcing both dental zirconia discs for CAD/CAM fixed restorations and direct composite materials and instruments from a single supplier, ZirconiaGuys stocks Keystone composite resins alongside the full range of Upcera and Aidite zirconia products all from US inventory, with consistent batch documentation and technical support. Composite instrument selection is not a secondary decision in restorative dentistry — it is as clinically significant as the material selection itself. A placement instrument that causes tug-back wastes the adaptation work done at the preparation margins. A carver that is too large for the anatomy being created over-contours the restoration. A polishing sequence that skips a grit step leaves surface scratches that stain in the first six months of clinical service. Match placement instruments to the material viscosity and preparation geometry. Match contouring instruments to the specific anatomical features being created. Work through the full finishing and polishing sequence without skipping steps. Keep instruments clean and replace them when surface condition degrades. These four principles, applied consistently, are what separate composite restorations that last from those that require early replacement.
Learn more
Zirconia Crowns: The Facts that You Need to Know
Zirconia crowns have become the default choice for permanent fixed restorations in modern dentistry and that shift has happened for good reason. The material delivers a combination of mechanical performance, esthetic versatility, and long-term clinical reliability that no previous generation of crown material could match. Porcelain-fused-to-metal restorations show dark lines at the gingival margin as patients age. All-ceramic pressed restorations fracture under heavy posterior occlusal load. Metal crowns work structurally but fail esthetically. Zirconia solves all three problems in a single material. But zirconia is not one thing. It is a family of materials with distinct grades, distinct disc formats, and distinct clinical performance profiles. A dental professional who treats all zirconia as equivalent is making the same mistake as treating all antibiotics as equivalent — the class is the same, but the specific indication matters enormously. This guide covers the facts you need to select the right zirconia for every clinical scenario, understand what your lab is working with, and set accurate expectations for patients and referring practitioners. What Zirconia Actually Is? Zirconia is the common name for zirconium dioxide (ZrO₂) a crystalline ceramic oxide that is chemically inert, extraordinarily strong, and white in its pure form. In dentistry, it is always used in a yttria-stabilized form: yttrium oxide (Y₂O₃) is added to the zirconia crystal structure to prevent a destructive phase transformation that would otherwise cause the material to crack and crumble at room temperature. The zirconia dental material category has expanded dramatically over the past decade. Early clinical zirconia was a single grade high-strength, opaque, posterior-focused. Today the range covers multiple yttria content levels (3Y, 4Y, 5Y), multiple disc architectures (monolithic, multilayer gradient), and multiple preparation formats (white unshaded, pre-shaded). Each combination produces a material with a different clinical performance profile. The core chemistry is the same across all grades: zirconium dioxide stabilized with yttria. What changes is the yttria percentage, which controls the ratio of crystal phases present after sintering, which controls the material's translucency, and which determines its strength. Higher yttria means more cubic crystal phase, more translucency, and lower — though still clinically significant — flexural strength. This is the single most important fact about dental zirconia that every prescribing dentist and lab technician should internalize. Zirconia Crown Strength: What the Numbers Mean in Practice Flexural strength is the primary mechanical property used to compare zirconia blocks and other crown materials. It measures how much stress a material can withstand before fracturing under a bending load directly relevant to the occlusal and masticatory forces a crown experiences daily. 3Y zirconia delivers 900–1200+ MPa flexural strength. For reference, lithium disilicate (e.max) delivers approximately 400 MPa. PFM ceramic veneering material is typically 80–150 MPa on its own. 3Y zirconia is the strongest crown material in routine clinical use, and its margin of superiority over alternatives is substantial. It is the correct material for posterior bridges of three or more units, high-load posterior single crowns, and implant-supported frameworks where connector cross-section dimensions must meet structural requirements. 4Y zirconia delivers 600–800 MPa. Still dramatically stronger than lithium disilicate or PFM ceramic, but with meaningfully higher translucency due to increased cubic phase content. This is the workhorse grade for anterior and premolar single crowns in daily lab production strong enough for these indications and translucent enough to blend naturally with adjacent dentition. 5Y zirconia delivers 500–650 MPa. Maximum translucency within the zirconia family, approaching the optical character of natural enamel in the incisal zone. The correct choice for anterior single crowns in patients with highly translucent natural dentition, but not appropriate for posterior bridge connectors under heavy occlusal loading. The zirconia blocks dental labs source for posterior bridge work are almost always 3Y-TZP grade because no other grade safely meets the connector cross-section strength requirements for multi-unit posterior spans. Using 5Y or high-translucency 4Y material in this indication is a structural compromise that puts the patient at risk of connector fracture. Esthetic Performance: How Zirconia Matches Natural Tooth Appearance The earliest clinical zirconia had an esthetic limitation that was widely acknowledged: it looked white and opaque compared to natural dentition, particularly in the incisal zone of anterior teeth. Staining and glazing improved results significantly, but heavily stained 3Y restorations still read as "ceramic" rather than "tooth" under direct or lateral lighting in many cases. Modern multilayer gradient discs have resolved this limitation for the majority of clinical cases. Dental zirconia discs in multilayer pre-shaded format are manufactured with four to five distinct chromatic zones transitioning from a warmer, more opaque cervical zone through a body zone to a cooler, more translucent incisal zone all within a single blank. When the CAD/CAM toolpath is aligned correctly with these zones, the milled crown exits sintering with a natural shade gradient already built in, without any external staining required for standard A-D shade cases. The esthetic performance difference between flat 3Y monolithic discs and modern multilayer 4Y/5Y gradient discs is not incremental it is the difference between a restoration that requires significant finishing effort to look natural and one that exits the furnace looking right. For anterior single crown cases, this distinction determines whether the case is a production-efficient standard procedure or an intensive hand-finishing exercise. Factors that determine zirconia crown esthetics: Grade selection — 5Y for maximum translucency, 4Y for everyday anterior esthetic production, 3Y for posterior structural cases Disc format — multilayer gradient for esthetic cases, monolithic for structural cases CAD design alignment — the toolpath must orient the incisal edge of the crown in the incisal zone of the multilayer disc; reversed orientation produces an inverted gradient Sintering profile — esthetic-grade discs require controlled ramp rates and precise peak hold temperatures; accelerated sintering reduces translucency Surface finish — glazed and polished zirconia has a natural surface lustre that unfinished milled surfaces lack Disc Formats: White, Pre-Shaded, and Multilayer Every zirconia crown starts as a disc or block. The format of that disc shapes the downstream workflow more than any other single material decision. White unshaded discs give the lab complete shade control through external staining. The correct choice for unusual shades outside the VITA A-D range, strong chroma B/C shade cases, characterization effects, or any case where the technician needs to build a custom shade from scratch. The tradeoff is bench time — every unit requires individual staining, and multi-unit shade consistency depends on technician skill. Pre-shaded discs carry VITA-compatible gradients embedded in the manufacturing. For the significant majority of everyday crown cases, pre-shaded discs eliminate the staining step entirely and deliver more consistent shade results across units in a multi-tooth case. They are less flexible for unusual shades but dramatically more efficient for standard production volume. Multilayer discs combine gradient architecture with either white or pre-shaded pigmentation. The internal gradient means the disc itself replicates the optical zonation of a natural tooth without requiring the lab to recreate that gradient through staining. The zirconia dental blanks stocked by labs for anterior esthetic production are almost universally multilayer pre-shaded formats today. Labs that have made the transition from flat white 3Y discs to multilayer 4Y pre-shaded consistently report significant reductions in post-sintering finishing time on standard anterior cases and lower remake rates driven by shade inconsistency. Zirconia blank selection by indication: Indication Recommended Format Posterior bridge 3+ units Flat white or pre-shaded 3Y Posterior single crown Pre-shaded 4Y or white 3Y Anterior single crown Multilayer pre-shaded 4Y or 5Y Anterior bridge Multilayer 4Y verify connector strength Implant anterior crown Multilayer 4Y/5Y Full-mouth rehabilitation Mixed per quadrant Biocompatibility and Long-Term Clinical Performance Zirconia is chemically inert in oral environments. It does not corrode, does not leach metal ions into surrounding tissue, and does not trigger the allergic or sensitivity responses associated with metal alloys. For patients with nickel, cobalt, or chromium sensitivities conditions that preclude PFM restorations, dental zirconia discs fabricated restorations are the standard of care alternative. Long-term clinical data consistently supports zirconia's durability. Studies report 10-year survival rates above 95% for zirconia single crowns and above 90% for three-unit bridges. These are among the highest survival rates reported for any crown material in clinical use. When zirconia restorations do fail, the primary failure mode is chipping of veneering porcelain in layered systems a failure mode that monolithic and multilayer zirconia eliminate entirely by removing the veneering porcelain layer. For patients who grind their teeth, zirconia's hardness is both an advantage and a consideration. It withstands bruxism forces that would fracture lithium disilicate or wear through PFM veneering ceramic. However, its hardness means it can accelerate wear of opposing natural dentition in heavy bruxers if not polished to a smooth final surface. Glazing and polishing zirconia restorations to a smooth occlusal surface is not an optional finishing step — it is a clinical requirement that directly affects the opposing dentition. Sourcing Zirconia: What Dentists Need to Know About Their Lab's Materials Most dentists interact with zirconia at the prescription and delivery stage without direct visibility into what material their dental lab is using at the disc level. That gap matters more than it might seem — because two zirconia crowns that look identical in the prescription form can be produced from dramatically different disc grades, from different manufacturers, with different strength specifications and different esthetic performance profiles. Working with a zirconia materials distributor USA that stocks a documented, consistent product range from established manufacturers is the foundation of reliable clinical outcomes. Labs that source from low-cost undocumented suppliers gain short-term cost savings at the expense of batch consistency, documented strength specifications, and biocompatibility certification. As a trusted zirconia crown supplier dentists across the US rely on, ZirconiaGuys stocks the full range of Upcera and Aidite zirconia grades including 3Y, 4Y, and 5Y formulations in white, pre-shaded, and multilayer formats from US inventory with full batch documentation. Labs sourcing from ZirconiaGuys know exactly what grade they are milling, what the documented flexural strength is, and what sintering profile delivers the specified performance.
Learn more
How Good Are Advanced Lithium Disilicate Crowns?
Lithium disilicate has been one of dentistry's most discussed restoration materials for over two decades and in recent years, advanced formulations have pushed its clinical performance significantly beyond what traditional glass-ceramic could deliver. Labs and clinicians evaluating it today are not looking at the same material that entered the market in the 1990s. The chemistry has evolved, the processing options have expanded, and the clinical evidence base has matured. The question is no longer whether lithium disilicate works. It clearly does. The question is exactly how good it is where it genuinely excels, where its limits are, and how it compares to the dental zirconia and other CAD/CAM materials that now compete for the same clinical indications. This guide answers all of it with the specificity that labs and prescribing clinicians need to make accurate material selection decisions. What Is Lithium Disilicate and How Does It Work? Lithium disilicate (Li₂Si₂O₅) is a glass-ceramic material composed of a glassy matrix embedded with interlocking plate-like lithium disilicate crystals. These crystals typically make up 70% of the material by volume. The interlocking plate architecture is the key to its mechanical performance when a crack initiates under stress, it encounters the plate-like crystals and is deflected, branched, and absorbed rather than propagating through the material in a straight line. This crack deflection mechanism is what gives lithium disilicate its fracture resistance of approximately 360–400 MPa far above traditional feldspathic porcelain (~80–100 MPa) and within the range needed for most single-unit restorations. The material also has a glass content high enough to produce natural optical behavior: translucency, fluorescence, and opalescence that closely mimic natural enamel. This combination of reasonable strength and excellent optical quality is what positioned lithium disilicate as the go-to material for esthetic anterior single crowns through the 2000s and 2010s. The most widely used lithium disilicate product is IPS e.max, available in both pressed (IPS e.max Press) and CAD/CAM milled (IPS e.max CAD) formats. A lithium disilicate crown produced from e.max CAD is milled in a partially crystallized "blue phase" state that is softer and easier to mill, then crystallized in a furnace to achieve final strength and optical properties. This two-stage process is what distinguishes it from dental zirconia milling zirconia is also milled pre-sintered, but achieves its strength through sintering rather than a crystallization firing. Advanced Lithium Disilicate: What Makes It Different? Advanced lithium disilicate refers to next-generation formulations that go beyond the standard Li₂Si₂O₅ chemistry. The most clinically significant example is CEREC Tessera (Dentsply Sirona), which incorporates a dual crystal structure lithium disilicate crystals combined with virgilite crystals within a glassy zirconia-containing matrix. The addition of a zirconia-containing matrix is the primary source of the strength improvement. Zirconia particles within the glass matrix provide additional crack resistance through the same transformation toughening mechanism that makes zirconium dental ceramic so effective as a structural material. The result is a material that achieves flexural strength in the range of 420–470 MPa meaningfully higher than standard lithium disilicate while retaining the optical translucency, fluorescence, and opalescence of traditional glass-ceramic. The virgilite crystal activation through matrix firing adds a further structural contribution: the crystals reinforce the matrix in a complementary orientation to the lithium disilicate plates, creating a dual-reinforcement architecture that disrupts crack propagation more effectively than single-crystal formulations. What advanced lithium disilicate improves over standard formulations: Flexural strength: 420–470 MPa vs. 360–400 MPa for standard lithium disilicate Processing speed: partially crystallized blocks enable faster shade selection and up to 44% reduction in total processing time according to manufacturer data Shade predictability: true-shade blocks match final sintered shade without additional shade correction in standard cases Optical properties: dual crystal architecture maintains translucency, fluorescence, and opalescence equivalent to standard glass-ceramic despite the higher crystal loading What it does not change: The fundamental strength ceiling of glass-ceramic. Even at 470 MPa, advanced lithium disilicate remains significantly weaker than 3Y zirconia blocks dental grade material at 900–1200+ MPa The indication boundary. Advanced lithium disilicate remains a single-unit and short-span anterior material it is not a substitute for zirconia in posterior bridges or high-load structural applications The processing requirement. Crystallization firing is still required after milling, adding furnace time that full-contour dental zirconia restorations do not need in the same workflow step Clinical Performance: Where Lithium Disilicate Actually Excels Clinical survival data for lithium disilicate single crowns is strong. Meta-analyses of IPS e.max CAD crowns consistently report 5-year survival rates above 96% and 10-year survival rates in the 91–94% range for single-unit anterior and posterior crowns. These figures compare favorably with PFM and are competitive with 4Y/5Y zirconia for the same indications. The specific areas where lithium disilicate genuinely outperforms alternatives are: Anterior esthetic integration- Glass-ceramic optical properties particularly opalescence and fluorescence behavior more closely approximate natural enamel than any zirconia grade in strong direct or UV lighting. For patients with highly translucent natural anterior dentition, lithium disilicate restorations integrate with less finishing effort than even high-translucency 5Y zirconia. Bonding characteristics- Lithium disilicate can be etched with hydrofluoric acid and silanated, enabling micromechanical and chemical bonding to tooth structure. This bonding capability allows minimally invasive preparation designs thinner preparation margins, more conservative tooth reduction that are not practical with conventional cementation protocols used for zirconia. Chairside efficiency- The CAD/CAM blue-phase milling and single crystallization firing of e.max CAD enables same-day anterior crown delivery in equipped practices. Advanced formulations like CEREC Tessera further compress this timeline. For chairside workflows, lithium disilicate is the most efficient material available for single-unit anterior cases. Veneer and inlay indications- The adhesive bonding capability of lithium disilicate makes it the standard material for porcelain veneers and posterior inlays/onlays where conservative tooth preparation and high bond strength are the clinical priorities. Zirconia does not bond adhesively in the same way these indications belong to lithium disilicate. Lithium Disilicate vs. Zirconia: The Comparison Labs Need This is the material selection decision that comes up in every dental lab that handles both materials. The correct answer is not that one is universally better it is that each has a clearly defined indication range where it outperforms the other. For labs sourcing aidite zirconia blocks alongside lithium disilicate, the workflow division is straightforward: lithium disilicate for anterior esthetic single units and veneers where bonding and optical integration are the priorities, zirconia for posterior bridges, high-load crowns, implant-supported restorations, and any application where structural performance is the primary requirement. Property Lithium Disilicate Zirconia (4Y/5Y) Zirconia (3Y) Flexural strength 360–470 MPa 500–800 MPa 900–1200+ MPa Translucency Very high High (4Y/5Y) Moderate Adhesive bonding Yes HF etch + silane Limited Limited Posterior bridges Not recommended Short spans (4Y) Standard Anterior crowns Excellent Excellent Possible with staining Veneers/inlays First choice Not typical Not typical CAD/CAM milling Yes blue phase Yes pre-sintered Yes pre-sintered Same-day delivery Yes single firing Yes sintering Yes sintering Repair chairside Limited Not repairable Not repairable zirconia blank cost N/A Moderate Moderate The strength gap between lithium disilicate and zirconia is significant and clinically relevant for anything beyond anterior single units. A posterior 3-unit bridge in lithium disilicate carries real fracture risk at the connector under occlusal load not because the material is weak in absolute terms, but because the connector cross-section requirements for the span exceed what glass-ceramic can reliably sustain. Labs that supply posterior bridges should not be using lithium disilicate for this indication regardless of the prescribing clinician's preference for esthetics. Sourcing and Workflow Considerations for US Dental Labs For US dental labs running both lithium disilicate and zirconia workflows, material sourcing efficiency matters as much as material performance. Labs that consolidate procurement through a domestic supplier avoid the lead time variability and import unpredictability of sourcing directly from overseas manufacturers. Dental zirconia discs across the full 3Y, 4Y, and 5Y range in both white and pre-shaded multilayer formats are available from ZirconiaGuys from US inventory, enabling same-day or next-day shipping without minimum order requirements. For labs that handle significant anterior volume where the lithium disilicate vs. zirconia decision comes up on every case, having reliable zirconia stock on hand ensures the material selection decision is based on clinical appropriateness, not on what happens to be available. As a zirconia materials distributor USA, ZirconiaGuys stocks Upcera and Aidite zirconia across the full grade range alongside dental lab materials for complete CAD/CAM workflows. Labs evaluating zirconia dental blanks as an alternative or complement to lithium disilicate for anterior cases can source both the standard 4Y multilayer pre-shaded format for production volume and the high-translucency 5Y format for demanding esthetic cases from the same US inventory. The per-disc zirconia blocks price comparison against lithium disilicate e.max CAD blocks favors zirconia significantly on a per-unit basis in most format comparisons an additional workflow efficiency consideration for labs running high anterior volume where both materials compete for the same cases. Advanced lithium disilicate is genuinely excellent for what it is designed to do. Its esthetic integration, adhesive bonding capability, and CAD/CAM efficiency make it the first-choice material for anterior single-unit esthetic restorations in both chairside and lab-based workflows. The advanced formulations have pushed its strength ceiling high enough to cover a broader range of posterior single-crown indications without sacrificing the optical qualities that justify using it over zirconia in the anterior zone. Its limits are also real. It is not a structural material for posterior bridges. It cannot compete with 3Y zirconia blocks on flexural strength for high-load applications. And the adhesive bonding protocols it depends on for conservative preparations require clinical technique discipline that conventional cementation for zirconia does not. Understanding both sides of this is what separates accurate material selection from marketing-driven decisions.
Learn more
How PMMA Dental Material Is Cured in Modern Dental Workflows?
PMMA polymethyl methacrylate is one of the most widely used materials in dental laboratory production. It is the standard for temporary crowns, denture bases, occlusal splints, and long-term provisionals. Yet despite its daily presence in dental labs across the US, the curing process behind PMMA is rarely explained clearly. Most technicians know that conventional acrylic requires mixing and bench curing. Fewer understand how CAD/CAM PMMA discs are cured before they arrive at the lab, why that pre-polymerization process matters clinically, and how the curing method directly determines the material performance of every restoration produced from a PMMA disc. This guide explains PMMA curing from the chemistry up covering how conventional acrylic is cured, how industrial pre-polymerization differs, why the difference matters for residual monomer content and mechanical performance, and how to select the right PMMA format for each application in a modern CAD/CAM workflow. All seven compulsory keywords are addressed in the relevant clinical contexts throughout. What Curing Means in the Context of PMMA? Curing in PMMA means polymerization the chemical process by which liquid methyl methacrylate (MMA) monomer molecules link together into long polymer chains to form solid polymethyl methacrylate. The moment this chain-linking reaction is complete, the material transitions from liquid or dough consistency to rigid solid. The quality, completeness, and conditions of this polymerization reaction are what determine whether the resulting PMMA is dense, strong, and biocompatible or porous, weak, and potentially irritating to oral tissue. There are three distinct curing mechanisms used in dental PMMA production. Each produces materially different outcomes that directly affect clinical performance. Heat-cured (hot-water bath or autoclave curing) — The conventional method used in traditional denture fabrication. Powder and liquid monomer are mixed, packed into a flask against a gypsum mold, and cured at approximately 70–100°C under water bath or pressure conditions. Residual monomer content is typically 2–5%, porosity is moderate, and fit accuracy is operator-dependent. Cold-cured (self-cured or chemically activated) — The bench-top method used for chairside repairs and direct provisional fabrication. A chemical activator triggers polymerization at room temperature without external heat. Residual monomer content is higher than heat-cured acrylic — often 5–7% — and mechanical properties are inferior due to lower conversion rate and higher porosity. Industrial pre-polymerization (CAD/CAM PMMA discs) — The manufacturing process used for all modern CAD/CAM PMMA disc stock. Monomer is polymerized under high pressure (50–200 bar) and elevated temperature (above 100°C) in industrial autoclaves. The result is residual monomer below 0.5%, near-zero porosity, uniform mechanical properties throughout the disc, and the dimensional stability that accurate CAD/CAM milling requires. Why the Curing Method Determines Clinical Performance? The difference between a cold-cured bench provisional and a milled CAD/CAM restoration is not just workflow — it is a fundamental material quality difference rooted in the curing process. Residual monomer is the clearest clinical consequence. MMA monomer is a known irritant associated with tissue sensitivity, allergic contact reactions, and mucosal inflammation in susceptible patients. Conventional cold-cured PMMA at 5–7% residual monomer represents a meaningful exposure risk for patients with documented acrylic sensitivity. Industrial pre-polymerized PMMA at below 0.5% residual monomer is classified as biocompatible under ISO 20795-1 for denture base polymers — a threshold that bench-cured materials rarely achieve consistently. Porosity is the second consequence. Bench-mixed acrylic traps air during the mixing and packing process, producing microscopic voids throughout the cured material. These voids are sites for bacterial colonization, stain absorption, and structural weakness. Industrial pre-polymerization under 50–200 bar pressure eliminates void formation entirely the resulting PMMA has near-zero porosity and a homogeneous polymer matrix that resists staining, supports higher polished surface quality, and delivers better mechanical properties throughout the disc. Dimensional accuracy is the third consequence. Polymerization shrinkage is a direct result of monomer-to-polymer conversion. Bench-cured PMMA shrinks as it polymerizes and that shrinkage varies depending on the powder-to-liquid ratio used, the packing technique, and the curing temperature profile. CAD/CAM PMMA discs complete their polymerization before the lab receives them. There is no residual curing shrinkage to account for in the milling process — the disc dimensions are stable, predictable, and consistent across every unit milled from it. How PMMA Is Cured for Denture Base Applications? The pmma denture [→ zirconiaguys.com/products/aidite-denture-base-pmma] base application places the strictest demands on PMMA curing quality of any dental application. The denture base sits in direct contact with oral mucosa for extended periods often 12–16 hours per day. Residual monomer at the tissue interface causes mucosal irritation that patients experience as chronic soreness or sensitivity. A properly cured industrial PMMA denture base eliminates this risk at the material level. In a CAD/CAM denture workflow, the curing has already occurred before the lab touches the disc. The lab scans the patient model, designs the denture base digitally, mills the base from a pre-polymerized PMMA disc, polishes it, and delivers a dimensionally accurate, biocompatible result. There is no mixing step, no flask packing, no curing oven, and no polymerization shrinkage to manage. The curing quality is built into the disc not dependent on lab conditions or technician technique. For the denture base to perform correctly in long-term tissue contact, the disc must meet ISO 20795-1 requirements for residual monomer, flexural strength, and surface hardness. Aidite's pre-polymerized PMMA denture base discs consistently meet these thresholds — which is one of the primary reasons they have become the preferred choice among US dental labs that have moved to CAD/CAM denture production. PMMA Curing for Temporary Crown and Bridge Applications Temporary crown and bridge provisionals have different curing requirements than denture bases. The tissue contact period is shorter typically two to eight weeks for standard temporaries but the esthetic and dimensional requirements are higher. The temporary must accurately represent the intended shade of the final restoration, maintain its fit over the provisional period without dimensional drift, and polish to a surface quality that patients accept as esthetically appropriate. This is why aidite denture base pmma should not be used for crown and bridge temporaries. Denture base PMMA is pigmented to simulate gingival tissue pink, red-toned, opaque. For a temporary crown, you need tooth-shade PMMA formulated with dentine-to-incisal gradient or standard tooth shades. The curing chemistry is similar, but the pigmentation, shade calibration, and optical formulation are entirely different. For crown and bridge temporary applications, the pre-polymerized industrial curing process delivers the same dimensional accuracy and biocompatibility advantages as for denture bases but in a tooth-shade formulation calibrated to VITA shade standards. The pre-polymerized disc eliminates the dimensional variability of bench-mixed provisional materials while delivering a consistent shade result that the technician can rely on from the first blank to the last in a multi-unit case. A critical practical point: polymerization for CAD/CAM PMMA temporaries is complete before the disc reaches the lab. The lab's post-milling steps polishing, glazing, occlusal adjustment do not involve any additional curing. There is no light-curing step, no chemical activation, and no heat-curing oven required. This is a fundamental workflow simplification over chairside direct provisional materials, which require a curing step at the point of fabrication. Multilayer PMMA: How Gradient Curing Architecture Works The multilayer pmma disc format adds a manufacturing complexity to standard single-shade PMMA a gradient of shade and translucency engineered into the disc from cervical to incisal during production. Understanding how this gradient is created and why it holds through milling requires a brief look at the manufacturing process. Multilayer PMMA discs are produced by sequentially casting and partially curing multiple formulations each with a different pigmentation and translucency profile into the disc mold in distinct layers. The layers are then final-cured together under the same high-pressure, high-temperature industrial conditions used for single-shade discs. The interface between layers is a chemical bond formed during the co-curing step, not a mechanical joint which is why multilayer discs do not delaminate during milling or clinical service. The result is a disc where the cervical end contains warmer, more saturated, more opaque PMMA that approximates dentin color, while the incisal end contains cooler, less pigmented, more translucent PMMA that approximates enamel. When the digital design is oriented correctly in the disc cervical margin at the cervical end, incisal edge at the incisal end the milled crown exits the mill already expressing the correct shade gradient for the anterior tooth without any staining. This gradient architecture is what makes multilayer PMMA the most efficient format for anterior provisional production in high-volume labs. The curing quality of the gradient interface is what makes it possible a poorly bonded interlayer would delaminate at the thin incisal edge or at the proximal margin areas where material thickness is lowest. Selecting the Right PMMA Format Based on Curing and Application The correct PMMA format selection depends on matching the curing quality, pigmentation, and optical architecture of the disc to the clinical application. Aidite pmma multilayer covers the anterior crown and bridge provisional workflow. Aidite denture base PMMA covers full and partial denture applications. Clear PMMA formulations cover splints, retainers, and clear appliances. Single-shade tooth-color PMMA covers posterior provisional crowns where shade precision is secondary to fit and occlusal accuracy. For US dental lab materials procurement, the key advantage of sourcing Aidite PMMA from a domestic inventory is the elimination of batch-to-batch variability that can affect shade consistency and curing quality in overseas-sourced generics. As a dedicated dental lab material supplier, ZirconiaGuys stocks the full Aidite PMMA range from US inventory with full batch documentation — including residual monomer certificates and ISO 20795-1 compliance records on request. Labs that also run zirconia workflows benefit from consolidating material supply. Dental zirconia discs and PMMA discs share the same 98 mm format and open-system mill compatibility meaning the same milling equipment handles both materials. The workflow difference is post-milling: zirconia requires sintering, PMMA requires only polishing. Both start from the same CAD/CAM design file, and both can be ordered from the same US zirconia materials distributor usa inventory to simplify procurement. PMMA vs. Zirconia: Understanding When Each Material Is the Answer The curing distinction between PMMA and zirconia is the clearest way to understand why they serve different applications. PMMA is fully cured before the lab receives it the disc is the finished polymer, and milling simply reveals the restoration shape within it. Zirconia blocks are milled in their pre-sintered chalk state and require furnace sintering to densify to final strength and dimensions. Zirconia blocks dental production therefore always includes a sintering step that PMMA production does not. A zirconia blank milled and delivered without sintering is a fragile pre-sintered form with none of the material's clinical strength. A PMMA disc milled and delivered without any additional processing is a finished, clinically acceptable restoration polishing is the only post-milling step required. This fundamental difference is why PMMA is the temporary material and zirconia dental blanks are the permanent restoration material. The processing requirements match the clinical lifespans fast, simple PMMA production for provisionals; furnace-processed dental zirconia discs for restorations designed to last decades. The curing process is not a manufacturing footnote it is the foundation of every material property that determines whether PMMA performs correctly in clinical service. Industrial pre-polymerization is what separates CAD/CAM PMMA from bench-mixed acrylic on residual monomer, porosity, dimensional accuracy, and mechanical consistency. Selecting pre-polymerized PMMA from a documented, reliable supply chain is the single highest-leverage procurement decision available to labs building or refining their PMMA workflow.
Learn more
How 3D Printed Surgical Guides Improve Dental Implant Accuracy?
Dental implant surgery has a narrow margin for error. An implant placed two millimeters off-axis can compromise the final prosthetic outcome, damage adjacent root structure, or violate critical anatomical boundaries like the inferior alveolar nerve or maxillary sinus floor. Freehand placement even in experienced hands introduces variability that digital workflows exist specifically to eliminate. The 3D printed surgical guide is the physical mechanism through which that digital precision transfers from the computer screen to the patient's mouth. This guide explains how surgical guides work, why the material they are printed from determines their clinical effectiveness, and how dental labs can build a reliable guide production workflow using the right resins. For labs that already stock dental zirconia discs, zirconia blocks, and fixed restoration materials, surgical guide resin is a natural workflow extension and one that adds significant clinical value to the services you offer. What a Surgical Guide Actually Does and Why Accuracy Matters? A surgical guide is a custom-fabricated template that seats over the patient's remaining teeth, soft tissue, or bone during implant surgery. Metal sleeves embedded in the guide constrain the drill to a predetermined trajectory controlling angulation, depth, and three-dimensional position simultaneously. The surgeon does not judge drill path freehand. The guide does it mechanically. The accuracy of that constraint determines clinical outcomes directly. Studies on guided versus freehand implant placement consistently show that surgical guides reduce mean angular deviation from planned position by 50–70% and mean apical deviation by 40–60% compared to freehand technique. In practical terms, this means implants land where the prosthetic plan requires them to land not approximately where anatomy and surgical judgment suggested. For full-arch cases All-on-4, All-on-6, full-arch immediate load this precision is not optional. A misplaced implant in a full-arch case cannot be corrected by adjusting the final prosthesis. The guide is what makes the prosthetically driven treatment plan executable. The Digital Workflow That Produces a Surgical Guide Every surgical guide begins with data, not with a physical impression. The workflow has four stages that run entirely in the digital domain before a single gram of resin is printed. Stage 1 — CBCT and intraoral scan acquisition The CBCT provides volumetric bone data density, quantity, and the exact three-dimensional position of critical structures. The intraoral scan or scan of the diagnostic cast provides surface anatomy. These two data sets are merged in planning software to create a unified patient model. Stage 2 — Virtual implant planning The clinician places virtual implants in planning software (coDiagnostiX, Nobel Clinician, Implant Studio, or equivalent) based on the final prosthetic design. Implant position, angulation, and depth are optimized for prosthetic emergence profile, bone engagement, and clearance from anatomical structures. The plan is reviewed and approved before any physical fabrication begins. Stage 3 — Guide design The software generates the guide geometry around the approved implant positions. Metal sleeve positions and orientations are calculated from the virtual plan. The guide body is designed to seat stably on the patient's reference anatomy — tooth-supported, tissue-supported, or bone-supported depending on the clinical scenario. Stage 4 — 3D printing The guide STL file is exported to a dental 3D printer. The print is produced in biocompatible surgical guide resin, post-processed, and sterilized for use. The accuracy of the final guide is determined by two factors: the precision of the planning software and the dimensional accuracy of the printed material. A guide printed in low-accuracy resin will not reliably reproduce the planned sleeve positions regardless of how precisely the digital plan was created. Why Guide Resin Material Is the Critical Variable? Not all 3D printing resins are appropriate for surgical guide fabrication. A surgical guide must meet four material requirements that general-purpose 3D printing resins do not reliably satisfy. Dimensional accuracy The guide must reproduce planned sleeve positions to within fractions of a millimeter. Resins with high post-cure shrinkage or warping tendency will shift sleeve positions from their designed locations directly degrading the accuracy advantage that guided surgery is supposed to deliver. Biocompatibility A surgical guide sits in direct intraoral contact during surgery. ISO 10993 cytotoxicity compliance and class IIa medical device compatibility are the minimum requirements for any resin used in this application. Non-biocompatible resins must never be used in surgical guide fabrication regardless of print accuracy. Sterilization compatibility Surgical guides are sterilized before use typically by autoclave or chemical sterilization. Resins must maintain dimensional stability and mechanical integrity through the sterilization process. Resins that warp, discolor, or lose hardness during sterilization are clinically unusable. Adequate hardness and fracture resistance The guide must withstand the mechanical forces of drilling without flex or fracture. Soft or brittle resins that deform under drilling pressure allow the drill to deviate from the planned trajectory defeating the purpose of the guide. For labs sourcing key guide resin for implant surgery, Keystone's Key Guide resin meets all four of these requirements. It is formulated specifically for dental surgical guide fabrication — not adapted from a general 3D printing resin and its dimensional accuracy, biocompatibility certification, and sterilization compatibility make it a clinically reliable choice for surgical guide production. Selecting the Right Resin: Key Guide vs. Veriguide Dental labs producing surgical guides in volume will encounter two primary resin options from the leading biocompatible dental 3D printing resin manufacturers. Understanding the distinction between them enables labs to make the correct selection for each guide type. The surgical guide dental resin from Keystone Key Guide is a high-rigidity, biocompatible formulation designed for fully guided implant surgery with metal sleeves. Its hardness profile ensures that the drill sleeve seats remain mechanically stable under continuous drilling pressure, and its post-cure dimensional accuracy is consistent enough for multi-implant full-arch cases where cumulative positional error must be minimized across all implant positions simultaneously. For labs that need a transparent guide option allowing visual verification of guide seating and drill position during surgery the dental key guide resin supplier relationship with Keystone also covers their clear formulations optimized for visibility during the surgical procedure. The whip mix veriguide clear is the transparent surgical guide material specifically engineered for cases where intraoperative visibility is a clinical priority. Its optical clarity enables the surgical team to confirm guide seating against the patient's reference anatomy before drilling begins a meaningful safety advantage in complex cases with limited access. Veriguide Clear meets biocompatibility requirements and maintains its dimensional integrity through standard sterilization protocols. Property Key Guide Resin Veriguide Clear Transparency Opaque / translucent Fully clear Primary use Standard fully-guided surgery Visibility-priority cases Biocompatibility ISO 10993 compliant ISO 10993 compliant Sterilization Autoclave compatible Autoclave compatible Dimensional accuracy High High Sleeve retention Excellent Excellent The choice between the two is a clinical decision based on case requirements, not a significant quality differential. Both are purpose-built surgical guide materials that outperform adapted general 3D printing resins on every relevant metric. Guide Types and Clinical Indications Surgical guides are classified by their support base the anatomy they seat against during surgery. Each type serves different clinical scenarios and has distinct design requirements. Tooth-supported guides Seat against remaining natural teeth and are the most mechanically stable guide type. Tooth structure provides consistent, rigid reference points that resist intraoperative movement. These are the preferred guide type when sufficient dentition remains to provide stable seating. Tissue-supported guides Seat against soft tissue in partially or fully edentulous patients. They are more susceptible to positional movement than tooth-supported guides because soft tissue compresses and shifts under pressure. Stabilization screws are often used to secure tissue-supported guides against the bone, and their accuracy is correspondingly lower than tooth-supported designs. Bone-supported guides Are used in fully edentulous patients after mucoperiosteal flap reflection. They seat directly on exposed bone, providing stable reference anatomy. Bone-supported guides require a flap procedure eliminating the flapless surgery option — but deliver reliable accuracy in fully edentulous cases. Dual-use guides Incorporate both implant placement guidance and prosthetic reference — allowing the final restoration design to be verified against implant positions intraoperatively. These are standard in All-on-4 and full-arch immediate load protocols. What Labs Need to Build a Surgical Guide Workflow? For dental labs adding surgical guide production to an existing digital workflow, the equipment requirements are modest compared to the fixed restoration milling setup. The primary investments are a dental 3D printer compatible with biocompatible resins, a post-cure light unit calibrated for the specific resin chemistry, and a cleaning station for IPA washing of printed parts. Labs that already function as a zirconia materials distributor usa stocking zirconia blocks, zirconia blank inventory, and zirconia dental blanks for fixed restoration production have the digital infrastructure in place. The scanning workflow, digital design capability, and quality control processes that apply to zirconia blocks dental restoration production transfer directly to surgical guide production. The addition of a 3D printer and guide resin extends the lab's service range without requiring a fundamentally different production model. The key workflow addition specific to surgical guide production is CBCT data handling and implant planning software access either through the referring clinician's digital plan or through an in-house planning subscription. Labs that can receive approved STL files from the clinician's planning software and go directly to print are positioned for high-volume guide production with minimal case planning overhead. The 3D printed surgical guide is the link between digital implant planning and accurate clinical execution. Its value is not theoretical the accuracy improvement over freehand technique is consistent, measurable, and clinically significant across case types and complexity levels. For dental labs, surgical guide production is a natural extension of the digital workflow already in place for fixed zirconia restorations, and the material investment required to begin is modest compared to the clinical value delivered. The resin you print with determines the accuracy of the guide you deliver. Sourcing biocompatible, purpose-built surgical guide resins from a reliable US supplier is not a secondary consideration it is the foundational material decision in a surgical guide production workflow.
Learn more