

Blogs
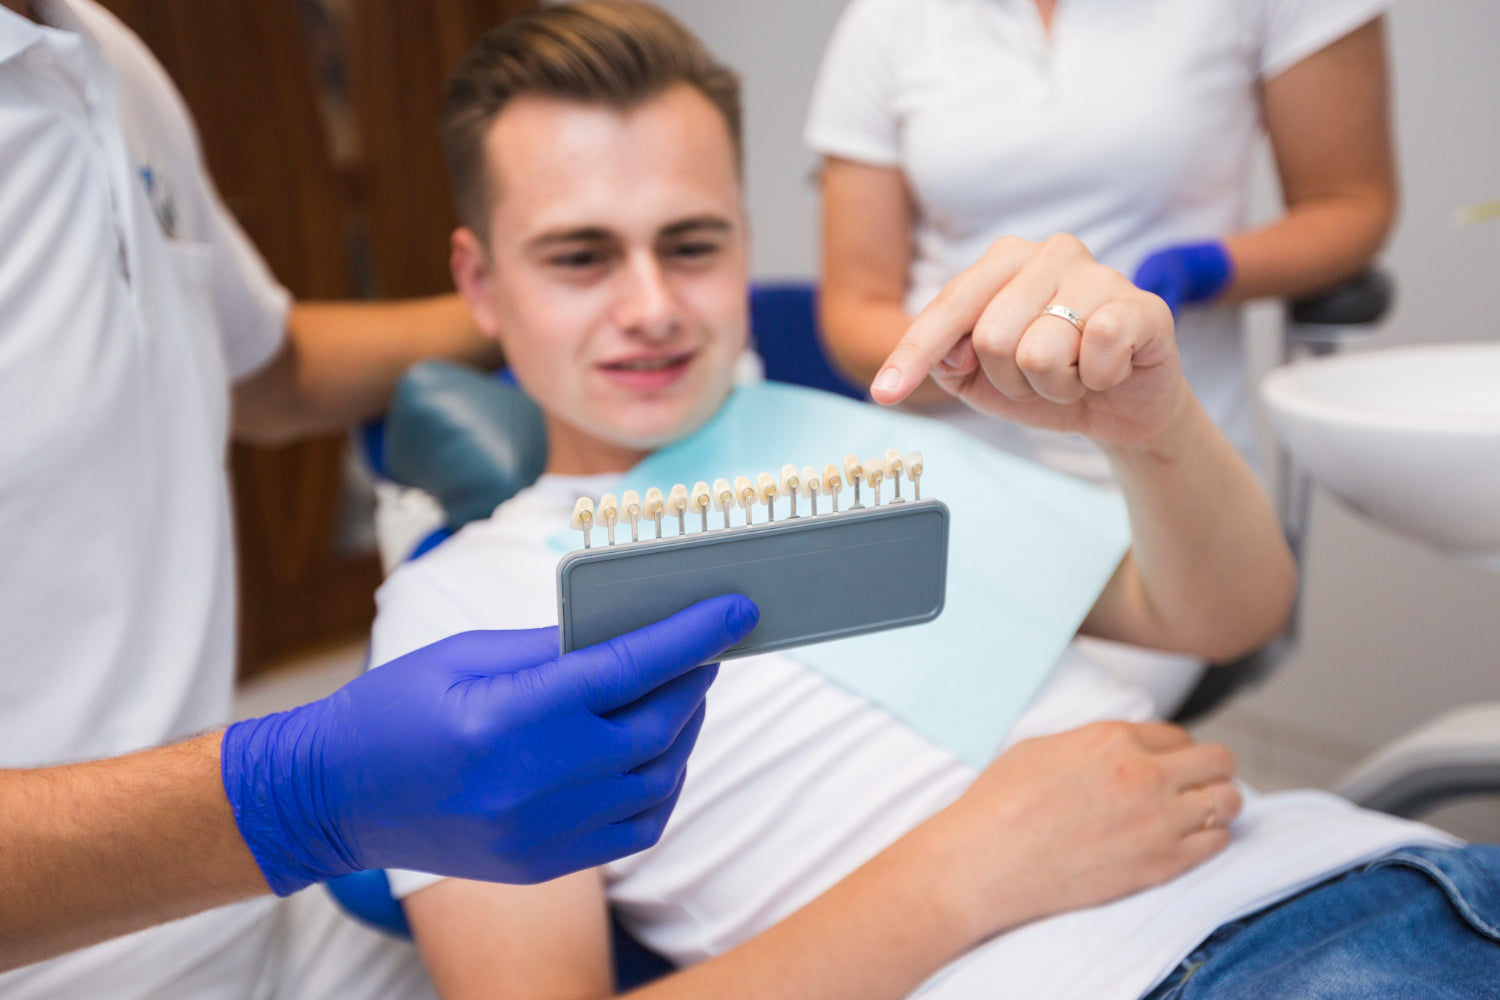

Everything You Should Know About Zirconia Crown and Bridge
Dental zirconia has fundamentally changed what is possible in crown and bridge dentistry. In the span of two decades, it has moved from a niche high-strength alternative to porcelain-fused-to-metal to the dominant material for both anterior and posterior fixed restorations in modern digital dental labs. Yet despite how widely zirconia is used, a significant number of clinicians and lab technicians still lack a clear understanding of why it performs the way it does, which grades exist, how discs are selected for specific cases, and where zirconia fits and doesn’t fit in a comprehensive restorative material strategy. This guide covers everything a dental lab or practicing clinician needs to know about zirconia crown and bridge restorations: the material science behind it, the full range of available grades, clinical indication guidelines, disc selection, workflow best practices, and how to evaluate dental lab materials suppliers when building or upgrading your zirconia supply chain. Whether you are new to zirconia or refining a workflow you have been running for years, the information here is designed to support better, faster, more consistent clinical decisions. What Is Zirconia and Why Is It Used for Crowns and Bridges? Zirconium dental ceramic properly called yttria-stabilized zirconia polycrystal (Y-TZP) is a high-performance oxide ceramic produced from zirconium dioxide (ZrO₂) stabilized with yttrium oxide (Y₂O₃). Before stabilization, pure zirconia undergoes a destructive phase transformation during cooling from high temperatures that would cause the material to crack and fail in service. Yttria stabilization prevents this transformation, locking the crystal structure in a state that delivers exceptional mechanical properties at room temperature. What makes zirconia uniquely suited to crown and bridge applications is the combination of properties it delivers simultaneously: high flexural strength, excellent fracture toughness, good biocompatibility, a coefficient of thermal expansion compatible with dental luting cements, and in modern esthetic grades optical translucency approaching that of natural tooth structure. No other single material class in restorative dentistry combines these properties in the same way. The shift from porcelain-fused-to-metal (PFM) to dental zirconia as the standard crown and bridge material was driven by three clinical realities: PFM restorations require metal substructures that are both expensive and biologically suboptimal for some patients; ceramic veneering on PFM frameworks is prone to chipping and delamination over time; and full-contour zirconia crowns milled in a single piece from a pre-polymerized disc eliminate the veneer layer entirely, removing the chipping failure mode from the equation. Modern full-contour zirconia restorations are stronger, more biocompatible, more esthetically consistent, and more efficiently produced than PFM which is why adoption has been near-universal in modern dental labs. Zirconia Grades Explained: 3Y, 4Y, 5Y and What They Mean for Crown & Bridge Types of Zirconia Crowns and Bridges 3Y, 4Y, 5Y refers to the mole percentage of yttria (yttrium oxide) incorporated into the crystal structure. This single variable controls the ratio of tetragonal to cubic crystal phases in the sintered material, which in turn determines the balance between flexural strength and optical translucency. Understanding this tradeoff is the foundation of correct material selection for every crown and bridge case. Property 3Y Zirconia 4Y Zirconia 5Y Zirconia Yttria content ~3 mol% ~4 mol% ~5 mol% Dominant crystal phase Tetragonal Mixed tetragonal + cubic Predominantly cubic Flexural strength 900–1200+ MPa 600–800 MPa 500–650 MPa Translucency Moderate High Very high Crown application Posterior crowns, bridges Anterior + posterior crowns Anterior esthetic priority Bridge application 3–6 unit posterior bridges 1–3 unit anterior bridges Anterior single span only Staining required Yes, for anterior cases Minimal / optional Rarely needed Best format White or pre-shaded Multilayer pre-shaded Flat pre-shaded or white Choosing the Right Zirconia Disc Format for Crown & Bridge Cases Dental zirconia discs come in several formats that matter as much as the grade itself: white (unshaded) flat discs, pre-shaded flat discs, and multilayer gradient discs. Each format serves a different clinical and workflow purpose, and selecting the wrong format for a case type is one of the most common sources of avoidable finishing labor and shade correction remakes. For multi-unit bridge cases in particular, st multilayer zirconia for bridges represents one of the most practical disc selections available to labs producing high-volume posterior and premolar bridge work. The ST (standard translucency) multilayer format delivers the high-strength 3Y-range material properties needed for bridge connectors while incorporating a pre-built shade gradient that reduces post-sintering staining requirements even on multi-unit cases — a combination that is difficult to achieve with flat white 3Y discs without significant additional bench time. Disc format comparison: Disc Format Best Grade Best Application Staining Needed? Key Advantage White flat 3Y Posterior bridges, custom cases Yes — full staining Maximum strength, full shade control Pre-shaded flat 3Y or 4Y Standard posterior crowns Minimal Faster than white, predictable shade ST multilayer 3Y range Posterior bridges, full-arch Rarely Strength + built-in gradient TT/HT multilayer 4Y Anterior & premolar crowns Rarely Best daily esthetic production disc 5Y flat 5Y Anterior single esthetic units No Maximum translucency Zirconia for Bridges Specifically: What the Evidence Says Bridge cases present the most demanding structural requirements in crown and bridge dentistry, and material selection errors in bridge design are among the most clinically consequential. st multilayer zirconia discs in the ST grade range are formulated specifically to meet the connector cross-section strength requirements that multi-unit bridges impose — requirements that 4Y and 5Y esthetic-grade materials cannot reliably meet for posterior 3–6 unit spans. Critical bridge design parameters for zirconia: Minimum connector height: 4 mm for posterior bridges, 3 mm for anterior bridges (ISO 6872 guidance) Minimum connector width: 3 mm for posterior bridges, 2.5 mm for anterior bridges Minimum connector cross-section area: 9 mm² for posterior 3Y-TZP; 7 mm² for anterior 4Y Preparation design: Shoulder or deep chamfer preparation. Knife-edge margins are not appropriate for zirconia bridge abutments Occlusal clearance: Minimum 1.5 mm for full-contour posterior zirconia bridges. Less than 1.5 mm increases fracture risk regardless of material grade Connector shape: Rounded connectors with generous radius. Sharp internal line angles at connectors concentrate stress and dramatically increase fracture risk Clinical longevity data: Long-term clinical studies on 3Y-TZP zirconia bridges consistently report 5-year survival rates above 93% for 3-unit posterior bridges when fabricated within manufacturer specifications. Connector fracture the primary failure mode is associated almost exclusively with connector cross-sections below minimum recommended dimensions, not with material failure within specification. This means that bridge failures in zirconia are predominantly design errors, not material failures. How to Select the Right Zirconia Disc for Every Case Type? Selecting the right dental zirconia discs for a given case requires matching three variables simultaneously: grade (3Y/4Y/5Y), format (white/pre-shaded/multilayer), and disc dimensions (diameter and thickness). Getting all three right determines whether the case mills correctly, shades predictably, and delivers the expected clinical outcome without rework. Case-by-case selection guide: Case Type Recommended Grade Recommended Format Disc Thickness Notes Anterior single crown 5Y or 4Y Multilayer pre-shaded 12–14 mm Shade matching to natural adjacent teeth is primary priority Anterior 3-unit bridge 4Y Multilayer pre-shaded 14 mm Verify connector cross-section ≥7 mm² Premolar single crown 4Y Multilayer pre-shaded 12 mm Body zone of disc provides best esthetics/strength balance Posterior single crown (molar) 3Y or 4Y Pre-shaded or white 14 mm Functional demand — strength over esthetics Posterior 3-unit bridge 3Y (ST grade) ST multilayer or white 14–16 mm Connector area ≥9 mm² mandatory Zirconia Multilayer Technology: Why It Changed Crown & Bridge Production Zirconia multilayer disc technology represents the most significant production workflow advancement in dental lab zirconia since the introduction of CAD/CAM milling itself. Before multilayer discs, producing a natural-looking full-contour zirconia crown required significant post-sintering characterization: external staining of the cervical zone, application of translucency enhancers in the body, and incisal effects at the gingival edge all fired individually or in combined stain-glaze passes. For a busy production lab, this added 20–40 minutes of skilled bench time per anterior unit. The introduction of tt multilayer zirconia for crowns & bridges and similar multilayer disc formats solved this problem by engineering the shade gradient directly into the disc manufacturing process. A multilayer disc transitions continuously from a higher-chroma, lower-translucency zone at the cervical end to a lower-chroma, higher-translucency zone at the incisal end using controlled yttria variation across the disc depth to produce this gradient. When the CAD/CAM design is properly aligned with these internal zones, the milled crown exits the furnace with a natural shade gradient already present. How multilayer discs work in practice: Cervical zone: Higher chroma, moderate translucency, warm undertone — matches the dentin-heavy root-third appearance of natural teeth Body zone: Balanced chroma and translucency the primary functional zone for most of the crown’s visible surface Incisal zone: Lower chroma, maximum translucency, cooler tone approximates natural enamel opalescence at the incisal edge Workflow impact: Labs that have transitioned to multilayer pre-shaded discs for standard anterior and premolar cases consistently report a 60–70% reduction in post-sintering bench time for shade finishing. On a production schedule of 30–50 anterior crowns per week, this translates into several hours of recovered bench time time that can be redirected to quality control, complex customization cases, or additional production volume. Multilayer limitations: Multilayer discs require correct CAD/CAM alignment of the design to the disc’s internal gradient zones. A misaligned design where the incisal portion of the crown is positioned in the cervical zone of the disc produces a reversed gradient that looks worse than a flat white disc after staining. Most modern CAM software (exocad, 3Shape) includes built-in blank orientation tools that prevent this error when used correctly. Always verify blank orientation before milling the first unit from a new disc batch. Zirconia Crown & Bridge Workflow: From Design to Delivery Understanding the complete workflow for zirconia crown and bridge production helps labs identify where material quality matters most and where workflow efficiency gains are achievable. Case receipt and prescription review: Verify the prescription specifies the correct material grade for the indication. Flag any case where the clinician has requested a 5Y esthetic grade for a posterior bridge this is a clinically inappropriate material selection that should be confirmed before production begins. Model scanning and digital design: Scan the working model and opposing arch. Design the restoration in your CAM software with correct reduction guidelines: minimum 1.5 mm occlusal reduction for posterior full-contour crowns, minimum 1 mm for anterior crowns. For bridges, verify connector cross-sections in the design software before generating toolpaths. Disc selection and blank orientation: Select the disc grade and format appropriate for the case using the indication guide above. Mount the disc with correct directional orientation gingival-to-incisal axis verified against the disc manufacturer’s marking before milling. Milling: Mill at parameters recommended by the disc manufacturer. For multilayer discs, reduce feed rate by 10–15% at layer transitions to prevent micro-chipping. Standard bur life guidelines apply replace burs at recommended intervals regardless of visible wear, as a worn bur produces worse surface quality and increased chipping risk before any visual deterioration is apparent. Pre-sintering adjustment: Confirm fit on the model in the green (pre-sintered) state. Minor occlusal and proximal adjustments can be made with a carbide bur in the pre-sintered state much more efficiently than post-sintering grinding, which risks surface damage and requires re-polishing. Sintering: Load the furnace per the disc manufacturer’s sintering profile. Do not deviate from the prescribed ramp rate or peak temperature. For multilayer discs, accelerated sintering damages the optical gradient and produces a less translucent result at the incisal zone. Sintering furnace calibration should be verified every 6 months against a certified reference material. Post-sintering assessment: Check fit on the model after sintering. Verify occlusal contacts under articulating paper. Check marginal integrity with a probe no visible gaps at the margin should be present for a well-fitting restoration. Staining, glazing, and characterization: For pre-shaded multilayer discs in standard A–D shade cases, a clear glaze fired to the manufacturer’s recommended temperature is typically sufficient. For white discs, apply the full stain protocol. For complex characterization cases crack lines, hypocalcification, fluorosis apply characterization stains before the glaze layer. Final polish and delivery: High-gloss polish from the glaze fire. Inspect restoration under three light sources fluorescent, natural daylight, incandescent before delivery. Shade transitions on multilayer restorations should be imperceptible under all three light sources. Zirconia vs. Other Crown & Bridge Materials: When to Use What Understanding where dental zirconia fits relative to other crown and bridge materials is essential for labs that produce mixed-material cases and for clinicians who specify materials based on case requirements. Material Strength (MPa) Translucency Best Indication Key Limitation 3Y Zirconia 900–1200+ Moderate Posterior bridges, high-load crowns Requires staining for anterior esthetics 4Y Zirconia multilayer 600–800 High Anterior + posterior single crowns Not for long-span posterior bridges 5Y Zirconia 500–650 Very high Anterior esthetic single units Insufficient for posterior bridges Lithium disilicate (e.max) ~400 Excellent Anterior veneers, single crowns Limited to 3-unit anterior bridges max PFM Metal ~700+ Low — metal show-through Long-span bridges, implant cases Chipping, metal allergy, esthetic limitations Full-cast metal Very high None Posterior crowns under extreme load Esthetic failure — visible metal Composite resin (indirect) ~100–250 Good Temporary / provisional only Not suitable for permanent restorations What Dental Labs Should Look for in a Zirconia Material Supplier? Choosing a dental lab material supplier for zirconia is not purely a zirconia blocks price decision. The lowest per-disc cost rarely translates into the lowest total case cost when batch consistency, documentation quality, and technical support are factored in. These are the criteria that separate reliable zirconia suppliers from commodity vendors. Batch consistency documentation: Every disc batch should come with a batch certificate documenting material composition, flexural strength test results, and shade specification compliance. Without this documentation, you cannot verify that the material you are milling meets the properties you are designing to. ISO certification: Confirm ISO 6872 compliance for the specific grade and format. This is the international standard for dental ceramic materials and covers flexural strength, chemical solubility, and translucency requirements. Not all PMMA and zirconia products sold in the US market carry legitimate ISO certification. US domestic stock: International lead times introduce production uncertainty. A US-based supplier stocking domestic inventory ensures that stock-outs or delayed orders do not interrupt lab production schedules. Technical support: Sintering profile documentation, milling parameter guidelines, and troubleshooting support should be available from the supplier. A supplier who cannot provide these is selling a commodity, not a clinical material. Consistent shade formulation: Pre-shaded and multilayer discs should produce the same shade result from batch to batch. Shade drift between batches forces re-shade matching on every case rather than trusting a calibrated standard eliminating a core efficiency advantage of pre-shaded formats. ZirconiaGuys sources dental lab materials exclusively from manufacturers who meet all five criteria above. All Upcera and Aidite products stocked at ZirconiaGuys come with full batch documentation, ISO certification records, and technical support from a team that works with dental labs daily. Zirconia has earned its place as the dominant crown and bridge material in modern dental labs not through marketing but through clinical performance. Its combination of strength, biocompatibility, CAD/CAM machinability, and in modern esthetic grades natural optical properties makes it the most versatile fixed restoration material available. The knowledge gap that still exists around grade selection, disc format, and bridge design parameters is the primary source of avoidable clinical failures and production inefficiencies in zirconia crown and bridge work. The framework in this guide match the grade to the structural requirement, match the disc format to the esthetic requirement, and verify bridge connector dimensions before milling is the practical foundation of a consistent, high-quality zirconia production workflow. Apply it to every case and the material will consistently deliver what it is designed to deliver. The right dental lab materials, selected correctly for each indication, are what separate labs with strong clinical reputations from those that spend their time correcting avoidable material selection errors.
Learn more
What Is Splint Hard Resin? Applications in Dental 3D Printing
The range of photopolymer resins available for dental 3D printing has expanded rapidly, and with that expansion has come a legitimate source of confusion for dental labs and clinicians: which resin classification is right for which application? Splint hard resin occupies a specific and important position in that landscape it is the material of choice for a family of intraoral appliances that require rigidity, dimensional accuracy, biocompatibility, and the mechanical durability to withstand repeated occlusal loading over months of nightly wear. Understanding what makes this material class distinct from soft splint resins, model resins, and composite resin materials is the starting point for making correct material selections in a 3D printing workflow. This guide covers the material science behind splint hard resin, the specific dental applications it is designed for, the properties that separate clinical-grade formulations from lower-quality options, and how to integrate it effectively into a modern dental 3D printing workflow. Whether you are a dental lab material supplier evaluating what to stock, a lab technician selecting materials for a new printer, or a clinician setting up an in-office printing workflow, the information here will help you make the right call. What Is Splint Hard Resin? Material Science Explained Splint hard resin is a class of photopolymer resin formulated specifically for 3D printing rigid dental splints, night guards, occlusal appliances, and bruxism devices. Unlike general-purpose 3D printing resins, dental splint hard resins are engineered to meet the specific mechanical, biocompatibility, and optical requirements of intraoral appliances that sit against oral tissue for extended periods and must withstand significant occlusal forces without fracturing, deforming, or discoloring. At the chemistry level, splint hard resins are acrylate or methacrylate-based photopolymers the same polymer backbone as most dental photopolymers but formulated with a higher cross-link density than soft splint resins or flexible appliance materials. Cross-link density is the key variable that controls rigidity: higher cross-linking between polymer chains produces a harder, stiffer, more fracture-resistant cured material. The specific cross-link density of a splint hard resin is calibrated to produce a material hard enough to resist deformation under occlusal load while remaining impact-resistant enough not to fracture under the sudden forces of bruxism events. This distinction from composite resin is worth clarifying directly. Dental composite resin is a direct or indirect restorative material filled resin designed for tooth-colored fillings, inlays, onlays, and veneers. It is optimized for wear resistance, optical properties, and bond strength to tooth structure. Splint hard resin is an appliance material optimized for flexural strength, impact resistance, dimensional accuracy after printing, and long-term biocompatibility against soft tissue. These are different material categories with different formulation priorities and different clinical applications. Substituting one for the other produces predictably poor clinical results. Key Properties of Clinical-Grade Splint Hard Resin The dental lab materials market contains a wide range of products labeled as “splint resin” or “night guard resin.” The performance gap between clinical-grade splint hard resins and lower-quality alternatives is significant and directly impacts patient outcomes. Here are the properties that define clinical-grade formulations: Flexural Strength Flexural strength is the resistance to bending and fracture under load — the most clinically relevant mechanical property for an occlusal splint. Clinical-grade splint hard resins deliver flexural strength in the 80–120 MPa range. This is sufficient to resist fracture under the high cyclic loads generated by bruxism patients, who can produce bite forces of 400–800 N during parafunction. Resins with flexural strength below 70 MPa are at measurable fracture risk in heavy bruxers and should not be used for full-arch night guards in this patient population. Shore D Hardness Shore D hardness measures surface resistance to indentation — the property that determines whether an occlusal surface will scratch, pit, or wear under repeated tooth contact. Clinical-grade splint hard resins target Shore D values of 78–88, which produces a surface hard enough to resist indentation from tooth cusps while remaining below the hardness level that would cause excessive wear to opposing dentition. This balance is clinically important: a splint that is too soft wears through quickly; a splint harder than natural enamel can cause enamel loss on opposing teeth. Biocompatibility Intraoral appliances contact oral mucosal tissue for 6–8 hours per night over months or years of use. Clinical-grade splint hard resins must meet ISO 10993 biocompatibility standards and Class IIa medical device requirements in regulated markets. Residual monomer uncured photopolymer left in the print after the initial cure cycle is the primary biocompatibility risk factor. A thorough post-cure protocol using appropriate UV intensity and duration is essential to minimize residual monomer to within acceptable limits. This is a workflow requirement, not just a dental lab materials specification: the best resin in the world will have unacceptable residual monomer if the post-cure is inadequate. Dimensional Accuracy A splint that fits poorly at delivery requires chairside adjustment, which wastes clinical time and risks patient dissatisfaction. Clinical-grade splint hard resins are formulated with controlled shrinkage during photopolymerization typically below 2% volumetric shrinkage and are tested for dimensional stability across the print volume of standard dental 3D printers. Formulations with high shrinkage produce appliances that warp away from the printed model shape, resulting in poor intraoral fit. Color Stability Patients wear night guards long-term, and visible yellowing or staining of the appliance material within weeks of delivery creates a perception of poor quality that reflects on the lab and the prescribing dentist. Clinical-grade splint hard resins use colorfast pigment systems that resist yellowing under UV exposure and resist staining from common patient behaviors including coffee and tea consumption. Cheaper resins with poor color stability yellow noticeably within 4–6 weeks of regular use. Primary Applications of Splint Hard Resin in Dental 3D Printing The key splint hard resin product line from Keystone Industries represents one of the most widely used clinical-grade splint hard formulations in US dental labs, validated across a broad range of intraoral appliance applications. The following are the primary clinical indications for splint hard resin in dental 3D printing workflows. 1. Occlusal Night Guards for Bruxism The most common application for splint hard resin is the fabrication of occlusal night guards for patients with bruxism involuntary teeth grinding during sleep. These appliances typically cover the full upper or lower arch, provide a flat occlusal platform that redirects jaw muscle forces, and must withstand nightly parafunction without fracturing or deforming. 3D-printed night guards in splint hard resin outperform conventionally fabricated thermoplastic guards in fit accuracy, material consistency, and repeatability. A scanned model and digital design can be reprinted identically when a patient loses or damages their appliance a major advantage over vacuum-formed guards that require a new physical model for each fabrication. 2. Michigan Splints and Anterior Repositioning Appliances Michigan splints are full-arch maxillary occlusal splints with a flat bite plane and canine guidance ramps used in the management of temporomandibular disorders (TMD). They require precise occlusal surface geometry to produce the correct muscle deprogramming effect a requirement that 3D printing meets more reliably than hand-fabrication. The rigidity of splint hard resin is essential here: a soft or semi-rigid material would deform under occlusal contact and fail to produce the flat bite plane geometry required for therapeutic effect. 3. Clenching Suppression Splints (NTI-Style) Anterior-only clenching suppression devices are small, rigid appliances that cover only the front teeth to reduce masseter muscle activity. Their small size and precise geometry make them ideal for 3D printing — and their clinical function depends entirely on maintaining rigid occlusal contacts at the incisors, making splint hard resin the only appropriate material class. 4. Repositioning Splints for TMD Mandibular repositioning appliances guide the jaw into a therapeutic position during sleep to reduce condylar loading and relieve TMD symptoms. The dimensional accuracy requirements are stringent — even 0.1–0.2 mm of fit error can significantly alter the jaw position achieved. 3D printing in clinical-grade splint hard resin is currently the most accurate fabrication method available for these appliances. 5. Athletic Mouthguards (Hard Component) Dual-layer sports mouthguards that combine a hard outer shell with a soft inner liner use splint hard resin for the outer structural component. The hard shell provides impact distribution and structural integrity while the soft liner provides shock absorption and patient comfort. 3D printing the hard component allows custom geometry per patient anatomy rather than the generic sizing of stock mouthguards. Splint Hard Resin vs. Soft Splint Resin: Choosing the Right Material The choice between hard and soft splint resin is one of the most frequent material selection questions in dental 3D printing. The answer depends on the specific appliance function, the patient’s clinical presentation, and the prescribing dentist’s treatment protocol. Neither material is universally superior they serve different clinical functions. When evaluating dental splint printing resin options, the starting point is always the clinical indication not personal preference or material availability. The following comparison provides a decision framework for the most common appliance types. Appliance Type Recommended Material Reason Michigan splint / full-arch occlusal guard Splint hard resin Flat bite plane requires rigid surface geometry Heavy bruxism night guard Splint hard resin High occlusal force demands fracture resistance Sleep apnea MAD device Splint hard resin Dimensional accuracy critical for repositioning TMD repositioning splint Splint hard resin Precise jaw position requires rigid, non-deforming material Mild-moderate bruxism guard Soft splint resin Comfort priority; lower force levels tolerated Sports mouthguard (single layer) Soft splint resin Impact absorption is primary requirement Pediatric night guard Soft splint resin Comfort and compliance in pediatric patients Dual-layer sports guard (outer shell) Splint hard resin Structural outer layer; soft resin used for inner liner Keystone KeySplint Hard: The Industry Standard for 3D Printed Splints keysplint hard from Keystone Industries has established itself as the benchmark formulation for 3D printed occlusal splints in US dental labs. It is an MSLA/DLP-compatible biocompatible rigid photopolymer resin cleared for use as an intraoral dental device material, validated across the most common desktop dental 3D printers in use today. The formulation delivers a Shore D hardness of approximately 84 and flexural strength in the 90–100 MPa range well within the clinical requirement zone for full-arch bruxism guards in heavy parafunction patients. It is available in both clear and tooth-colored variants, with color stability that meets clinical expectations for long-term patient use. For dental lab material supplier operations and in-office printing workflows alike, KeySplint Hard provides the documentation, batch consistency, and performance data needed to integrate it confidently into regulated dental device production. Key specifications of KeySplint Hard: Printer compatibility: MSLA (385/405 nm), DLP compatible with Formlabs Form series, SprintRay Pro, Asiga Max, Phrozen Sonic series, and most open-system dental 3D printers Shore D hardness: ~84 within optimal range for occlusal splint applications Flexural strength: ~90–100 MPa suitable for full-arch heavy bruxism guards Biocompatibility: ISO 10993 tested, Class IIa medical device material Post-cure requirement: Standard UV post-cure station, 385/405 nm, per Keystone’s published protocol Available variants: Clear and tooth-colored color-stable formulations Shelf life: 12 months from manufacture date in sealed packaging at recommended storage conditions 3D Printing Workflow for Splint Hard Resin: Step-by-Step Producing a clinically acceptable 3D-printed hard splint requires attention to each stage of the printing and post-processing workflow. Errors at any stage print orientation, support placement, exposure settings, or post-cure directly affect fit accuracy, surface quality, and biocompatibility. The following workflow applies to the majority of open-system dental 3D printers used in the US market. ZirconiaGuys stocks the full Keystone dental resin 3d printing range from US inventory including KeySplint Hard, KeySplint Soft, KeyModel, KeyGuard, and the complete Keystone dental photopolymer lineup. All products ship from domestic stock with same-day or next-day availability. Digital design and file preparation Design the splint in your CAD software (exocad, 3Shape, or specialized splint design software). Export as STL or OBJ. Ensure the occlusal surface geometry is correct at this stage post-print corrections to occlusal geometry are labor-intensive and reduce the workflow efficiency advantage of digital fabrication. Slice and support generation Import into your printer’s slicing software. Orient the splint at 45–60 degrees to the print platform to minimize peel forces and reduce suction cup effect on large flat surfaces. Generate supports on the tissue surface rather than the occlusal surface wherever possible support removal marks on the occlusal surface require additional polishing. Resin preparation Shake or gently agitate the resin bottle before use to ensure pigment and photoinitiator are evenly distributed. Bring resin to room temperature (18–25°C) before printing — cold resin has higher viscosity, which can cause print failures and surface irregularities. Fill the resin vat to the minimum required level. Print Run the print using Keystone’s published exposure settings for your specific printer model. Do not use generic PMMA or model resin profiles for splint hard resin the exposure requirements differ and using incorrect settings produces under-cured or over-cured parts with poor mechanical properties. Isopropyl alcohol wash Remove the printed splint from the platform and wash in fresh IPA (isopropyl alcohol) for 3–5 minutes. Use two-stage washing a dirty wash stage followed by a clean wash stage to avoid redepositing partially dissolved resin on the print surface. Compressed air can be used to clean internal features. Post-cure This step is non-negotiable for biocompatibility. Post-cure in a UV curing station at 385/405 nm for the duration specified in Keystone’s published protocol for the specific resin variant. Under-curing leaves residual monomer at levels that may cause tissue irritation. Over-curing can cause surface brittleness and color yellowing. Support removal and finishing Remove supports carefully with flush cutters. Sand support marks smooth with 320–600 grit sandpaper. Polish the occlusal surface to a high gloss using a sequence of pumice slurry and acrylic polishing compound. A polished surface is significantly more resistant to staining and biofilm accumulation than a matte surface. Fit check and delivery Check fit on the patient model before delivery. Minor fit adjustments can be made with an acrylic bur and polishing. Verify that the occlusal contacts are as designed 3D printing at correct parameters should require minimal occlusal adjustment at delivery if the digital design was accurate. Splint Hard Resin vs. Milled PMMA Splints: Which Is Right for Your Lab? Dental labs that produce occlusal splints have two primary fabrication methods available: 3D printing in splint hard resin and milling from PMMA discs. Both methods are clinically acceptable, and the right choice depends on the lab’s existing equipment, production volume, and case mix. Understanding this comparison also helps contextualize splint hard resin relative to the broader range of dental lab materials a lab stocks. Factor 3D Printed (Splint Hard Resin) Milled PMMA Equipment required 3D printer + post-cure station CAD/CAM mill + PMMA discs Material cost per unit Lower — resin per volume used Moderate — disc waste from milling Production time Faster for batch production Faster for single units Fit accuracy Excellent — digitally controlled Excellent — digitally controlled Surface finish (as-produced) Requires polishing Smooth from mill — less polishing Color options Clear, tooth-colored Wide range of shade options Batch production Multiple units per print One at a time typically Biocompatibility Post-cure dependent Pre-polymerized — inherently lower monomer Reprintability Exact reprint from file Re-mill from same design file How Splint Hard Resin Fits Into a Full Dental 3D Printing Material Strategy? For dental labs and clinicians building a comprehensive 3D printing material inventory, splint hard resin is one of several specialized resin categories that each address a distinct clinical application. Understanding the full material ecosystem helps labs stock intelligently without overpaying for redundant material categories. This also contextualizes splint hard resin relative to the broader dental lab materials landscape that includes CAD/CAM milling materials like dental zirconia discs, PMMA, and wax. Resin Category Primary Application Key Property Splint hard resin Night guards, occlusal splints, TMD appliances Rigidity, flexural strength, biocompatibility Splint soft resin Sports guards, comfort-priority night guards Flexibility, impact absorption, patient comfort Model resin Diagnostic study models, working models Dimensional accuracy, surface detail resolution Surgical guide resin Implant surgical guides Rigidity, translucency, sterilizability Try-in resin Try-in restorations, provisionals Tooth color, machinability, removability Denture base resin 3D-printed denture bases Tissue color, biocompatibility, fit accuracy Castable resin Burnout patterns for metal casting Complete burnout, ash residue <0.1% Ortho model resin Orthodontic model series High accuracy, rapid printing speed For labs that also run CAD/CAM milling workflows, the material strategy extends beyond 3D printing resins to include dental zirconia discs for fixed restorations, PMMA for denture bases and temporaries, and wax discs for casting patterns. The distinction between 3D printing materials and milling materials is workflow-based, not quality-based: both platforms can produce clinically excellent outcomes when matched to the right material for each application. Labs that stock zirconia multilayer discs for fixed restorations and splint hard resin for removable appliances are operating a complete, materials-optimized digital production workflow.
Learn more
Why Dental Labs Prefer Aidite PMMA for Denture Bases?
The denture base is one of the most structurally and esthetically demanding applications in a dental lab. It must be strong enough to withstand daily occlusal forces and handling, accurate enough to maintain fit over years of wear, biocompatible enough to sit against sensitive oral tissue all day, and natural-looking enough that patients accept it without hesitation. The dental lab materials you choose for this application directly determine whether your lab hits all four of those requirements consistently — or spends time on remakes and fit adjustments. As a dedicated dental lab material supplier to US dental labs, we stock and work with multiple PMMA formulations across different applications. Aidite PMMA for denture bases has become the consistent preference among labs that have evaluated it against alternatives — not because of branding, but because of specific, measurable performance characteristics that translate directly into better production outcomes. This guide explains what those characteristics are and why they matter in daily lab workflow. What Is PMMA and Why Is It the Standard for CAD/CAM Denture Bases? PMMA polymethyl methacrylate is the material class that replaced conventional heat-cured acrylic as the preferred denture base material in modern CAD/CAM dental labs. Unlike conventional acrylic, which is mixed and cured chairside or in a flask in a time-consuming manual process, PMMA discs are pre-polymerized under industrial conditions at significantly higher pressure and temperature than bench curing allows. This industrial pre-polymerization is what gives CAD/CAM PMMA its material advantages over conventional denture acrylic. The pre-polymerization process eliminates most of the residual monomer present in conventionally processed acrylic a key biocompatibility advantage, as residual monomer is associated with tissue irritation and allergic responses in sensitive patients. It also produces a denser, more homogeneous polymer matrix, which translates into better fracture resistance, dimensional stability, and machinability compared to hand-mixed acrylic. In a CAD/CAM workflow, the lab scans the patient model, designs the denture base digitally, mills it from a pre-polymerized PMMA disc, and delivers a dimensionally accurate, consistently reproducible result. The material quality of the PMMA disc its hardness, homogeneity, shade formulation, and surface finish after milling determines the final quality of the denture. This is why dental lab materials selection at the disc level is not a commodity decision. What Makes Aidite PMMA Discs the Preferred Choice for Denture Bases? Aidite has built its reputation in the dental CAD/CAM market through consistent material quality, reliable batch-to-batch performance, and a product range calibrated specifically to the demands of dental laboratory production. Their PMMA denture base discs are formulated to address the specific failure points that labs encounter with lower-quality PMMA: shade instability, chipping during milling, poor polishability, and inconsistent fit across batches. The aidite denture base pmma disc is engineered specifically for full and partial denture base applications in open-system CAD/CAM mills. The formulation prioritizes the four properties that matter most in denture base production: machinability, shade accuracy, surface finish quality, and long-term dimensional stability. Each of these translates directly into measurable lab workflow benefits. 1. Machinability Aidite PMMA discs are formulated for clean chip formation during milling — a property that directly affects surface finish quality, tool wear, and the frequency of milling defects like micro-chipping at edges and tissue surface irregularities. Poorly formulated PMMA tends to produce rough, fibrous milled surfaces that require extensive manual polishing. Aidite’s formulation produces a smooth milled surface that requires minimal post-milling polishing to achieve clinical acceptability, reducing bench time per unit significantly. 2. Shade accuracy and stability The gingival shade of a denture base is one of the most visible esthetic elements a patient evaluates. Aidite PMMA discs are pigmented using colorfast formulations that match the natural tissue tones of gingival anatomy across a range of patients — from lighter pink shades for fair-skinned patients to deeper reddish-brown tones for patients with more melanin-rich tissue coloring. Importantly, the shade stability over time is consistent: Aidite PMMA does not yellow or grey significantly under oral conditions or UV exposure at the same rate as lower-quality PMMA formulations. 3. Biocompatibility The industrial pre-polymerization of Aidite PMMA produces a residual monomer content well within biocompatibility thresholds. For labs serving patients with known acrylic sensitivity or for practitioners who specify low-residual-monomer materials as a standard of care, Aidite’s formulation meets ISO 20795-1 biocompatibility requirements for denture base polymers. As a trusted dental lab material supplier, ZirconiaGuys only stocks PMMA products that meet this standard but Aidite’s documentation and batch consistency in this regard is particularly reliable. 4. Flexural strength and fracture resistance Denture bases are subjected to repeated flexural stress during mastication and to impact stress when dropped. Aidite PMMA denture base discs deliver flexural strength typically in the 80–95 MPa range meeting ISO 20795-1 requirements for denture base polymers and providing adequate fracture resistance for full-arch dentures in standard clinical use. This is not exceptional by the standards of reinforced acrylic, but it is consistently within the clinical requirement range, and the batch-to-batch consistency means labs can rely on predictable mechanical performance from every disc in a production run. How Aidite PMMA Compares to Generic PMMA Alternatives? Labs evaluating aidite pmma dental discs against generic or unbranded PMMA alternatives consistently report the same advantages: cleaner milling surfaces, better shade consistency across batches, and more predictable polishing behavior. The following comparison reflects the properties labs most commonly use to evaluate PMMA denture base materials. Property Aidite PMMA Denture Base Generic PMMA Alternatives Milled surface quality Smooth, low post-processing Variable — often fibrous or rough Shade consistency Consistent batch to batch Frequent batch drift reported Residual monomer Within ISO 20795-1 limits Variable — not always documented Polishing ease High gloss achievable quickly More manual effort typically required Flexural strength 80–95 MPa typical Often lower and less consistent Dimensional stability High — low post-milling warping Moderate — warping more common CAD/CAM compatibility Open system, all major mills Varies — some proprietary systems only Documentation / certs Full ISO documentation available Often minimal or unavailable Aidite PMMA in the CAD/CAM Denture Workflow: Step by Step Understanding where PMMA disc quality impacts the workflow — and where it doesn’t — helps labs make the most of their material investment. Here is how Aidite PMMA performs at each stage of a standard CAD/CAM denture production workflow. Labs that have standardized on pmma denture material aidite report the most significant time savings in the post-milling polishing and quality control stages — where lower-quality materials demand extensive rework that Aidite’s formulation makes unnecessary. Scanning and digital design: The PMMA material grade has no impact on the scanning or design stage. Workflow begins at disc selection. Disc selection and mounting: Aidite denture base PMMA discs are available in standard diameters (98 mm) and thicknesses calibrated for full and partial denture base applications. The disc is mounted in the milling chuck with standard adapter compatibility for open-system mills including Roland, Amann Girrbach, Zirkonzahn, VHF, and Sirona. Milling: Aidite PMMA machines cleanly at standard PMMA cutting parameters. No special toolpath modifications are required. Chip evacuation is efficient, and the milled surface of the tissue side is smooth enough to proceed directly to polishing without intermediate grinding steps in most cases. Post-milling separation and cleanup: The milled denture base separates cleanly from sprues with minimal flashing. Edge cleanup is straightforward with a tungsten carbide bur or acrylic trimming tool. Polishing: This is where Aidite PMMA delivers its most visible workflow advantage. The formulation polishes to a high gloss in fewer steps than most PMMA alternatives. A standard sequence of pumice slurry followed by acrylic polishing compound achieves clinical-grade surface finish in approximately 10–15 minutes per denture base — compared to 20–30 minutes commonly reported with generic PMMA. Teeth setting and finishing: The dimensional accuracy of the milled base ensures that tooth setup proceeds from a stable, accurately fitted foundation. The shade of the base complements standard denture tooth shades without requiring additional tinting or characterization in most standard cases. Delivery and patient acceptance: Labs consistently report high patient acceptance of Aidite PMMA denture bases, citing natural gingival color, comfortable tissue adaptation, and absence of the “plastic” appearance associated with lower-quality PMMA bases. Aidite Multilayer PMMA: When to Upgrade from Standard Denture Base For labs producing temporary crowns, bridges, and long-term provisional restorations in addition to denture bases, the aidite pmma multilayer disc format extends the Aidite PMMA range into crown and bridge provisional applications. The multilayer format incorporates a dentine-to-incisal gradient within a single disc — the same gradient architecture concept used in multilayer zirconia, applied to PMMA for provisional restorations. The key distinction between Aidite’s standard denture base PMMA and the multilayer PMMA format is application. Denture base PMMA is formulated as a structural tissue-contact material — optimized for gingival shade accuracy, tissue compatibility, and structural integrity in full-arch applications. Multilayer PMMA is formulated as a crown and bridge provisional material — optimized for translucency, tooth shade accuracy, and the optical properties needed to produce natural-looking temporary restorations. Labs that run both denture and crown/bridge workflows should stock both formats. Using denture base PMMA for crown and bridge provisionals produces restorations that look opaque and flat compared to multilayer formulations. Using multilayer PMMA for denture bases wastes the optical gradient architecture on an application where gingival shade uniformity matters more than incisal translucency. Property Aidite Denture Base PMMA Aidite Multilayer PMMA Primary application Full & partial denture bases Temporary crowns & bridges Shade format Uniform gingival tissue shades Dentine-to-incisal gradient Translucency Low-moderate (tissue-like) High (tooth-like) Key performance priority Biocompatibility, fit accuracy Optical esthetics, shade gradient Post-milling polishing High gloss achievable quickly High gloss with minimal effort Best stocked for Denture labs, full-service labs Crown & bridge, full-service labs Aidite PMMA vs. Other Dental Lab Material Options for Denture Bases Dental labs evaluating denture base materials have three main material categories to consider: conventional heat-cured acrylic, CAD/CAM PMMA discs, and injected thermoplastic bases. Each serves a different workflow and patient population. The following comparison helps clarify where dental lab materials like Aidite PMMA fit relative to the alternatives. Material Type Aidite PMMA (CAD/CAM) Conventional Heat-Cured Acrylic Injected Thermoplastic Workflow CAD/CAM milling Flask and pack, bench processing Injection molding Fit accuracy High — digitally controlled Variable — operator-dependent Good — mold-controlled Production time Fast — milling + polish Slow — multi-step bench process Fast once mold is ready Residual monomer Very low — pre-polymerized Higher — bench curing limitation None Biocompatibility ISO 20795-1 compliant Acceptable if processed correctly Excellent Shade options Multiple standard shades Wide range available Limited — system-dependent Repair/reline ease Standard acrylic repair Easy bench repair Difficult — bond issues CAD/CAM integration Native — designed for digital Not compatible Not compatible Buying Aidite PMMA in the US: What Labs Need to Know For US dental labs, sourcing dental lab materials like Aidite PMMA from a domestic inventory avoids the lead time uncertainty and import variability associated with direct overseas purchasing. ZirconiaGuys stocks Aidite PMMA denture base discs from US inventory, with standard orders typically shipping same day or next day. The zirconia blocks price comparison is worth noting for labs that stock both zirconia and PMMA: Aidite PMMA denture base discs are priced significantly lower per disc than comparable zirconia products, reflecting the lower raw material and manufacturing cost of PMMA relative to zirconia ceramic. For labs that calculate per-case material cost across their full workflow, PMMA denture base cases are among the most cost-efficient in the CAD/CAM portfolio. Labs that also produce CAD/CAM fixed restorations can consolidate their Aidite material supply through ZirconiaGuys stocking Aidite PMMA alongside Aidite zirconia multilayer discs, Aidite stain and glaze, and Aidite CAD/CAM accessories from a single US supplier. Consolidating dental lab material supply reduces ordering overhead, simplifies inventory management, and ensures consistent batch documentation across the full material range. The reason dental labs prefer Aidite PMMA for denture bases is not brand loyalty it is consistent, measurable performance in the specific properties that determine denture base quality: machinability, shade accuracy, biocompatibility, and dimensional stability. For labs that have evaluated multiple PMMA formulations in actual production conditions, Aidite consistently outperforms generic alternatives on the metrics that determine clinical outcomes and reduce rework. Selecting the right dental lab materials for denture base production is a decision that compounds across every case in your production schedule. A material that polishes faster, holds its shade longer, and mills more cleanly reduces labor cost and remake risk on every single denture you produce. That is the case for Aidite PMMA and it is why labs that switch to it rarely switch back.
Learn more
Zirconia vs Lithium Disilicate Crowns: A Complete Comparison
The comparison between zirconia and lithium disilicate is one of the most frequently debated material decisions in modern dental labs and most of the debate focuses on the wrong question. Asking which material is better misses the point. They're not in competition with each other. They occupy different parts of the clinical spectrum, and labs that understand those parts clearly produce better outcomes and run more efficient workflows than labs that default to one material for everything. This guide covers the comparison from a lab perspective not just what each material is, but how each behaves through the CAD/CAM workflow, what the fabrication differences mean in practice, how the clinical indications map to specific products, and how to build a material inventory that uses both correctly. The clinical decision ultimately belongs to the prescribing dentist, but the lab's understanding of the materials directly shapes the quality of the conversation. Material fundamentals: what each one actually is Before comparing performance, it's worth being precise about what distinguishes these two materials structurally because the structural difference explains every clinical and workflow difference that follows. Zirconia is a polycrystalline ceramic yttria-stabilised zirconium dioxide (Y-TZP) in which the entire structure is crystalline with no glassy phase. Its strength comes from the crystal network itself and from a crack-arrest mechanism called transformation toughening, where the crystal structure resists crack propagation by undergoing a phase change at the crack tip. This is what makes high-strength 3Y-TZP zirconia reach 900–1,200 MPa and why it doesn't fracture the way glass-based ceramics do under heavy load. Lithium disilicate is a glass ceramic a partially crystalline material where approximately 70% of the volume consists of needle-like lithium disilicate crystals (Li₂Si₂O₅) embedded in a residual glassy matrix. The glassy phase is what gives lithium disilicate its optical quality light transmits through the glass and scatters off the crystals in a way that closely resembles natural enamel. The crystals provide toughening through crack deflection. The result is a material with flexural strength of 360–500 MPa and optical properties that zirconia, as a purely polycrystalline material, cannot fully replicate. The fundamental tradeoff is clear from the structure: zirconia's crystalline network gives it superior strength; lithium disilicate's glassy phase gives it superior optical quality. Neither material has both properties simultaneously. Every other difference in the comparison flows from this. Strength: the numbers and what they mean in practice Lithium disilicate at 360–500 MPa is significantly stronger than feldspathic porcelain (60–100 MPa) and adequate for anterior single-unit crowns on natural teeth under normal occlusal load. The fracture toughness of approximately 2.75 MPa·m½ (pressed) means crack deflection provides a meaningful safety margin beyond the raw flexural strength figure. Zirconia at 900–1,200 MPa (3Y-TZP) is two to three times stronger than lithium disilicate. For posterior implant crowns, multi-unit bridges, and full-arch prostheses, this strength difference is clinically decisive implants transfer bite force directly to the restoration without the cushioning of a periodontal ligament, which pushes even anterior bite force into the range where lithium disilicate fracture risk becomes clinically significant. In practice, the strength decision resolves simply: posterior position, implant support, bridge span, or bruxism → zirconia. Anterior single unit on natural teeth with verified light bite → lithium disilicate is clinically viable and optically superior. Any case that doesn't meet all those conditions → zirconia. Aesthetics: where the comparison is genuinely close The aesthetic gap between lithium disilicate and zirconia has narrowed substantially over the past decade but it hasn't closed. Understanding where the gap still exists helps labs and clinicians make honest prescribing decisions rather than over- or under-selling either material. Lithium disilicate's optical advantage derives from its glassy phase. The way light enters, scatters internally off the crystal network, and exits the restoration closely approximates the optical behaviour of natural enamel. The depth of translucency, the way colour shifts subtly from cervical to incisal, and the surface gloss achievable after glazing create a restoration that in the hands of a skilled technician is genuinely difficult to distinguish from a natural tooth under varied lighting. Zirconia multilayer technology has addressed the original opacity limitation significantly. The introduction of 4Y and 5Y formulations with higher yttria content produces zirconia with translucency levels far above early-generation material, and multilayer zirconia discs build the gradient directly into the blank 3Y-equivalent strength at the cervical, 5Y-equivalent translucency at the incisal. For most anterior cases where a patient and clinician assess the result without direct comparison to an adjacent natural tooth under calibrated lighting, a well-executed multilayer zirconia crown is now clinically acceptable. The remaining gap appears in demanding anterior cases central incisors adjacent to natural teeth in high-contrast lighting, cases requiring very high incisal translucency, or patients with a history of scrutinising their restorations. In these cases, lithium disilicate remains the more appropriate specification. For everything else in the aesthetic zone, a good zirconia multilayer product eliminates the fracture risk of lithium disilicate without a meaningful aesthetic compromise visible to the patient. The Explore Esthetics zirconia multilayer from UPCERA covers this anterior range well a 4Y/5Y multilayer formulation that delivers the translucency gradient and optical depth needed for most anterior aesthetic cases at zirconia's strength, without the fracture risk of a glass ceramic in borderline indications. CAD/CAM workflow: fabrication differences that affect lab operations Both materials are compatible with CAD/CAM milling, but the workflow differs significantly enough to affect lab planning, equipment requirements, and per-unit cost. Factor Zirconia Lithium disilicate (milled) Milling state Pre-sintered ("green") — soft, fast to mill Partially crystallised ("blue") — harder, slower, requires diamond burs Tooling required Standard carbide or zirconia-specific burs Diamond burs — higher tooling cost per unit Milling time Faster — typically 15–25 min per unit Slower — typically 30–45 min per unit Post-mill firing Sintering at 1,450–1,550°C, 4–8 hours Crystallisation firing at ~840°C, 25–45 min Same-day delivery Possible with fast-fire sintering (<90 min) Standard — crystallisation cycle is short Shrinkage during firing 20–25% — oversized milling compensates Minimal — design-to-delivery dimension more direct Adhesive bonding Cannot be HF etched — alternative bonding protocols HF etchable — strong adhesive bond For labs running high-volume posterior crown production, the zirconia workflow is operationally more efficient: faster milling, lower tooling cost per unit, and nesting software that places multiple units per milling cycle on a single zirconia multilayer disc. A lab running 20 posterior units daily on zirconia discs will run meaningfully lower per-unit production cost than the equivalent lithium disilicate workflow. For anterior aesthetic cases where lithium disilicate is specified, the shorter crystallisation firing (25–45 minutes versus zirconia's standard 4–8 hour sintering) makes same-day anterior restorations more straightforward without needing a fast-fire sintering furnace. The tradeoff is higher diamond tooling cost and slower milling time per unit compared to zirconia. Pressed vs milled lithium disilicate: a workflow note Labs working with lithium disilicate have two fabrication routes. Pressed lithium disilicate using heat-pressed ingots via the lost-wax technique produces slightly stronger restorations (~400 MPa) with better fracture toughness (2.75 MPa·m½) than the milled equivalent (~360 MPa, 2.25 MPa·m½). For three-unit anterior bridges where every MPa matters, pressed is the stronger clinical choice. For labs running full digital workflows without press furnace capability, milled lithium disilicate (IPS e.max CAD) integrates into the existing CAD/CAM system. The mechanical difference between pressed and milled is clinically significant for bridge spans but largely irrelevant for single-unit anterior crowns where either format exceeds the loading requirement comfortably. Clinical indications: a clear decision framework The clinical question isn't "which material is better" it's "which material suits this case." The following framework reflects the current clinical evidence and the mechanical properties of each material: Clinical situation Recommended material Reason Posterior implant crown Zirconia (3Y-TZP) Direct loading without periodontal cushioning; lithium disilicate fracture risk unacceptable Posterior crown on natural teeth Zirconia (3Y or 4Y) Strength priority; monolithic zirconia is efficient and predictable Multi-unit posterior bridge Zirconia (3Y-TZP) Lithium disilicate not indicated for posterior bridges Full-arch prosthesis Zirconia (3Y-TZP) Only material with adequate strength for full-arch loading Anterior single crown — highest aesthetic demand Lithium disilicate Optical quality remains superior; strength adequate for anterior load Anterior single crown — most cases Zirconia multilayer (4Y/5Y) Adequate aesthetics without fracture risk; conservative choice Veneers Lithium disilicate Minimal preparation, adhesive bonding, superior translucency Inlays and onlays Lithium disilicate Conservative prep, strong adhesive bond, adequate posterior strength Anterior implant crown Zirconia multilayer (4Y/5Y) or lithium disilicate Clinician and patient preference; verify bite load and parafunctional history Bruxism patient Zirconia (any position) Parafunctional loading exceeds lithium disilicate's safe range Cost comparison: material and workflow economics From a dental lab material supplier perspective, the cost comparison between zirconia and lithium disilicate involves more than the raw material price. Zirconia blocks price per unit is typically lower than lithium disilicate ingots or milling blanks for equivalent case types but the full cost comparison must include tooling, milling time, and firing requirements. For posterior crowns where zirconia is the appropriate material, the economics strongly favour zirconia: lower material cost per unit, faster milling, standard tooling, and a workflow that supports high-volume nesting on a single zirconia multilayer disc. For anterior aesthetic cases where lithium disilicate is specified, the slightly higher material cost is justified by the aesthetic outcome and the shorter crystallisation cycle partially offsets the higher per-unit milling time. Labs that over-specify lithium disilicate for posterior work using it in positions where zirconia is the correct clinical choice pay a cost and workflow penalty without clinical benefit. Labs that over-specify zirconia for all anterior cases may be leaving aesthetic quality and clinical appropriateness on the table in cases where lithium disilicate is the better choice. Building a lab inventory that covers both materials correctly For labs serving a mixed case type, the practical inventory approach is: Zirconia — stock high-strength 3Y for all posterior, implant, and bridge work. Stock a quality zirconia multilayer in 4Y/5Y for anterior and premolar cases. Use zirconium dental material in both pre-shaded and white configurations depending on volume and prescription mix. Source from a reliable dental lab material supplier with batch documentation and technical support. Lithium disilicate — stock for anterior single-unit crowns where the highest aesthetic outcome is required, veneers, and inlays/onlays. Milled format for digital-only labs; pressed format if press furnace capability exists. Keep the indication range honest using it outside its mechanical comfort zone creates clinical risk and remakes. The Aidite zirconia range available through Zirconia Guys in both pre-shaded and white, across all grades and formats covers the complete zirconia side of this inventory from a single North American dental lab material supplier relationship. Get in touch with the team to discuss which grades, formats, and shade configurations suit your milling system and case mix.
Learn more
Types of Zirconia Crowns: Complete Material Guide
Zirconia is now the dominant crown material across most dental labs but "zirconia crown" is a category, not a single material. The grade, formulation, and construction of the zirconia blank determine whether the crown will perform well or fail, look natural or opaque, and suit the clinical case or compromise it. Labs that understand these distinctions make better material decisions. Labs that treat all zirconia as interchangeable create clinical problems that are difficult to trace back to the source. This guide covers the types of zirconia crowns comprehensively from the grade classifications that define mechanical behaviour, to multilayer technology, cementation protocols, and how to source dental lab materials that deliver consistent clinical results. It's written for dental labs and clinicians who want technical clarity, not brand comparisons. What determines the type of a zirconia crown? The classification of zirconia crown material starts with yttria content the mole percentage of yttrium oxide (Y₂O₃) added to zirconium dioxide (ZrO₂) during manufacturing. Yttria stabilises the crystal structure of the zirconia and, crucially, controls the ratio of tetragonal to cubic crystalline phase. That ratio is what shifts the material along the strength-to-translucency spectrum. More tetragonal phase higher strength, lower translucency. More cubic phase higher translucency, lower strength. The yttria percentage shifts the balance between these two phases, which is why a 3Y-TZP and a 5Y-PSZ are both zirconia dental material but behave so differently under load and light. Understanding this relationship rather than just memorising brand names gives both labs and clinicians a framework for making grade decisions that transfers across every zirconia product they'll ever encounter. 3Y-TZP: the high-strength standard 3Y-TZP (3 mol% yttria, tetragonal zirconia polycrystal) is the original dental zirconia formulation and remains the strongest. With nearly 100% tetragonal crystal phase, it reaches flexural strength of 900–1,500 MPa through transformation toughening the crack-arrest mechanism where the crystal structure at a crack tip undergoes a phase transformation that expands the material slightly, closing the crack rather than allowing it to propagate. This self-limiting crack resistance is what makes 3Y-TZP uniquely suited to the most demanding clinical situations. For posterior implant crowns, multi-unit bridges, bruxism patients, and full-arch prostheses, no other ceramic reliably performs at this mechanical level. The absence of a periodontal ligament on implants means all bite force transfers directly to the restoration 3Y-TZP absorbs that loading without the fracture risk that lower-strength grades would carry. The limitation of 3Y-TZP is optical. Its nearly fully tetragonal structure scatters light differently from natural enamel early monolithic 3Y restorations were noticeably opaque and flat in the anterior region. That limitation drove the development of higher yttria formulations for aesthetic cases, but 3Y remains the correct specification for any case where mechanical performance is the primary requirement. 4Y zirconia: the versatile middle ground 4Y zirconia (4 mol% yttria, partially stabilised zirconia) represents the practical middle of the spectrum a composition of approximately 75% tetragonal and 25% cubic phase that produces both higher translucency and adequate strength for a wide range of clinical indications. Flexural strength of 700–1,050 MPa is sufficient for anterior and premolar crowns, short-span bridges, and cases where moderate aesthetic improvement over 3Y is clinically relevant. The cubic phase contribution increases light transmission meaningfully, producing restorations that look significantly more natural in the smile zone than 3Y without the strength reduction that 5Y formulations carry. The expansion of 4Y zirconia's practical range particularly as some manufacturers have pushed its strength ceiling past 1,000 MPa has made it increasingly useful as a single-grade solution for labs running a mixed anterior/premolar caseload. A 4Y crown that reaches 1,050 MPa in the cervical region handles most non-implant posterior cases adequately while satisfying the aesthetic requirements of premolar and anterior positions. Where 4Y is not the right choice: posterior implant crowns and full-arch cases where the mechanical demands require the transformation toughening that only a predominantly tetragonal structure provides, and cases where the aesthetic expectation is at the highest level which calls for 5Y. 5Y zirconia: maximum translucency for anterior aesthetics 5Y-PSZ (5 mol% yttria, partially stabilised zirconia) has a crystal composition of approximately 50% tetragonal and 50% cubic phase, producing the highest translucency available in a monolithic zirconia crown. In optimal conditions, a well-executed 5Y anterior crown approaches the optical quality of lithium disilicate the translucency, incisal depth, and light diffusion closely mimic natural enamel. Flexural strength of 500–700 MPa is clinically adequate for anterior single-unit crowns on natural teeth with light to moderate bite load. It is not adequate for posterior implant crowns, bruxism patients, or multi-unit bridges. A 5Y crown in a molar position under direct implant loading carries real fracture risk. Grade selection for 5Y requires genuine patient assessment not default prescription for all anterior cases. The strength reduction from 3Y to 5Y is not trivial it's roughly 40–50% of flexural strength. In the context of direct implant loading, that difference is clinically significant. Labs that prescribe 5Y for anterior implant crowns on patients with heavy bites are creating risk that the aesthetics do not justify. Multilayer zirconia crowns: resolving the grade tradeoff The practical problem with 3Y, 4Y, and 5Y as discrete grades is that most anterior and premolar crowns need both structural strength at the cervical margin and translucency at the incisal edge. A monolithic 3Y crown in an anterior position looks flat. A 5Y crown in a premolar position carries unnecessary fracture risk. Zirconia multilayer discs resolve this by building the gradient into the blank during manufacturing. The cervical third is formulated closer to 3Y for marginal strength; the incisal edge moves toward 5Y for optical depth. A single multilayer disc covers anterior and premolar indications in one material without requiring the clinician or lab to choose between strength and aesthetics both are present in the correct position within the blank. The quality of multilayer construction varies between manufacturers. Key differentiators are whether the gradient is continuous or stepped (continuous is preferable no visible demarcation lines), whether it uses ratio-based or fixed-thickness layers (ratio-based performs consistently across disc thicknesses), and how many distinct translucency zones the blank contains. Well-engineered multilayer discs from established manufacturers produce restorations where the gradient is clinically invisible there is no detectable line between the cervical and incisal zones in the finished crown. Monolithic vs. layered zirconia crowns A monolithic zirconia crown is milled from a single blank the restoration that exits the sintering furnace is the final crown, characterised through surface staining and glazing only. A layered zirconia crown uses a zirconia coping as a substructure, with feldspathic veneering porcelain built up over it by hand. The clinical case for monolithic zirconia has strengthened significantly over the past decade. Published systematic reviews report chipping rates of 5–15% over five years for veneered zirconia restorations, compared to essentially zero chip risk for monolithic work. For most posterior and premolar cases, monolithic zirconia is the superior long-term choice. For the highest aesthetic anterior cases where hand-built porcelain's optical complexity is genuinely necessary layered remains the gold standard, with the understanding that chip risk is the tradeoff accepted. Modern multilayer zirconia has substantially closed the aesthetic gap that previously justified layered work for many anterior cases. A high-quality multilayer monolithic crown now satisfies most anterior aesthetic requirements without the chipping liability of a veneered restoration. The cases that genuinely require layered work are narrower than they were five years ago. Cementation: the factor that determines long-term clinical success Even a correctly specified zirconia crown fails if cemented incorrectly. Cementation protocol is the most commonly mismanaged aspect of zirconia crown delivery, and understanding it correctly is as important as grade selection. Zirconia is not glass ceramic it cannot be etched with hydrofluoric acid. The surface treatment approach that works for lithium disilicate does not apply to zirconia. The bonding mechanism for zirconia is fundamentally different. Surface preparation: Airborne particle abrasion (sandblasting with 50-micron alumina at 1–2 bar pressure) cleans the intaglio surface and creates micro-mechanical retention. This step should be performed immediately before cementation contamination after sandblasting reduces bond strength. Some manufacturers have developed primer systems (MDP-based primers such as Clearfil Ceramic Primer, Z-Prime Plus) that create chemical bonding between the MDP phosphate monomer and the zirconia oxide surface. These primers, used after sandblasting, produce the best documented bond strengths for zirconia cementation. Cement selection: Resin cement (after MDP primer) produces the highest bond strength for zirconia and is recommended for shorter preparations, high-stress positions, and implant-supported crowns. For preparations with adequate retention and resistance form, conventional resin-modified glass ionomer cement is a viable option and easier to manage clinically. Self-adhesive resin cements without prior primer application produce lower bond strengths and are not the first-choice approach for challenging cases. Contamination control: Saliva contamination of a sandblasted zirconia surface reduces bond strength substantially. The clinical protocol should ensure contamination-free delivery from the point of sandblasting through cementation. If contamination occurs, re-sandblasting restores the surface but the sequence should be repeated, not just the primer application alone. Matching crown type to clinical indication: a practical framework Clinical situation Recommended grade Rationale Posterior crown, natural tooth, normal bite 3Y or 4Y monolithic Strength priority; aesthetics secondary in posterior positions Posterior implant crown 3Y only Direct loading without periodontal cushioning; transformation toughening essential Premolar crown 4Y or multilayer Moderate strength with improved aesthetics; both requirements met Anterior crown, normal bite Multilayer or 5Y Aesthetics primary; adequate strength for anterior loading Anterior implant crown, light bite 4Y or multilayer Better safety margin than 5Y under implant loading conditions Multi-unit bridge (3+ units) 3Y throughout Connector strength is the limiting factor; maximum grade required Full-arch prosthesis 3Y throughout Full-arch loading demands maximum strength; no exception Bruxism patient (any position) 3Y Parafunctional load cycles contraindicate lower-strength grades Sourcing dental lab materials for zirconia crowns The grade specification determines the clinical ceiling of a zirconia crown. The quality of the sourced material determines whether that ceiling is actually reached in production. Batch-to-batch consistency in zirconia dental lab materials is the variable that most affects long-term production quality. Pre-sintered density variation causes uneven shrinkage the same CAD file produces different marginal gaps between batches. Shade instability in pre-shaded products forces per-batch verification, eliminating the efficiency benefit. Hardness inconsistency accelerates milling tool wear in ways that compound over weeks. Zirconia blocks price differences between suppliers often reflect these quality variables directly. A cheaper blank that generates two remakes per month costs more in practice than a slightly more expensive blank that performs consistently. The correct evaluation is total cost per successful restoration, not material cost per unit. As a North American dental lab material supplier focused specifically on zirconia and milling materials, Zirconia Guys stocks both the UPCERA zirconia and Aidite zirconia ranges covering 3Y, 4Y, 5Y, and multilayer formulations in pre-shaded, white, and multilayer configurations, in both disc and block formats. Both product lines come with technical documentation, sintering curve guidance, and batch-level support for labs that need traceability. Get in touch with the team to discuss which grade, format, and shade configuration suits your case mix and milling system.
Learn more
Upcera Explore Functional and Explore Esthetic Multilayered Zirconia?
UPCERA's Explore range represents one of the more practical approaches to the perennial problem of zirconia grade selection: rather than asking labs to choose between strength and aesthetics, it offers two well-defined products that each optimise for one end of that tradeoff Explore Functional for strength-critical cases and Explore Esthetic for aesthetic-priority work while both using multilayered architecture that covers more clinical ground than a single-grade disc would. This guide covers both products in technical detail what the multilayer construction actually delivers, the mechanical specifications that determine clinical suitability, which cases each product handles best, and how to decide between them when the case falls in the overlap zone. It's written for dental labs and clinicians who want to make a well-reasoned material decision rather than rely on a product brochure. The multilayer principle: why it matters for both products Both Explore Esthetic and Explore Functional are built on multilayered zirconia architecture meaning the yttria content, and therefore the strength-translucency balance, varies continuously through the disc from cervical to incisal. This is not marketing language for a basic two-layer disc. The UPCERA Explore range uses a five-layer superimposed structure with nine gradient transition zones between those layers, producing a continuous optical and mechanical transition rather than visible step changes. Why does this matter practically? In a stepped multilayer disc, the boundary between layers can become visible in certain lighting conditions if the milling position places a margin or transitional zone exactly at a layer boundary. A continuously graduated structure eliminates this risk regardless of where in the disc the restoration is nested, the colour and translucency transitions are smooth. For anterior crowns in particular, this distinction between genuine gradient and stepped layer construction affects the final aesthetic outcome. The 3Y-4Y-5Y formulation strategy across both products is what drives the mechanical and optical performance simultaneously. The 3Y-equivalent zone at the cervical delivers the strength needed at the margin and the connector region; the 5Y-equivalent zone at the incisal delivers the translucency that makes the restoration look alive under natural and dental light. The ratio between these zones and the absolute strength values at each point differ between Explore Functional and Explore Esthetic, which is where their clinical distinction lies. Explore Functional: the high-strength multilayer option Explore Functional is the strength-priority disc in the range. Its cervical zone reaches approximately 1,050–1,100 MPa placing it firmly in the 3Y-TZP performance band while the incisal zone maintains adequate translucency for anterior work without the significant strength reduction that a full 5Y formulation would produce. The clinical indications where Explore Functional is the correct specification are clear. Full-arch prostheses where a complete arch of restored dentition must sustain sustained bilateral occlusal loading across all positions require the higher strength profile at every connector point. Multi-unit posterior bridges across three or more units carry significant cantilever forces at connectors that demand a material with the transformation toughening mechanism more fully active at those zones. Posterior implant crowns, where bite force transfers directly to the restoration without a periodontal ligament to distribute it, also belong in Explore Functional territory. What distinguishes Explore Functional from a simple high-strength 3Y white disc is that the incisal multilayer gradient still delivers noticeably better translucency than a monochrome high-strength disc. For anterior units that are part of a full-arch case where aesthetic demands exist alongside the structural requirements Explore Functional handles the entire arch in a single material without requiring a separate anterior disc. This is the primary operational efficiency argument for the product. Available in 95mm and 98mm diameters, thicknesses from 10mm through 30mm, with 16 VITA shades and four bleach shades in pre-shaded configuration. The 30mm thickness covers full-arch vertical dimensions that shallower discs cannot accommodate a specification that matters specifically for the full-arch indication. Explore Esthetic: the translucency-priority multilayer option Where Explore Functional tilts toward strength, Explore Esthetic tilts toward optical quality. Its incisal zone reaches translucency levels that approach 5Y-PSZ performance closer to the optical properties of lithium disilicate than early-generation zirconia was capable of while the cervical zone maintains sufficient strength for anterior and premolar indications. The trade is explicit: the strength at the incisal zone in Explore Esthetic is lower than Explore Functional. In cases where that incisal zone carries significant direct occlusal contact notably in Class I occlusion with heavy anterior guidance or in bruxism patients Explore Esthetic is not the appropriate specification. For those cases, Explore Functional's higher overall strength profile, or a dedicated high-strength disc, is the correct choice regardless of the aesthetic preference. Where Explore Esthetic genuinely shines is in anterior single-unit and short-span anterior bridge work where the patient and clinician have high aesthetic expectations and the occlusal loading on anterior units is light or moderate. The colour depth, incisal translucency, and natural-looking gradients that the product produces reduce the staining and characterisation time needed to achieve a satisfactory anterior result which is the efficiency argument that experienced technicians who have switched to Explore Esthetic most consistently cite. Also available in 95mm and 98mm diameters with the same thickness range and shade configuration as Explore Functional. The pre-shading across 16 VITA shades plus bleach covers the standard anterior prescription spectrum without requiring liquid pre-shading for most cases. Head-to-head: which product for which case Clinical Situation Explore Functional Explore Esthetic Full-arch prostheses ✓ Correct specification ✗ Insufficient connector strength Posterior implant crowns ✓ Preferred ✗ Not recommended Multi-unit posterior bridges (3+ units) ✓ Correct specification ✗ Not recommended Anterior single-unit crowns (light occlusion) ✓ Viable — adequate aesthetics ✓ Preferred — better translucency Anterior 3-unit bridges ✓ Preferred for connector strength ✓ Viable if anterior only, light load Bruxism patients ✓ Preferred throughout ✗ Not recommended Premolar crowns ✓ Correct ✓ Viable with light bite assessment The overlap zone anterior single units on patients with moderate occlusion is where the decision is genuinely case-dependent. For technicians uncertain about the patient's bite load, Explore Functional is the conservative default. For cases where the clinician has explicitly confirmed light anterior loading and the aesthetic benchmark is high, Explore Esthetic is the correct upgrade. Sintering: what both products require Both Explore Functional and Explore Esthetic use standard zirconia sintering protocols ramp rate, hold temperature, and cool-down profile validated by UPCERA across major furnace platforms. Deviating from the specified sintering curve reduces final flexural strength by 20–30% with no visible indication at the furnace or at delivery. The difference in yttria formulation between the two products means their sintering curves are not identical labs switching between Explore Functional and Explore Esthetic should verify and load the correct program for each product in their furnace, not assume a shared program applies to both. Fast-fire sintering programs are also available for both products, enabling sub-90-minute cycles for single units and short bridges on compatible furnace systems. Fast-fire compatibility should be confirmed for the specific furnace model speed sintering on unvalidated equipment can introduce crystal development inconsistencies that standard programs avoid. Pre-shaded vs. white: how the Explore range handles shade Both products are available in pre-shaded and white disc configurations. The pre-shaded range 16 VITA classical shades plus four bleach shades is the choice for most production workflows. Pre-shading eliminates or significantly reduces external liquid staining time for standard prescriptions, which is a meaningful bench-time saving across a week of anterior and premolar volume. The shade stability of UPCERA's pre-shaded Explore discs across batch deliveries is one of the product's operationally important qualities. Labs that have experienced shade drift between batches from other suppliers requiring per-batch verification that eliminates the pre-shading efficiency advantage report that the UPCERA Explore line's batch consistency is a primary reason they maintain it as a core stock item. White discs in both Explore lines are available for labs that characterise shade manually through liquid systems. This is appropriate for complex anterior cases where the prescription deviates significantly from a standard VITA shade, or where the technician's characterisation workflow is a differentiator in the lab's service offering. Why the Explore range competes with more expensive designer zirconia One of the most consistent observations from labs that have switched to the UPCERA Explore range is the price-to-performance ratio. Designer zirconia from European and Japanese premium brands commands a significant premium over the Explore range — and for most clinical indications, the clinical outcome is indistinguishable. The TOSOH-based raw material used in UPCERA manufacturing is the same Japanese-sourced zirconium dental powder that premium brands also specify, which means the starting material quality is comparable. For dental labs managing material costs across a mixed case volume, the zirconia blocks price differential between Explore and premium designer lines represents a meaningful operating cost difference without a clinical outcome difference in most cases. Where the premium brand specification is genuinely justified highly complex aesthetic cases where marginal translucency differences matter the Explore Esthetic already delivers that performance at a lower zirconia blocks price point than the typical premium alternative. The Explore range as a complete dental lab material system For labs building a rationalised zirconia inventory, the Explore Functional and Explore Esthetic combination covers the complete clinical spectrum without requiring additional grades or formats for most case types. Explore Functional handles all high-strength indications full arch, multi-unit bridges, implants, bruxism cases. Explore Esthetic handles anterior aesthetic work. A small inventory of individual zirconia blocks in specific shades for atypical prescriptions rounds out the stock without creating excessive SKU complexity. As a North American UPCERA zirconia dental lab material supplier, Zirconia Guys carries the full Explore range both Functional and Esthetic, in pre-shaded and white configurations, across standard disc diameters and thicknesses. This is the dental lab materials inventory that covers most case types a digital lab encounters, from a single trusted supply source with domestic technical support. Get in touch with the team to discuss which Explore disc configuration, thickness, and shade range suits your milling system and case mix and to get current pricing across the range.
Learn more
Pre-Shaded vs White Zirconia Blocks: Impact on CAD/CAM Workflow and Aesthetics
The choice between pre-shaded and white zirconia blocks sits at the intersection of workflow efficiency and aesthetic control two things that rarely point in the same direction. Pre-shaded material saves bench time on standard cases. White material preserves maximum characterisation control for complex cases. Neither is universally better, and labs that default to one without understanding the other are leaving either efficiency or aesthetic capability on the table. This guide covers how the choice between pre-shaded and white zirconia affects every stage of the CAD/CAM workflow design, nesting, milling, sintering, and finishing and what the practical implications are for batch consistency, shade predictability, and final aesthetics. It's written for lab technicians who work with these materials daily, not for dentists making chairside purchasing decisions. What pre-shaded and white zirconia actually are? Both pre-shaded and white zirconia blanks are pre-sintered zirconium dental material manufactured from the same base chemistry. The zirconia dental material itself yttria-stabilised zirconium dioxide is identical between the two configurations. What differs is whether pigment is incorporated into the blank during manufacture. Pre-shaded zirconia has metal oxide pigments iron, praseodymium, and other rare earth oxides in calibrated concentrations distributed through the blank during the powder pressing stage. These pigments are stable through the sintering cycle, producing a post-sintering shade that corresponds to a specified VITA classical shade. In multilayer configurations, the pigment concentration gradient produces the cervical-to-incisal colour transition in the sintered blank without any external liquid staining. White zirconia blanks contain no pigment the blank sinters to a uniform off-white or slightly translucent appearance. All shade characterisation is applied externally by the technician, either as liquid shade solution applied before sintering, or as surface stain and glaze applied to the sintered crown. White blanks give the technician complete control over the final shade which is both their primary advantage and the source of their efficiency limitation. How the choice affects the CAD/CAM design stage? The CAD/CAM design stage is largely unaffected by shade configuration the geometry, margins, occlusal morphology, and contact points are identical regardless of whether the blank is pre-shaded or white. Where the configuration matters at design stage is in multilayer pre-shaded discs, which require attention to nesting orientation. A pre shaded zirconia multilayer disc has a defined orientation the cervical region of the gradient is at one end of the disc, the incisal region at the other. Nesting software must be set to respect this orientation so that the incisal translucency of each crown aligns with the incisal region of the blank gradient, not the cervical. A crown nested upside-down in a multilayer pre-shaded disc will have the correct shade structure in reverse — more saturated and opaque at the incisal, lighter and more translucent at the cervical which produces an unnatural-looking result that requires correction. Most nesting software supports multilayer orientation lock a setting that constrains unit placement to maintain the correct vertical orientation within the disc. Labs switching from white to pre-shaded multilayer for the first time should verify this setting is active in their workflow before running the first production batch. A test run on a single unit before committing to a full disc is a sensible protocol when evaluating a new pre-shaded product. White blanks have no orientation constraint units can be placed in any orientation within the disc without affecting shade outcome. This gives nesting software more freedom to optimise material utilisation, which can produce marginally better disc yield on complex multi-unit nesting layouts. Milling: where the two configurations behave identically At the milling stage, pre-shaded and white zirconia behave identically. Both are milled in the pre-sintered ("green") state at the same hardness and density for equivalent grade and manufacturer. Cutting parameters spindle speed, feed rate, bur type should be set the same for both configurations from the same product line. The pigment content in pre-shaded blanks does not meaningfully affect machinability or bur wear. What does affect milling performance is grade and pre-sintered density variables that are consistent within a product line regardless of shade configuration. A pre-shaded 3Y-TZP disc and a white 3Y-TZP disc from the same manufacturer will mill identically. Sintering: the critical difference in pre-shaded workflow Sintering is where the pre-shaded and white workflows diverge most practically. Both follow the same temperature profile 1,450–1,550°C depending on the product but the pre-sintered processing steps before the furnace differ. With white blanks, the technician applies liquid shade solution to the milled crown before sintering. The application method brush, dip, or spray and the number of coats determine the post-sintering shade. This step requires skill and calibration: liquid shade concentrations vary between brands, the shade result is affected by how thoroughly the liquid penetrates the pre-sintered structure, and the outcome can vary between technicians applying the same product. Getting consistent shade results from white blanks requires standardised technique and regular verification against a shade guide. With pre-shaded blanks, the milled crown goes directly to the furnace with no liquid shade application step. The post-sintering shade is determined entirely by the blank's pigment formulation the technician has no ability to modify it before sintering. What comes out of the furnace is the shade. This removes one variable from the process and eliminates technician-to-technician shade inconsistency on standard prescriptions. The tradeoff is that pre-shaded sintering behaviour must be validated more carefully when switching sintering furnaces. The colour development of metal oxide pigments is temperature-sensitive a furnace running 20–30°C cooler or hotter than specified can produce shade shift in pre-shaded blanks that wouldn't be visible in an equivalent white blank. Calibrating the sintering furnace against the pre-shaded product's specified temperature profile, and verifying shade outcomes after furnace servicing, is good practice that matters more for pre-shaded than for white. Bench time: the efficiency argument for pre-shaded The most concrete workflow argument for pre-shaded zirconia is bench time per unit. For a standard posterior crown in A2 or A3 the two shades that cover the majority of cases in most labs a pre-shaded blank eliminates the liquid shade application step entirely and reduces post-sintering characterisation to glazing only. A realistic bench time comparison for a standard posterior crown in a high-volume lab looks approximately like this: Step White blank Pre-shaded blank Post-milling shade application 3–6 minutes (liquid shade, dry, verify) 0 minutes Sintering Same duration Same duration Post-sintering characterisation 5–10 minutes (stain + glaze) 2–4 minutes (glaze only, standard cases) Shade verification Required per unit Batch verification, not per unit At ten units per day, the pre-shaded workflow recovers 60–120 minutes of bench time compared to equivalent white blank production. Across a five-day week, that's five to ten hours of recovered capacity — the equivalent of adding half a working day to the production schedule without hiring additional staff. This is why most high-volume labs running standard shade prescriptions have standardised on pre-shaded material for posterior production. The zirconia blocks price difference between pre-shaded and white (pre-shaded typically carries a modest premium) is offset multiple times over by the labour efficiency at scale. Shade stability and batch consistency: the real risk of pre-shaded The efficiency argument for pre-shaded is compelling, but it depends entirely on one condition: batch-to-batch shade stability. If the post-sintering shade of a pre-shaded blank shifts between deliveries producing A2.5 from a batch that should produce A2 the efficiency advantage disappears immediately. The lab is now verifying every batch and adjusting staining accordingly, which takes more time than liquid shade application from white would have. Shade stability in pre-shaded zirconia is a function of raw material consistency and manufacturing process control. Labs evaluating a new pre-shaded product should run at least three consecutive batches before committing to full production quantities checking post-sintering shade accuracy against a Vita Linearguide or spectrophotometer at the same furnace settings each time. The HonorZir pre-shaded zirconia blocks from Aidite are manufactured from TOSOH powder a Japanese-sourced base material known for tighter particle size and purity tolerances that directly support shade stability across batches. Labs that have made the switch to Aidite pre-shaded products for standard posterior production typically report consistent shade outcomes without per-batch verification adjustments, which is the operational behaviour that justifies pre-shaded adoption. When white zirconia is the right choice? Pre-shaded efficiency is compelling for standard production but there are clinical situations where white blanks remain the correct specification and where attempting to force a pre-shaded product into the case creates more problems than it solves. Complex or unusual shade prescriptions — cases outside standard VITA A, B, C, D shades, or cases requiring specific bleach or master shades not covered in the pre-shaded range, require white blanks. No pre-shaded product covers every possible shade prescription. White gives the technician complete control. High characterisation cases — anterior restorations where the technician needs to build internal shade effects, stump shade masking, or complex gradient work benefit from the blank-canvas control of white zirconia. Starting from a pre-shaded base limits the degree to which internal shade can be modified. Labs with specific staining expertise — some labs have developed highly refined liquid shade techniques that produce better aesthetic results than the pre-shaded equivalent. For those labs, the efficiency gain of pre-shaded is outweighed by the aesthetic quality achievable from white. The UPCERA dental zirconia blank range — including the HT White, ST White, TT White, and TT One White lines — covers white zirconia in high-strength, moderate, and high-translucency formulations for labs running custom characterisation workflows. Multilayer zirconia: where pre-shaded and white diverge most in aesthetics The aesthetic impact of pre-shaded vs. white is most pronounced in multilayer zirconia products and this is where the decision has the most clinical consequence. A zirconia multilayer disc that is pre-shaded produces its gradient entirely from the pigment concentration built into the blank. The incisal translucency and cervical saturation are fixed by the manufacturing process. A skilled technician can enhance with surface stain and glaze, but cannot fundamentally alter the internal shade gradient established in the blank. A white multilayer disc provides the translucency gradient from the yttria concentration gradient, but the colour gradient must be created entirely through liquid shade application which requires more technical skill to achieve a result that matches the natural, pre-distributed pigment of a good pre-shaded blank. In the hands of an experienced technician with calibrated technique, white multilayer can match or exceed the aesthetic depth of pre-shaded. In a high-volume production environment where technique consistency across technicians is variable, pre-shaded multilayer produces more reliable anterior aesthetics. For most labs, the practical recommendation is: pre-shaded multilayer for standard anterior production volume, white multilayer for complex or highly customised anterior cases. That combination covers the full aesthetic range without over-indexing on either efficiency or control. Building a practical zirconia inventory: how most labs solve this The labs that manage this decision most effectively don't choose one configuration for everything — they stock both strategically. A practical inventory approach for a mid-to-high-volume digital dental lab looks like: Pre-shaded multilayer disc — A2 and A3 in a reliable multilayer formulation, covering standard anterior and premolar prescriptions for the majority of the week's caseload. This is where the efficiency gains compound most meaningfully. White zirconia in high-strength 3Y — for posterior implant crowns, bridges, and full-arch cases where shade is controlled by the technician and strength is the primary concern. White 3Y is appropriate here because the posterior aesthetic requirement is lower and the custom staining control is less critical. White multilayer in high-translucency — a smaller inventory for complex anterior cases, bleach shades, and custom characterisation work where the pre-shaded range doesn't cover the prescription. As a dental lab material supplier serving North American labs, Zirconia Guys carries both Aidite and UPCERA zirconia dental lab materials in pre-shaded and white configurations across all grades and thicknesses so labs can build this kind of mixed inventory from a single supplier relationship without managing multiple sourcing channels. Get in touch with the team to discuss which pre-shaded and white products suit your milling system, furnace, and case mix.
Learn more
What’s the Difference Between 3Y, 4Y, and 5Y Zirconia?
If you purchase dental lab materials or specify restorations for patients, you have almost certainly encountered the terms 3Y, 4Y, and 5Y zirconia and found that no one has explained them clearly enough to make confident material decisions. The numbers seem technical, the tradeoffs are rarely spelled out, and most resources either oversimplify or bury the answer in clinical jargon. This guide fixes that. As a dental lab material supplier specializing in CAD/CAM zirconia, we work with these three grades every day. The Y classification directly determines the clinical performance of every crown, bridge, and restoration you produce strength, translucency, indication range, and how much finishing work the case requires. Understanding the difference doesn’t require a materials science degree. It requires one clear explanation, which is exactly what follows. What Does the “Y” Number Actually Mean? The Y in 3Y, 4Y, and 5Y stands for yttria yttrium oxide (Y₂O₃) the stabilizing compound added to zirconium dioxide (ZrO₂) during manufacturing. Yttria prevents zirconium dental ceramic from undergoing a destructive phase transformation at room temperature, which would cause the material to crack and crumble. Without yttria stabilization, zirconia would be clinically useless. The number itself refers to the mole percentage of yttria incorporated into the zirconia crystal structure. 3Y contains approximately 3 mol% yttria. 4Y contains approximately 4 mol%. 5Y contains approximately 5 mol%. This single variable yttria content is what drives every meaningful performance difference between the three grades. The reason this matters clinically is that yttria content directly controls the ratio of crystal phases present in the sintered material. Zirconia exists in three crystal phases: monoclinic, tetragonal, and cubic. The tetragonal phase delivers strength through a toughening mechanism called transformation toughening. The cubic phase delivers translucency by eliminating the birefringence that makes tetragonal zirconia appear opaque. As yttria content increases, the cubic phase fraction increases gaining translucency but gradually surrendering the strength advantage of the tetragonal phase. 3Y Zirconia: Maximum Strength for High-Load Indications 3Y zirconia is the original clinical zirconia grade the formulation that established zirconia as a viable alternative to PFM restorations in the first place. It contains the lowest yttria content of the three grades and therefore the highest tetragonal phase fraction, which produces its defining characteristic: exceptional flexural strength typically ranging from 900 to 1200+ MPa depending on the specific product and sintering conditions. Labs sourcing 3y zirconia for posterior bridge cases are choosing this grade specifically because no other zirconia classification reliably meets the structural demands of multi-unit posterior restorations under heavy occlusal load. The flexural strength of 3Y-TZP (3 mol% yttria-stabilized tetragonal zirconia polycrystal) is not just a marketing figure it directly determines whether a 4- or 5-unit posterior bridge connector survives clinical function. Clinical strengths of 3Y zirconia: Flexural strength: 900–1200+ MPa the highest of any zirconia grade Best indication: Posterior bridges of 3 units or more, high-load posterior single crowns, implant-supported posterior frameworks Translucency: Moderate sufficient for posterior esthetic zones, not suitable for demanding anterior esthetics without staining Post-sintering finishing: External staining and glazing required for anterior cases; less critical for posterior applications Connector minimums: Supports smaller connector cross-sections in bridge design due to higher strength reserve Where 3Y falls short: The moderate translucency of 3Y makes it a poor choice for anterior single crowns where shade matching to adjacent natural teeth is the primary clinical requirement. Under direct lighting, 3Y restorations in the anterior zone can appear flat and opaque next to natural enamel. Labs producing esthetic anterior work on 3Y material typically require significant staining and glazing effort to compensate effort that the next grades eliminate. 4Y Zirconia: The Balanced Grade for Everyday Esthetic Work The 4y 5y multilayered formulations represent the most significant innovation in zirconia material science of the past decade. 4Y zirconia sits precisely between the strength pole of 3Y and the translucency pole of 5Y, making it the most versatile daily-use grade for the majority of dental laboratory cases. 4Y zirconia contains approximately 4 mol% yttria, which produces a mixed tetragonal-cubic microstructure. The result is a material that retains enough tetragonal phase for clinically useful flexural strength typically 600–800 MPa while incorporating enough cubic phase to deliver meaningfully higher translucency than 3Y. Under clinical lighting conditions, 4Y restorations blend naturally with adjacent dentition in most shade ranges without requiring intensive stain correction. Clinical strengths of 4Y zirconia: Flexural strength: 600–800 MPa adequate for single crowns and anterior/premolar bridges Best indication: Anterior single crowns, premolar crowns, anterior 3-unit bridges, posterior single crowns in moderate-load cases Translucency: High 25–35% higher light transmission than 3Y grades Staining requirement: Minimal for standard A–D shades; pre-shaded versions eliminate staining entirely in most cases Versatility: The grade most commonly stocked as a daily production standard in high-volume dental labs The multilayer advantage in 4Y: The most clinically significant application of 4Y formulations is in multilayer disc formats, where the 4Y composition is combined with gradient manufacturing to produce a disc that transitions from a stronger, more opaque cervical zone to a more translucent incisal zone within a single blank. This is what makes 4Y the preferred format for labs seeking to reduce post-sintering finishing without sacrificing shade accuracy. 5Y Zirconia: Maximum Translucency for Anterior Esthetic Cases 5Y zirconia contains approximately 5 mol% yttria, pushing the material toward the maximum translucency end of the zirconia spectrum. The elevated yttria content produces a predominantly cubic crystal microstructure, which eliminates most of the birefringence responsible for the opacity in lower-grade formulations. The result is a material that transmits light in a way that closely approximates natural enamel particularly in the incisal zone of anterior teeth. Clinical strengths of 5Y zirconia: Flexural strength: 500–650 MPa lower than 3Y and 4Y grades Best indication: Anterior single crowns, anterior veneers, anterior implant crowns, cases where shade matching to highly translucent natural dentition is the overriding priority Translucency: Very high 25–40% higher light transmission than 4Y grades; the closest zirconia approximation to natural enamel Staining requirement: Minimal the inherent optical quality of 5Y often eliminates the need for characterization in standard cases Limitation: Not suitable for posterior bridges. The flexural strength of 5Y is insufficient to safely meet connector cross-section requirements for multi-unit posterior spans under full occlusal load Where 5Y is the only correct choice: When a patient presents with highly translucent, naturally opalescent anterior teeth typical in younger patients or in cases involving lateral incisors adjacent to e.max veneers 5Y is the only zirconia grade that will produce a restoration capable of matching the optical character of surrounding natural dentition. Attempting to match these cases with 3Y or 4Y material, regardless of staining effort, consistently produces restorations that appear flat and artificial under direct or lateral lighting. Side-by-Side Comparison: 3Y vs 4Y vs 5Y Property 3Y Zirconia 4Y Zirconia 5Y Zirconia Yttria content ~3 mol% ~4 mol% ~5 mol% Crystal phase Predominantly tetragonal Mixed tetragonal + cubic Predominantly cubic Flexural strength 900–1200+ MPa 600–800 MPa 500–650 MPa Translucency Moderate High Very high Light transmission Baseline ~25–35% higher than 3Y ~50–70% higher than 3Y Post-sinter staining Required for anterior Minimal / optional Rarely needed Anterior single crowns ⚠ Possible with staining ✅ Excellent ✅ Best choice Posterior single crowns ✅ Excellent ✅ Good ⚠ Acceptable Posterior bridges (3+ unit) ✅ Required ⚠ Short spans only ❌ Not recommended Multilayer disc format Available Most common format Available Best for High-load posterior cases Everyday esthetic production Anterior esthetic priority Choosing the Right Grade: A Buying Guide for Dental Labs When evaluating zirconia blocks price and product selection, the lowest per-disc cost is rarely the lowest total cost. A 3Y disc priced below market rate that requires three additional staining and glazing passes per anterior case costs more in lab time than a higher-quality pre-shaded 4Y multilayer disc that delivers the same result from the mill. For current upcera zirconia price options across the full 3Y, 4Y, and 5Y range, ZirconiaGuys stocks the complete Upcera lineup from US inventory. For labs that handle both high-volume anterior esthetic cases and posterior bridge work, the most practical stocking strategy is a combination of pre-shaded 4Y multilayer for daily anterior production and a strong 3Y grade for posterior bridge indications. The tt multilayer zirconia disc is one of the most widely used formats for this dual-purpose workflow delivering consistent shade gradients across the full disc with reliable batch-to-batch consistency. Recommended stocking strategy by lab type: High-volume anterior lab: Primary stock pre-shaded 4Y multilayer. Secondary stock — 5Y for demanding esthetic cases. Tertiary 3Y for any posterior bridge referrals. General-purpose dental lab: Primary stock 4Y multilayer pre-shaded covering 80% of cases. Secondary 3Y white for posterior bridges. Optional 5Y for selective anterior esthetic cases. Posterior-focused lab: Primary stock 3Y white or pre-shaded for bridges and high-load crowns. Secondary 4Y for anterior and premolar single crown cases. How Multilayer Discs Change the 3Y / 4Y / 5Y Decision? Zirconia multilayer disc technology has added an important dimension to the 3Y/4Y/5Y decision. Multilayer discs are manufactured with gradient yttria content — typically transitioning from a higher-strength, lower-translucency zone at the cervical to a higher-translucency, lower-strength zone at the incisal. This means a single multilayer disc can incorporate the optical characteristics of multiple grades across its depth. In practical terms, this means that a well-designed 4Y multilayer disc can produce anterior crown results that approach the optical quality of a flat 5Y disc in the incisal zone, while retaining stronger material in the body and cervical zones where fracture resistance matters more. This is the primary reason that 4Y multilayer pre-shaded discs have become the default format for high-throughput anterior labs worldwide. The decision between a flat single-grade disc and a multilayer disc is as important as the 3Y/4Y/5Y grade decision itself. For posterior bridges where structural uniformity matters, flat single-grade 3Y discs are appropriate. For anterior esthetic work, multilayer formats consistently outperform flat single-grade discs of the same grade in clinical shade matching outcomes. Disc Format Best Grade Best For Key Advantage Flat white 3Y Posterior bridges, high-load crowns Maximum uniform strength, full stain control Flat pre-shaded 4Y or 5Y Standard anterior crowns Eliminates staining step for A–D shades Multilayer pre-shaded 4Y High-volume anterior esthetic production Built-in gradient no staining, best optical outcome Multilayer white 3Y or 4Y Complex custom characterization cases Full stain flexibility with gradient architecture The 3Y/4Y/5Y classification is not a minor technical footnote it is the single most important material selection decision in any dental lab materials procurement process involving zirconia. Get the grade right and the downstream workflow sintering, finishing, shade correction, and patient outcomes becomes more predictable and more efficient. Get it wrong and you’re compensating for material limitations through extra labor or, worse, through remakes. The decision framework is straightforward: use 3Y for structural integrity in posterior bridges and high-load cases, 4Y multilayer as your daily anterior production standard, and 5Y selectively for anterior esthetic cases where translucency matching is the overriding clinical priority. Understanding zirconium dental material grades at this level is what separates labs that hit their production targets from labs that spend time correcting avoidable material selection errors.
Learn more
Zirconia Discs: What Matters Most for Lab Technicians in Dental Restorations
Ask a lab manager what matters most in a zirconia disc and they'll often say price. Ask the technician running the mill every day and you'll get a different list fit consistency, shade accuracy batch to batch, how cleanly the disc mills without chipping, whether the pre-shaded gradient is positioned correctly for nesting, and whether the sintering curve matches their furnace without adjustment. These aren't abstract procurement criteria. They're the variables that determine whether a production day runs smoothly or generates remakes. This guide is written from the technician's perspective. It covers what actually matters at the bench the factors that separate a disc that produces predictable, clinical-grade restorations day after day from one that looks similar on the spec sheet but frustrates in practice. Grade: matching the disc to the case, not to a preference Every experienced technician knows that zirconia disc grade isn't a style choice it's a clinical specification that should follow the case type, not personal preference or what happens to be in stock. The consequences of misspecification show up in the clinic months later, not on the bench at delivery. 3Y-TZP at 900–1,200 MPa is the grade for posterior implant crowns, multi-unit bridges, and full-arch prostheses. Transformation toughening where the zirconia crystal structure arrests crack propagation makes this grade the only ceramic that reliably handles direct implant loading over the long term. If a technician is running a high-strength 3Y disc for posterior implant cases, the grade is correct. If they're running 5Y "because it looks better," the grade is wrong regardless of how good the restoration looks at seating. 4Y and 5Y formulations trade strength for translucency appropriate for anterior single-unit crowns and premolar cases where optical quality is the primary clinical requirement and bite load is genuinely light. The tradeoff is real: 5Y at 500–700 MPa should not be specified for posterior positions, bridges spanning more than one unit, or any implant case in a load-bearing position. Multilayer discs resolve the anterior tradeoff by building a grade gradient into the blank 3Y-equivalent strength at the cervical margin for structural integrity, graduating to 5Y-equivalent translucency at the incisal edge for aesthetic depth. For technicians handling a mixed caseload that includes both anterior aesthetic work and posterior crowns, stocking a quality multilayer disc for anterior and a high-strength disc for posterior covers most indications without an unwieldy inventory. Nesting efficiency: the production metric that drives real-world economics Spec sheets don't mention nesting efficiency. Lab managers who've run the numbers on a busy week of production know it's one of the most significant economic variables in a zirconia workflow. Every disc has a usable zone the area of the blank that can accommodate restorations without marginal quality risk from proximity to the edge or the disc holder groove. The proportion of that usable zone that can be filled with nested restorations per milling cycle determines the material cost per unit at the volume the lab actually runs. For multilayer discs specifically, nesting position within the disc determines where in the gradient each restoration sits and therefore what shade gradient the sintered crown will exhibit. A multilayer disc with a ratio-based gradient design (where the translucent incisal zone represents a consistent percentage of disc height regardless of total thickness) gives technicians more nesting flexibility than a fixed-layer design where the incisal zone occupies a fixed absolute thickness. If the nesting software places a crown with the incisal margin outside the translucent zone of a fixed-layer disc, the gradient will be wrong at delivery. This is a detail worth verifying before committing to a multilayer disc product. Ask the supplier whether the gradient design is ratio-based or fixed-layer, and how the nesting software handles gradient positioning. For the Explore Esthetics zirconia discs from UPCERA, the multilayer formulation is specifically designed for anterior aesthetic applications providing predictable gradient positioning for technicians running anterior and premolar cases where shade depth consistency matters across a batch. Shade accuracy: the gap between the spec sheet and the furnace Shade accuracy is where pre-shaded zirconia dental materials most frequently disappoint labs that haven't evaluated a product properly before committing to volume purchases. A disc marketed as "A2 pre-shaded" should produce a post-sintering shade that matches A2 on a VITA shade guide under standard lighting consistently, across every batch ordered over twelve months. In practice, shade stability varies significantly between manufacturers. The variables that drive batch-to-batch shade variation include pigment concentration uniformity in the raw powder blend, sintering temperature sensitivity of the colorant system, and raw material powder quality. A supplier using lower-grade zirconia powder with inconsistent pigment distribution will produce shade variation between batches even if the sintering program is followed exactly. The practical evaluation protocol before committing to a pre-shaded disc product: mill and sinter three restorations from three different disc lots using the same sintering program and same furnace. Verify post-sintering shade against a VITA shade guide under consistent lighting. Shade drift of more than one shade step between lots is a batch consistency failure that will generate remakes in production. Zirconia blocks price comparisons should account for this. A pre-shaded disc that costs 20% more per unit but delivers consistent shade across twelve months of orders is less expensive in total than a cheaper disc that generates two shade remakes per month each remake representing material, milling time, sintering time, and technician hours that exceed the price differential many times over. Milling compatibility: what happens at the bur Zirconia mills in its pre-sintered "green" state firm enough to hold detail during machining, soft enough for diamond burs to cut without the forces that would fracture a fully sintered ceramic. The pre-sintered hardness of the blank determines how the disc behaves at the bur, and this varies between products even within the same grade classification. A blank that's too soft will produce surface defects smearing rather than clean cutting, which translates to surface porosity after sintering and compromised marginal integrity. A blank that's too hard accelerates bur wear, increases milling time, and risks micro-chipping at thin margins during machining. The target pre-sintered hardness for a given milling system should be verified against the machine manufacturer's recommended parameters. For technicians experiencing accelerated bur wear or marginal chipping on a new disc product, the first diagnostic question is whether the disc's pre-sintered hardness is within the recommended range for their milling platform. This isn't information that appears on most product data sheets it requires contacting the supplier's technical support, which is one reason working with a dental lab material supplier who can answer that question matters practically. Sintering: where a technician's quality control actually happens Procurement chooses the disc. The technician controls the sintering. And sintering is where most zirconia quality failures originate that aren't attributable to the raw material itself. Every zirconia disc has a manufacturer-specified sintering curve ramp rate, hold temperature (typically 1,450–1,550°C), and cool-down profile. Deviating from that curve reduces final flexural strength by 20–30% with no visible sign of failure. A restoration that sintered 50°C below the specified hold temperature looks identical to a correctly sintered crown at delivery. It performs differently under clinical loading over the following months. Technicians running multiple disc products from different suppliers need to maintain separate sintering programs for each product not assume that a program optimised for one product works for another. Most furnaces allow multiple saved programs, which is the right approach for labs stocking more than one disc brand or grade. Fast-fire sintering programs completing a cycle in under 90 minutes are available for several disc products and enable same-day crown delivery. Fast-fire compatibility should be verified per product, not assumed based on the furnace's capability. Some discs that sinter correctly on standard programs show strength reduction on fast-fire profiles due to different crystallisation kinetics at accelerated temperature profiles. Open-system compatibility: why it matters for technician flexibility A technician's ability to switch disc products, trial new materials, or adapt to a new milling system depends on whether the discs they use are open-system or proprietary. Open-system discs compatible with any milling platform accepting standard 98mm holder dimensions give labs sourcing flexibility that proprietary systems restrict. The UPCERA zirconia range covers the full spectrum of dental lab materials needs for a digital lab from the high-strength Explore Functional for posterior and implant work, through the multilayer TT and ST lines for anterior aesthetic cases all in open-system format compatible with Roland, vhf, Zirkonzahn, Imes-icore, and other major platforms. No proprietary software keys, no machine-specific restrictions. What a technician should ask before trialling a new disc Before committing to a new disc product, experienced technicians evaluate on five practical dimensions that spec sheets don't fully address: Batch traceability: Can the supplier provide per-lot test data not just "typical values" from a single batch? Per-lot ISO 6872 documentation demonstrates manufacturing accountability that translates into production predictability. Shade verification protocol: Is the shade designation based on post-sintering VITA shade guide comparison under standardised lighting? Some suppliers shade-designate based on pre-sintered disc appearance, which doesn't correlate reliably with post-sintering outcome. Furnace validation: Has the supplier validated the sintering curve on the specific furnace brand the lab uses? Thermocouple calibration differences between furnace brands mean a curve validated on one brand may not transfer perfectly to another. Nesting software compatibility: Is the disc's dimensional specification (diameter, thickness, holder type) fully compatible with the lab's nesting software? Dimensional non-conformances show up during registration, not at ordering. Technical support accessibility: When a sintering or shade issue arises and eventually one will is there a technical contact who can diagnose the problem and provide a solution? A dental lab material supplier with accessible support is worth more than a slightly cheaper source with no technical capability. Sourcing for the technician's workflow The disc decisions that matter most for lab technicians are the ones made at the bench every day which grade for which case, whether the pre-shaded result matches the prescription, whether the sintering program is producing the specified strength, whether the milling is clean and the margins are intact. Getting those decisions right consistently requires both the right disc and the right supplier relationship. The Aidite zirconia discs for dental labs including the HonorZir, Superfect Zir, 3D Pro Zir, and Aizir lines and the UPCERA range are both available through Zirconia Guys as a North American dental lab material supplier with technical support for sintering, milling compatibility, and shade verification. Labs building or rationalising their zirconium dental disc inventory can discuss specific requirements with the team.
Learn more