

Blogs
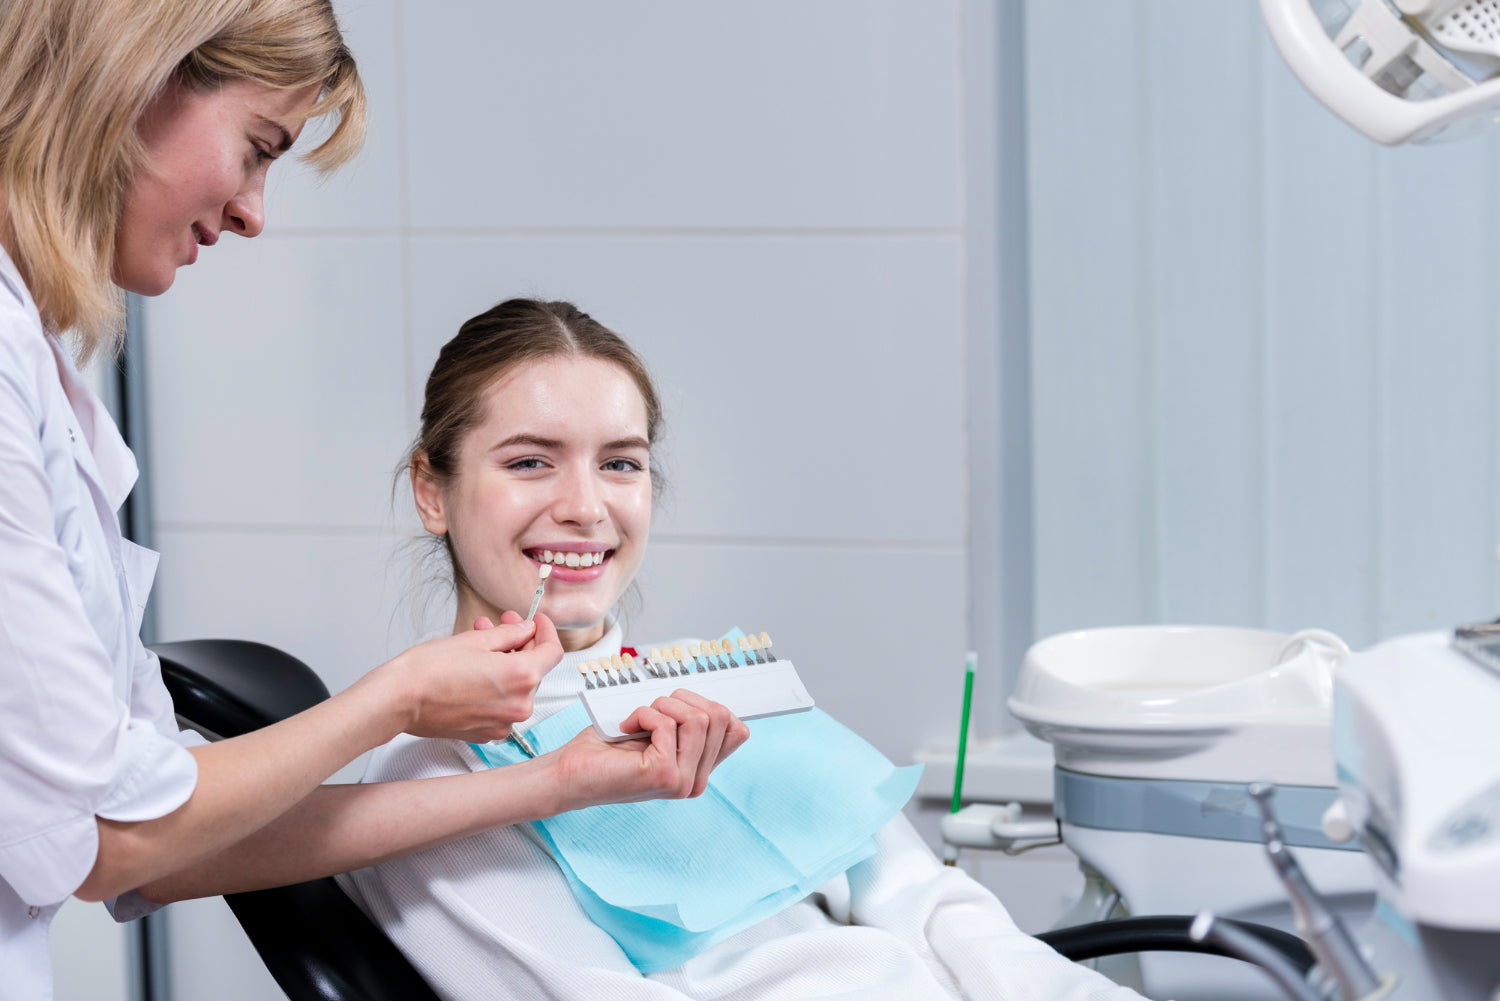

Zirconia vs PMMA in Dentistry: Which Material Should You Choose?
Zirconia and PMMA are both staples of the modern digital dental lab but they're staples in entirely different clinical roles. The question "which should you choose?" is rarely a binary one. In most workflows, both materials are used: PMMA for the temporary phase, zirconia for the permanent restoration. The real decisions are about which cases call for each, and whether a lab is specifying them correctly. This guide cuts through the surface-level comparison to give dental labs and clinicians a clear, technically grounded framework. It covers what each material is, what the mechanical differences mean in practice, where each genuinely outperforms the other, and how to think about cost honestly, not just at the material sourcing level. What the mechanical difference actually means? The gap between dental zirconia and PMMA in raw mechanical terms is not marginal it's fundamental, and understanding it is the starting point for every material decision. High-strength 3Y-TZP dental zirconia reaches 900–1,200 MPa flexural strength through transformation toughening a crack-arrest mechanism where the crystal structure resists crack propagation under load. It's chemically inert, non-porous, biocompatible with bone and soft tissue, and its smooth sintered surface resists bacterial adhesion better than acrylic. These properties make it the definitive material for permanent restorations under sustained occlusal loading. PMMA (polymethyl methacrylate) reaches 80-120 MPa approximately ten times weaker than high-strength zirconia.. It machines quickly on the same CAD/CAM equipment used for zirconia, can be adjusted and repaired chairside without specialist equipment, and costs substantially less per unit. These properties make it the definitive material for temporary restorations, denture bases, and diagnostic provisionals where adjustability and speed matter more than long-term fracture resistance. The clinical implication is straightforward: these two materials occupy different positions in the treatment timeline, not competing positions in the same clinical role. Specifying zirconia where PMMA belongs wastes cost. Specifying PMMA where zirconia belongs creates clinical risk. Getting the sequence right is the foundation of good digital lab practice. Where zirconia is the right choice? Permanent posterior crowns on natural teeth Monolithic zirconia milled from a high-strength zirconium dental blank and sintered to final strength is the standard specification for permanent posterior crowns. Posterior bite forces regularly exceed 400 MPa. PMMA at 80–120 MPa fractures in this environment. Zirconia at 900–1,200 MPa does not. The workflow is efficient: mill, sinter, characterise, deliver. For high-volume posterior work, dental zirconia discs in pre-shaded format reduce per-unit bench time significantly. Implant-supported crowns and bridges Implants transfer bite force directly to the restoration without the cushioning of a periodontal ligament. Every ceramic material that works on natural teeth has a wider safety margin than the same material on implants. For posterior implant crowns, multi-unit implant bridges, and full-arch implant prostheses, high-strength 3Y-TZP zirconia is the clinical standard without exception. PMMA is the correct temporary material during osseointegration; the permanent restoration should be zirconia. Multi-unit bridges Bridge connectors need the flexural strength and fracture resistance to handle the concentrated loading at the connector cross-section. Zirconia handles this; PMMA does not. For bridges spanning two or more pontics in any arch position, zirconia is the appropriate permanent specification. Full-arch prostheses Full-arch cases All-on-4, All-on-X, full-arch implant prostheses require high-strength 3Y-TZP zirconia for the permanent prosthesis. The mechanical demands of full-arch loading under direct implant loading are the highest in restorative dentistry. Dental lab materials for these cases should be specified accordingly. For labs building a zirconia inventory for these indications, the dental zirconia discs from UPCERA including the Explore Functional for high-strength posterior and implant work, and the full TT and ST multilayer range for anterior aesthetic cases cover the complete spectrum from a single supplier relationship. Where PMMA is the right choice? Implant temporaries during osseointegration Every implant workflow requires a temporary prosthesis worn during the three to six months of osseointegration. PMMA is the correct material for this role because it can be adjusted and relined chairside as tissue heals something sintered zirconia cannot do. The temporary also shapes the soft tissue emergence profile that the permanent restoration will inherit, so getting the PMMA temporary right is a prerequisite for getting the final zirconia result right. For anterior implant temporaries worn for several months in a visible position, single-shade PMMA looks flat next to natural teeth. Multilayer PMMA discs with a shade gradient built into the blank produce significantly better anterior aesthetics from the same milling workflow, without additional characterisation time. Same-day temporaries in standard crown workflows For temporary crowns and bridges produced in a conventional crown and bridge workflow worn while the permanent restoration is being fabricated PMMA is the efficient and correct choice. It mills on the same equipment used for zirconia, requires no sintering step, and can be delivered at the same appointment as the impression or scan. The economics of a temporary material should match the temporary clinical role. Full and partial denture bases PMMA is the long-established material for full and partial denture bases not as a temporary, but as a permanent prosthetic platform. Its light weight is a genuine clinical advantage over alternatives in prosthetic applications, and milled PMMA denture bases from high-density blanks produce lower porosity than conventionally processed acrylic. Lower porosity means less bacterial infiltration into the base material over years of use a tissue health advantage that accumulates over the prosthesis lifetime. The pmma denture base materials from Aidite specifically the Denture Base PMMA disc covers this indication in tissue-matching gingival shades, producing dimensionally accurate bases with good surface finish for full and partial denture workflows. Diagnostic and trial restorations Before committing a complex case to a final zirconia restoration, some clinicians request a diagnostic PMMA trial a full-contour provisional that allows the patient to evaluate aesthetics and occlusion in situ before the permanent material is committed. PMMA's low cost relative to zirconia blocks price makes this trial step economically practical, and the ability to adjust the trial restoration chairside provides clinical information that a definitive restoration at first delivery cannot. The cost comparison: what the real numbers look like The material cost comparison between zirconia and PMMA is straightforward PMMA discs cost substantially less than zirconia dental discs per unit. Zirconia blocks price reflects the higher-grade raw material, more complex sintering requirements, and longer production time. The clinical cost comparison is more nuanced. For permanent restorations, zirconia's ten-to-fifteen year expected lifespan with no maintenance, no chipping, no colour degradation makes it less expensive in total cost terms than a PMMA-based provisional that would need replacing. Specifying PMMA as a permanent crown material to save upfront cost is a false economy: the material will fail under sustained loading and the remake cost exceeds any material saving at sourcing. The correct framing is that each material should be costed for its actual clinical role. A temporary worn for three to six months during osseointegration should cost as a temporary. A permanent restoration designed to last a decade should be specified and priced as a permanent restoration. Mixing those two frames produces either unnecessary cost (permanent zirconia for a temporary indication) or clinical failure (PMMA in a permanent indication). Worflow comparison: how each material fits a digital lab Factor Zirconia PMMA Flexural strength 900–1,200 MPa (3Y-TZP) 80–120 MPa Milling equipment CAD/CAM with diamond burs Same CAD/CAM with carbide burs Sintering required Yes 1,450–1,550°C, 4–8 hours No sintering step Chairside adjustment Limited grinding only Yes trim, reline, repair Same-day delivery With fast-fire sintering only Yes standard workflow Permanent use Yes 10–15 year expected lifespan No (crowns/bridges); Yes (denture bases) Plaque resistance High smooth non-porous surface Moderate higher porosity than zirconia Pre-shaded options Yes , multilayer and pre-shaded discs Yes , multilayer PMMA discs available The practical decision framework For dental labs making material decisions case by case, a clear framework covers the large majority of situations: Permanent posterior crowns and bridges on natural teeth or implants: zirconia. Grade selection follows the indication 3Y-TZP for high-strength posterior and implant cases, multilayer for anterior and premolar aesthetic work. Full-arch permanent prostheses: high-strength 3Y-TZP zirconia throughout. Not PMMA hybrid, not multilayer zirconia strength is the primary requirement and the correct grade should reflect that. Implant temporaries during osseointegration: PMMA. Multilayer PMMA for anterior visible positions; standard PMMA for posterior. Duration of the temporary phase (three to six months typical) doesn't change this PMMA remains the correct specification. Same-day temporaries in standard crown workflows: PMMA. Fast and economically proportionate to the temporary clinical role. Full and partial denture bases: PMMA as a permanent prosthetic material in this specific application. Milled PMMA denture bases from high-density blanks outperform conventionally processed acrylic in fit accuracy and porosity. Diagnostic trials before complex permanent restorations: PMMA. The cost of a trial restoration in PMMA is proportionate to its diagnostic role and the clinical information it provides before committing to a permanent material. Sourcing both materials from a single supplier For dental labs running both zirconia and PMMA workflows which describes most complete digital labs sourcing from a single dental lab material supplier simplifies ordering, technical support, and material compatibility management across milling platforms and sintering programs. As a North American dental lab material supplier, Zirconia Guys carries the complete Aidite PMMA range multilayer, denture base, and clear variants alongside Aidite and UPCERA zirconium dental and ceramic materials, covering the full workflow from temporary through to permanent restoration from a single source. Get in touch with the team to discuss which zirconia grades, PMMA formats, and disc configurations suit your lab's case mix and milling system.
Learn more
Why Esthetic Zirconia Discs Are Ideal for Layered Dental Restorations?
Dental zirconia has evolved dramatically from its early reputation as an opaque, white ceramic suited mainly to posterior strength-critical cases. Modern dental laboratories face one persistent challenge: producing restorations that look as natural as they function. The material you select at the disc stage determines everything downstream translucency gradient, shade depth, how well the crown mimics natural tooth anatomy, and how much finishing time your bench technicians spend correcting what the milling process didn’t deliver. Today’s multilayer esthetic formulations have fundamentally changed what is achievable from a single milled blank. This guide explains exactly why esthetic dental zirconia discs especially multilayer gradient formats outperform conventional monolithic blocks for layered restorations. We cover the material science behind the gradient, the right clinical indications, milling workflow best practices, and what dental labs should prioritize when evaluating their next disc stock. What Makes a Zirconia Disc “Esthetic”? Not all dental zirconia performs the same optically. Standard 3Y-TZP delivers exceptional flexural strength often exceeding 900 MPa but its limited translucency makes it optically unsuitable for esthetic anterior cases. Esthetic grades shift the yttria content upward to 4Y, 5Y, or a multi-zone gradient blend. Higher yttria increases the cubic phase fraction in the crystal microstructure, raising light transmission and bringing the material’s optical behavior closer to natural enamel and dentin. The practical result is a zirconia blank that doesn’t need extensive external staining to look natural. Internal gradients within the disc mimic the optical zones of a real tooth warm, opaque dentin chroma at the cervical margin transitioning to cooler, more translucent enamel toward the incisal edge. Labs that previously depended on hand-layering porcelain or intensive stain protocols are now achieving equivalent esthetics directly from the mill, with fewer steps and less technician-dependent variability. The Clinical Case for Multilayer Zirconia Blocks When restorations are milled from single-shade monolithic aidite zirconia blocks, the technician must compensate optically through external staining, glazing, and characterization layering. That adds bench time, introduces stain-batch variables, and increases remake risk particularly when different technicians handle different units in the same case. The zirconia blocks dental labs rely on for esthetic-zone volume work are built fundamentally differently. Each layer of a multilayer disc is pre-formulated to correspond with a distinct optical zone of the tooth: Cervical / dentin zone: Higher chroma, reduced translucency, warm undertone replicating the opaque, saturated root-third of a natural tooth Body zone: Balanced translucency and saturation the workhorse layer for mid-tooth anatomy in both anterior and posterior cases Enamel / incisal zone: High translucency, cooler tone, natural opalescence essential for anterior restorations blending with natural dentition When the CAD/CAM toolpath is properly aligned with these internal zones, the milled crown already contains the natural color gradient before any stain is applied. This is the core workflow advantage of multilayer esthetic discs and the primary reason they have become the default material for anterior cases in high-throughput labs. Key Performance Facts: 4–5 distinct chromatic layers in premium multilayer discs ~65% reduction in post-sintering stain time for standard A-shade cases 600+ MPa flexural strength retained in 4Y esthetic grades 98 mm standard disc diameter — compatible with all major open-system mills Zirconia Dental Blanks: White vs. Pre-Shaded Choosing the Right Format When evaluating zirconia dental blanks for esthetic work, the first decision is format: white (unshaded) or pre-shaded. Labs browsing upcera zirconia options will find both formats available and this distinction determines not just lab time but remake rates and multi-unit shade consistency. White zirconia blanks give the technician full manual control over shade application. They are the right choice for complex customization unusual shades outside the standard VITA range, strong B or C chroma cases, or restorations requiring characterization effects like craze lines or hypocalcification simulation. The tradeoff is labor: every unit requires individual staining, and consistency across a multi-unit case depends entirely on technician skill. Pre-shaded multilayer blanks are manufactured with VITA Classic or 3D-Master-compatible gradients already embedded from cervical to incisal. For the majority of everyday anterior and premolar cases standard A1 through D4 shades pre-shaded discs eliminate the external staining step entirely and deliver reproducible results regardless of which technician handles the case. Feature White Zirconia Blank Pre-Shaded Multilayer Blank Shade control Full manual staining required Built-in VITA-compatible gradient Best for Complex / unusual shade cases Standard A–D shade daily restorations Post-sinter staining Always required Rarely needed glaze only Multi-unit consistency Operator-dependent Highly reproducible batch to batch Bench time per unit Higher Significantly reduced Remake risk Moderate Low Milling Workflow: Six Steps for Reliable Esthetic Results Even the highest-quality esthetic disc underperforms when the milling workflow isn’t tuned to its layered architecture. These six steps separate consistent, natural-looking results from remakes. Match disc thickness to the indication.For posterior full-contour crowns, 14 mm discs provide the structural reserve needed under occlusal load. Anterior crowns and short-span bridges can use 10 mm or 12 mm stock. Always confirm the manufacturer’s recommendation for each specific product. Orient the blank correctly in the milling chuck.Every multilayer disc is directionally coded an engraved arrow indicates the gingival-to-incisal axis. Mounting backwards reverses the shade gradient, placing high-translucency incisal-grade material at the cervical margin. Verify before milling the first unit from any new batch. Map your CAD design to the disc’s internal zones.In exocad, 3Shape, or your CAM software, align preparation margins and cusp tips with the corresponding disc layers. The crown body should sit in the body zone; the incisal one-third should reach into the enamel zone. Reduce milling speed by 10–15% through layer transitions.Hardness varies slightly between layers in high-gradient esthetic discs. An aggressive default toolpath can cause micro-chipping at interlayer interfaces. A conservative finishing pass at reduced speed preserves edge integrity. Follow the manufacturer’s sintering profile no accelerated cycles.Most premium esthetic discs specify a ramp rate of ≤5°C/min with a peak hold between 1480–1550°C. Accelerated sintering disrupts the controlled grain growth that produces translucency in esthetic-grade zirconia. Evaluate shade transitions under three light sources before delivery.Check the sintered restoration under fluorescent lab lighting, natural daylight, and incandescent light. Shade transitions should be imperceptible gradients. Visible demarcation lines indicate a toolpath orientation error. Upcera Explore Esthetics: The Benchmark Multilayer Disc for US Labs Among the multilayer esthetic options available to US labs, explore esthetics zirconia by Upcera has established itself as the reliable choice for laboratories that need consistent shade performance at production volume. It uses Upcera’s TT-GT (Transparency Gradient Technology), engineering four distinct chroma zones dentin core, opaque transition, body enamel, and incisal halo into each 98 mm disc, with controlled yttrium oxide variation between each layer. The explore esthetics zirconia discs are calibrated to both VITA Classic and 3D-Master shade guides, making them compatible with either shade-matching system your practice or referring dentist uses. Shade consistency across the full disc is one of the most practically significant advantages a common failure point with lower-quality multilayer products where edge zones drift from center specification as the disc ages. For labs transitioning from PFM workflows or from older 3Y monolithic grades, the learning curve is manageable. The material behaves predictably, sintering requirements are thoroughly documented, and the pre-shaded format means technicians achieve natural-looking results without mastering a new staining system. Available from ZirconiaGuys in multiple thicknesses from US inventory — no international lead times. Clinical Indication Guide: Which Disc for Which Case? Indication Recommended Format Clinical Notes Anterior single crowns Multilayer esthetic (5Y) Maximum incisal translucency essential for blending with natural dentition Anterior 3-unit bridges Multilayer esthetic (4Y/5Y) Verify connector cross-section meets minimum strength spec for span Premolar crowns Pre-shaded multilayer (4Y) Body zone provides optimal esthetics-to-strength balance Posterior single crowns Pre-shaded 4Y or white 3Y Confirm occlusal load with prescribing dentist Posterior bridges (3–4 unit) High-strength white 3Y blank Structural demand takes priority; 3Y-TZP preferred Anterior implant crowns Multilayer esthetic (5Y) Shade matching to adjacent natural teeth is the primary challenge Full-mouth rehabilitation Mixed per quadrant Esthetic grade anterior; strength grade posterior The move to esthetic multilayer dental zirconia discs is a structural shift in how professional dental laboratories approach daily crown and bridge production. When the shade gradient is engineered into the material itself, variability moves out of the technician’s hands and into the manufacturing process. Fewer stain variables mean fewer remakes. Pre-shaded zirconia dental blanks in multilayer format deliver consistent, reproducible results across shifts, technicians, and case volume in a way that manual staining workflows simply cannot replicate at scale. For labs evaluating their disc stock whether upgrading from older monolithic zirconia grades, transitioning from PFM workflows, or standardizing the anterior production line — the evidence for high-quality esthetic multilayer discs is clear. Material selection at the disc stage is the highest-leverage decision in the production chain, and investing in the right disc pays dividends in every case that follows.
Learn more
What is dental bonding and how is it used?
Dental bonding is one of the most widely used procedures in restorative and cosmetic dentistry and one of the most misunderstood in terms of what actually makes it work. The term covers two distinct but related applications: direct composite bonding, where resin is applied and shaped directly on the tooth; and adhesive cementation, where a resin-based cement bonds a laboratory-fabricated restoration to tooth structure. Both rely on the same fundamental chemistry, but the protocols, materials, and clinical outcomes differ significantly. This guide covers dental bonding from both a clinical and a dental lab perspective what it is, how the bonding chemistry works, where it's used, which resin types are involved, and how bonding protocols connect to the ceramic and zirconia restorations that dental labs fabricate. It's written for dental professionals who want technical clarity, not a patient brochure. What dental bonding actually is? At its core, dental bonding is the adhesion of a resin-based material to tooth structure enamel, dentine, or both through a combination of micromechanical retention and chemical adhesion. The word "bonding" in dentistry refers specifically to this resin-mediated adhesion mechanism, which distinguishes it from the mechanical retention that older cementation techniques (zinc phosphate, glass ionomer without adhesive) relied on. The clinical significance of adhesive bonding is substantial. A restoration that bonds chemically and micromechanically to tooth structure distributes load differently than one held by friction and compressive forces alone. For ceramic restorations particularly thin, conservative preparations like veneers and inlays adhesive bonding is what provides the mechanical support that makes the restoration clinically viable. A lithium disilicate veneer at 0.3 mm thickness would fracture under normal function without the reinforcing effect of the adhesive bond to the underlying enamel. Direct composite bonding: the clinical procedure Direct dental bonding resin the procedure most patients associate with "bonding" — involves applying composite resin directly to the tooth surface, shaping it, and curing it with a visible-light curing unit. It's used for chipped or fractured teeth, closing diastemas, masking discolouration, and reshaping minor morphological irregularities without tooth preparation. The procedure follows a consistent protocol: Etching. The tooth surface is conditioned with phosphoric acid (typically 35–37%) for 15–30 seconds on enamel and 10–15 seconds on dentine. Acid etching creates a microporous surface in enamel by selectively dissolving hydroxyapatite the roughened surface provides the micromechanical retention that the resin infiltrates and locks into after curing. On dentine, etching is more technique-sensitive because it removes the smear layer and opens dentinal tubule the roughened surface provides the micromechanical retention that the resin infiltrates and locks into after curing. On dentine, etching is more technique-sensitive because it removes the smear layer and opens dentinal tubules, which requires the surface to remain moist for optimal resin infiltration with wet-bonding systems. Bonding agent application. A bonding agent a low-viscosity resin primer that wets the etched surface and penetrates the micro-porosity is applied and light-cured before the composite resin is placed. The bonding agent creates the hybrid layer: a zone of co-mingled resin and demineralised collagen at the dentine surface that forms the mechanical foundation of the adhesive joint. Composite placement and curing. The composite resin is applied in increments, shaped to the desired morphology, and cured in layers to minimise polymerisation shrinkage stress. Each increment is typically 2mm or less to ensure adequate light penetration and complete polymerisation through the full depth of the resin. Finishing and polishing. The cured composite is refined with finishing burs and polished to final surface texture. Surface finish has a direct effect on the restoration's stain resistance and longevity a smooth, well-polished surface accumulates significantly less extrinsic staining than a rough one. Adhesive cementation: bonding laboratory restorations Adhesive cementation is the dental lab-relevant application of dental bonding the protocol used to bond ceramic, composite, or other indirect restorations fabricated in the lab to prepared tooth structure. This is where bonding resin selection and protocol compliance have the most direct impact on restoration longevity. The cementation protocol depends on the restoration material, and this is where the distinction between ceramic types matters practically. Bonding to lithium disilicate and glass ceramics Lithium disilicate the material used for anterior veneers, inlays, and single-unit crowns is bondable through both micromechanical and chemical mechanisms. The glass phase of the material is etchd with hydrofluoric acid (5% HF, 20 seconds for IPS e.max CAD; 60 seconds for pressed), which creates a microporous surface similar to acid-etched enamel. Silanation follows — a silane coupling agent creates a chemical bridge between the ceramic surface and the resin cement — and then resin cement is applied and cured. The combination of micromechanical retention from HF etching and chemical bonding from silane produces bond strengths that meaningfully reinforce the restoration against fracture under occlusal load.This is why cementation protocol compliance is inseparable from lithium disilicate restoration a crown placed without HF etching and silanation loses most of this reinforcing effect and is mechanically compromised at delivery regardless of lab fabrication quality. why it's different? Zirconia dental material cannot be etched with hydrofluoric acid the polycrystalline ceramic structure doesn't have a glass phase to dissolve. This means the HF etching nd silanation protocol used for lithium disilicate doesn't work for zirconia, and a different bonding strategy is required. Current evidence supports two approaches for bonding to zirconia: sandblasting with alumina particles (50 µm Al₂O₃ at 2.5 bar) to create micromechanical retention, followed by application of an MDP-containing primer (10-methacryloyloxydecyl dihydrogen phosphate) that forms a chemical bond to the zirconium oxide surface; or use of a self-adhesive resin cement containing MDP, which combines the cementation and priming steps. For dental labs fabricating zirconia dental restorations, it's worth including sandblasting instructions and recommended primer products in the case documentation for every zirconia crown or bridge clinicians who aren't familiar with zirconia-specific bonding protocols sometimes apply the lithium disilicate protocol incorrectly, which produces inadequate bond strength. The zirconia multilayer anterior restorations that most digital labs now fabricate producing translucency levels that approach lithium disilicate still require the zirconia-specific MDP bonding protocol, not HF etching. The optical properties have changed with multilayer formulations; the surface chemistry has not. Types of dental bonding resin systems Bonding agents are classified by generation and by etching strategy. For clinical and lab professionals, the most relevant practical distinction is between three main strategies currently in use: Etch-and-rinse systems (also called total-etch or three-step) apply phosphoric acid separately, rinse it off, then apply primer and adhesive in sequential steps. They produce reliable bond strengths to enamel and dentine but are technique-sensitive particularly the wet-bonding requirement on etched dentine. These systems have the longest clinical track reco particularly the wet-bonding requirement on etched dentine. These systems have the longest clinical track record and the strongest evidence base for enamel bonding. Self-etch systems combine the etching and priming steps, using acidic monomers that simultaneously condition the surface and infiltrate it without a separate rinse step. They are less technique-sensitive than total-etch on dentine, produce a milder etch that preserves more collagen structure, and are faster to apply. Bond strengths to enamel are generally slightly lower than with phosphoric acid etching a a clinically significant consideration for enamel-dominant preparations. Universal adhesives can be used in total-etch, selective-etch, or self-etch mode depending on the clinical situation and the clinician's preference. Their MDP content makes them compatible with zirconia bonding when used with appropriate surface preparation. They are the most versatile option in contemporary restorative workflows. For resin cements specifically the luting agents used to seat laboratory restorations options include dual-cure resin cements (light-cured through the restoration and self-cured where light can't reach), self-adhesive resin cements (no separate adhesive required, suitable for zirconia and metal), and conventional resin cements (require a separate bonding agent). Clinical indications: where dental bonding is used Direct composite bonding — minor cosmetic corrections to tooth shape, size, and colour; repair of chipped or fractured anterior teeth; closing small diastemas; masking mild discolouration not amenable to bleaching. Best suited to cases where the extent of change required is modest and the patient's occlusion is favourable. Not appropriate for extensive reshaping, severely discoloured teeth, or patients with parafunctional habits where the composite's lower hardness compared to ceramic becomes a durability concern. Adhesive cementation of ceramic veneers — lithium disilicate or feldspathic porcelain veneers bonded to minimally prepared or unprepared enamel. The adhesive bond to enamel is the primary mechanical support for the restoration. Preservation of enamel at the preparation margin is therefore a clinical requirement for long-term veneer success bonding to dentine produces lower bond strengths and greater sensitivity risk. Adhesive cementation of ceramic inlays and onlays — conservative posterior restorations where remaining tooth structure is reinforced by the adhesive bond rather than weakened by crown preparation. Bond strength in this application replaces the retentive geometry that conventional cementation relied on. Cementation of zirconia crowns and bridges — using MDP-based resin cements or self-adhesive cements after appropriate surface preparation. Posterior zirconia crowns in conventional preparations can also be placed with high-strength conventional cements where adhesive bonding isn't the primary retention mechanism but for anterior positions and single implant crowns, resin cement with MDP primer is the recommended approach. Why bonding protocol matters for dental labs? From a dental lab perspective, the bonding protocol used by the clinician directly affects the clinical performance of every restoration the lab fabricates. A lithium disilicate crown that fractures six months post-cementation isn't necessarily a lab fabrication failure it may be an etching and silanation failure at the chair. A zirconia crown that debonds repeatedly may reflect incorrect cement selection rather than marginal fit issues it may be an etching and silanation failure at the chair. A zirconia crown that debonds repeatedly may reflect incorrect cement selection rather than marginal fit issues. Labs that include material-specific cementation instructions with every case — recommending the correct etching protocol for lithium disilicate, the correct MDP primer protocol for zirconia, and the appropriate cement type — reduce clinician errors that would otherwise result in remakes attributed to the lab. This communication is part of delivering a complete restoration, not an optional extra. As a dental lab material supplier serving North American laboratories, Zirconia Guys supplies both the Aidite zirconia range covering dental zirconia discs, multilayer, pre-shaded, and white options and related dental lab materials for complete digital workflows. Labs that want to discuss zirconia material selection, zirconia blocks price across the range, or how different zirconium dental material grades interact with cementation protocols are welcome to get in touch with the team directly.
Learn more
5 Types of Composite Resins Used in Dentistry
Composite resin has been a cornerstone of restorative dentistry since its commercial introduction in the early 1970s. In that time, the material has evolved from a basic tooth-coloured filling alternative into a sophisticated family of products with distinct formulations for different clinical indications. Understanding the differences between composite resin types isn't just academic it directly affects how well a restoration performs clinically, how long it lasts, and how it looks. This guide covers the five main types of composite resin used in dentistry today, what distinguishes each one chemically and clinically, and where each belongs in a restorative workflow. It also addresses where composite resin reaches its limits and ceramic materials take over a distinction that matters for labs and clinicians making material decisions across a full case range. What composite resin is? All composite resin formulations share the same basic architecture: an organic resin matrix (typically Bis-GMA, UDMA, or TEGDMA monomers), inorganic filler particles (glass, quartz, or ceramic particles), and a silane coupling agent that bonds the filler to the resin matrix.. Polymerisation occurs when light at the appropriate wavelength (typically 470nm blue light) activates camphorquinone photoinitiators, triggering the monomer-to-polymer chain reaction. The type of composite resin is determined primarily by the size, shape, and quantity of filler particles because filler particle characteristics control essentially every clinically relevant property: polishability, wear resistance, strength, translucency, viscosity, and depth of cure. This is why the five types differ so substantially in their clinical applications despite sharing the same fundamental chemistry. Type 1: Microfill composite resin Microfill composites contain extremely fine filler particles typically 0.01 to 0.1 micrometres which produce the smoothest, most highly polishable surface of any composite resin type. When polished, a microfill restoration approaches the surface gloss of natural enamel more closely than any other composite formulation. This makes them the material of choice for anterior cosmetic restorations where surface finish and gloss retention over time are the priority. The limitation of microfill composites is mechanical. The fine filler particles can only be incorporated at lower concentrations than larger fillers, leaving a higher proportion of resin matrix which is the weaker component. Flexural strength is lower than hybrid or nanofill composites, and modulus of elasticity is lower, which means microfills flex more under load. In posterior positions where bite forces are high, this makes them inappropriate as a structural material. They're specifically designed for anterior aesthetic work in small to moderate cavity sizes, not for posterior load-bearing restorations. Type 2: Nanofill composite resin Nanofill composites represent one of the most significant advances in composite resin technology. Using filler particles in the 5–75 nanometre range smaller than the wavelength of visible light nanofill composites achieve the polishability of microfills while incorporating significantly higher filler concentrations (typically 75–80% by weight) that produce strength approaching hybrid composites. The key innovation in nanofill technology is nanoclusters pre-aggregated clusters of nanoparticles that behave as larger units for mechanical load transfer but expose nanoparticle-sized surfaces at fracture, maintaining the polishability advantage. This allows nanofill composites to be used in both anterior aesthetic restorations and posterior load-bearing situations making them the most clinically versatile single composite formulation. Nanofill composites have largely replaced microfills in many clinical workflows because they deliver aesthetics approaching microfill quality with substantially better mechanical performance. For clinicians wanting a single composite that handles anterior and posterior indications adequately, a quality nanofill is the most defensible choice. Type 3: Hybrid composite resin Hybrid composites combine filler particles across a range of sizes typically a mix of large particles (0.6–5 micrometres) and smaller microfill particles to balance the strengths of both. This mixture produces composites with higher filler content (85–90% by weight), better compressive and flexural strength than microfills or pure nanofills, and adequate polishability for most clinical applications. Hybrids became the workhorse composite for posterior restorations in the 1990s and remain widely used. The subcategory of microhybrids with particle sizes refined to 0.4–1.0 micrometres offers better polishability than earlier hybrids while maintaining the mechanical advantages. Nanohybrids, combining conventional hybrid particles with nanoparticles, have further refined this balance and now represent a large proportion of the "universal" composites marketed for both anterior and posterior use. For posterior direct restorations in moderate cavity sizes, a hybrid or nanohybrid composite is the most common specification in general practice robust enough for functional loads, polishable enough to satisfy aesthetic requirements in posterior position Type 4: Bulk-fill composite resin Bulk-fill composites are engineered to be placed in increments of 4–5mm rather than the standard 2mm increments required for conventional composite without compromising depth of cure or generating excessive polymerisation shrinkage stress. The clinical advantage is efficiency: fewer placement increments per cavity, less light-curing time, and faster posterior restoration in high-volume practice environments. Bulk-fill composites achieve their depth of cure through formulation modifications: different photoinitiator systems with improved light transmission, reduced filler content or modified filler geometries that scatter less light, and resin matrix modifications that reduce polymerisation contraction forces. The tradeoff is that some bulk-fill formulations have lower filler content than conventional hybrids, which affects long-term wear resistance in high-load posterior positions. Bulk-fill composites come in two forms: flowable bulk-fill (for base layers and undercuts) and restorative bulk-fill (which supports occlusal loads). They are specifically indicated for posterior restorations with deep proximal boxes or difficult-to-access cavity geometries. They are not appropriate for anterior aesthetic cases where optical properties matter more than placement efficiency. Type 5: Flowable composite resin Flowable composites are low-viscosity formulations containing less filler (typically 45–65% by weight) that produce a material that flows into cavity angles, undercuts, and difficult-to-access areas that condensable composites can't reach. This makes them valuable as initial lining layers in deep cavities, for small Class V lesions at the gingival margin, for pit and fissure sealant applications, and as repair materials for existing restorations. The lower filler content that gives flowables their handling advantage also reduces their mechanical strength and wear resistance compared to conventional hybrids. They should not be used as primary occlusal load-bearing materials without a covering layer of a higher-strength composite. Used correctly as a cavity liner or in small non-load-bearing applications they're a useful and efficient addition to the composite workflow. Composite resin vs. ceramic: knowing when to change material Composite resin is an excellent direct restorative material within its range. Its limitations become clinically significant in specific situations and recognising those situations is as important as knowing the composite types. For large posterior restorations covering multiple cusps, composite resin's wear rate and fracture susceptibility under sustained occlusal loading make indirect restorations preferable ceramic inlays, onlays, or full crowns. For implant-supported restorations, composite resin lacks the mechanical properties to sustain the direct loading that implants create without periodontal cushioning. For full-arch cases, it's not a clinical option. This is where dental zirconia takes over. Dental zirconia whether sourced as dental zirconia discs for multi-unit production or zirconium dental blocks for single-unit cases reaches 900–1,200 MPa flexural strength, compared to 80–180 MPa for the best composite resin formulations. Zirconia multilayer discs now deliver translucency levels that satisfy anterior aesthetic demands while retaining the strength that composite resin cannot match in high-load positions. The Aidite zirconia range and the UPCERA zirconia range available through Zirconia Guys as a North American dental lab material supplier cover the full spectrum of zirconia dental material from high-strength 3Y-TZP for posterior implant cases to multilayer anterior discs, at zirconia blocks price points competitive with other premium lab materials. Choosing the right composite for the case The decision framework for composite resin selection follows a few consistent principles: Anterior aesthetics, small-to-medium cavities: nanofill or microfill. Polishability and optical properties are the priority. Surface gloss retention over years of brushing matters here more than compressive strength. Posterior direct restorations, moderate load: hybrid or nanohybrid. Strength, wear resistance, and adequate aesthetics for a non-visible position. Nanohybrid formulations that can handle both anterior and posterior work well for clinicians wanting a single composite. Deep posterior cavities, large proximal boxes: bulk-fill as the base layer, covered with a nanohybrid occlusal layer where wear resistance matters. The efficiency benefit of bulk-fill is genuine, but the occlusal surface should be covered with a higher-strength composite in most high-load cases. Cavity liners, small Class V, pit-and-fissure sealing: flowable. The adaptation advantage in confined spaces is real; the mechanical limitations are acceptable in these non-load-bearing applications. Large indirect restorations, implant cases, full-arch: zirconia or lithium disilicate. Composite resin is not the right specification. The dental lab materials and clinical outcomes both improve when the case is referred to the appropriate ceramic material. A note for dental labs Most dental lab workflows involve composite resin primarily in provisional and indirect contexts composite inlays, onlays, and temporary crowns rather than the direct chairside applications that dominate clinical practice. For labs, the more relevant material decision is which ceramic system to specify for cases where composite resin's limitations are the reason the clinician is sending the work to the lab in the first place. Building a complete dental lab materials inventory composite resin-based materials for the provisional and indirect composite range, alongside a well-stocked zirconia offering for permanent ceramic work is how labs serve the full clinical range of referring clinicians.
Learn more
Top 3 Uses of Composite Resin in Dentistry
Walk into any dental practice or lab in the country today and composite resin is there. It is in the filling being placed in Bay 2, in the bonding case being finished in the cosmetic chair, in the temporary crown the dentist is crafting chair-side while the lab works on the final zirconia crown. It is one of the most widely used materials across all of dentistry restorative, cosmetic, and preventive and it has been central to patient care for decades. Despite how commonplace it is, composite resin is frequently misunderstood. Patients think of it simply as the tooth-coloured filling material. Clinicians new to restorative dentistry sometimes treat it as interchangeable with other tooth-coloured options. And it is often discussed without the clinical context that helps practitioners and patients understand when composite is the right choice and when another material a ceramic inlay, a porcelain veneer, or a milled zirconia crown will produce a better long-term outcome. This guide covers the top three uses of composite resin in dentistry thoroughly the clinical context, the material science behind why composite works in each application, the limitations that every practitioner needs to understand, and how composite fits into the broader landscape of dental restorative materials. Whether you are a clinician, a lab technician, or a patient researching your options, the information here goes substantially further than the standard overview. What Is Composite Resin? Before getting into the applications, it helps to understand what composite resin actually is at a material level because that chemistry determines both its strengths and its limitations in clinical use. Dental composite resin is a tooth-coloured restorative material consisting of two main components: a resin matrix and an inorganic filler. The resin matrix is typically based on bisphenol A-glycidyl methacrylate (Bis-GMA) or urethane dimethacrylate (UDMA) monomers that polymerise when exposed to blue light in the visible spectrum, typically at around 470nm. The filler particles are most commonly silica, quartz, or ceramic glass their size, distribution, and volume fraction determine the wear resistance, polishability, and mechanical strength of the cured composite. Modern composites are typically divided into categories based on filler particle size: Macrofilled composites — larger particles, high strength, but rougher surface after wear. Less common in modern practice. Microfilled composites — very small particles producing an extremely smooth, polishable surface. Lower strength, better suited to anterior esthetic work. Hybrid composites — the most common category today. A blend of particle sizes that combines reasonable strength with acceptable polishability. Used across anterior and posterior applications. Nanofilled and nanohybrid composites — the current generation. Nanoparticles and nanoclusters produce materials with excellent polish retention, improved strength, and reduced polymerisation shrinkage compared to earlier formulations. The key clinical properties that flow from this chemistry are tooth-coloured appearance, direct application and light curing in a single appointment, adhesive bonding to tooth structure, and the ability to be sculpted and shaped in the uncured state. These properties define where composite resin excels — and they also define its boundaries, which become important when comparing it to indirect ceramic and zirconia restorations. Use 1: Tooth-Coloured Dental Fillings The most widespread use of composite resin for teeth is the direct restoration of teeth affected by decay. When a cavity forms and a dentist removes the decayed tooth structure, the resulting space must be restored to return the tooth to its original shape, seal it against further bacterial ingress, and re-establish the occlusal and interproximal contacts that maintain the surrounding dentition. Composite resin does this effectively in small to medium-sized defects, and it does it with a significant aesthetic advantage over the amalgam restorations it largely replaced. A well-placed composite filling in shade A2 or A3 blends with the surrounding natural enamel to a degree that makes the restoration virtually invisible on casual inspection. The days of seeing dark grey or black restorations in patients' mouths which was universal with amalgam are behind us for most newly placed restorations. The placement technique for composite fillings is more technique-sensitive than amalgam, which is important context for understanding both the quality variation in composite restorations and the skill involved in placing them well. The cavity preparation must be clean and dry. An adhesive system typically a dental bonding agent is applied to the enamel and dentine walls and light-cured before composite is placed. The composite is then applied in thin incremental layers, each no more than 2mm, with each layer independently light-cured before the next is added. This incremental technique compensates for polymerisation shrinkage as each layer cures and contracts, the stress is distributed incrementally rather than applied to the preparation walls as a single bulk unit. Where composite fillings work best: Small to medium Class I (occlusal) and Class II (proximal) cavities in posterior teeth. Small to medium Class III (proximal anterior), Class IV (proximal incisal), and Class V (cervical) restorations. Any area where aesthetics is a priority and the cavity size is appropriate for a direct restoration. Where composite fillings reach their limits: Large posterior cavities particularly those that involve significant loss of cusp structure are where composite starts to underperform relative to indirect restorations. In large defects, the volume of composite required is substantial, the occlusal contacts are entirely on the restoration rather than being partially on natural tooth structure, and the wear and fracture risk increases. This is where a ceramic inlay, onlay, or for the most extensive defects a full-coverage crown fabricated from high-strength composite resin for teeth or milled zirconia becomes the more appropriate clinical choice. The transition point when to move from a direct composite filling to an indirect restoration is one of the more nuanced clinical judgments in restorative dentistry. As a general guide, when the anticipated restoration would cover more than half the occlusal surface, involve two or more proximal boxes, or require replacement of one or more cusps, an indirect restoration typically provides better long-term outcomes. Use 2: Cosmetic Tooth Bonding The second major clinical application for composite resin is cosmetic dental bonding a procedure in which composite is applied directly to the tooth surface to change its colour, shape, length, or size for aesthetic reasons, rather than to restore structure damaged by decay. Bonding is one of the most underappreciated procedures in cosmetic dentistry. It can close diastemas (gaps between teeth), correct the appearance of chipped or fractured incisal edges, lengthen short teeth, restore worn teeth, mask discolouration that doesn't respond to bleaching, and create a more even, symmetrical smile all in a single appointment, without laboratory involvement, and at a fraction of the cost of porcelain veneers. The clinical process begins with shade matching selecting composite in shades that replicate the colour and translucency of the existing teeth. For complex anterior cases, skilled clinicians layer multiple composite shades to replicate the internal optics of natural enamel and dentine using more opaque dentine-shade composites for the body of the restoration and more translucent enamel-shade composites for the incisal third and edges. This layering approach is where composite bonding reaches its highest level of artistic and technical sophistication. Surface preparation varies by case. In some minimal cases particularly when resin is being applied over enamel etching alone is sufficient. In cases where the bonding is placed over dentine or where the restoration is under occlusal load, the full adhesive protocol with bonding agent is used. The composite is applied, sculpted to the desired shape, and then light-cured. Final contouring and polishing brings the restoration to its finished form. What bonding does well: Single-appointment transformation. No laboratory turnaround. Minimal or no tooth reduction required. Completely reversible in most cases. Excellent aesthetics in skilled hands. Cost-effective relative to indirect options. What bonding cannot replicate: The colour stability of ceramic. Composite resin absorbs stain from coffee, tea, red wine, and tobacco over time bonding typically needs polishing or replacement every three to five years to maintain its appearance. Porcelain veneers, by comparison, resist staining at the ceramic surface for significantly longer periods. For patients who prioritise longevity over the conservative nature of bonding, ceramic veneers represent a higher-durability option. The clinical conversation about bonding versus veneers is one that every restorative dentist has regularly. The right answer depends on the extent of the change needed, the patient's age and habits, their budget, and whether they value conservatism and reversibility or longevity and colour stability. Composite bonding is frequently the right answer it is not a lesser option, it is a different clinical tool with its own appropriate patient profile. Use 3: Composite as an Adhesive Securing Veneers, Crowns, and Indirect Restorations The third major use of composite resin is as an adhesive material specifically as the luting agent that bonds indirect ceramic restorations to the prepared tooth structure. This application is less visible to patients than fillings or bonding, but it is clinically critical. A perfectly designed and fabricated veneer or crown that is cemented with a suboptimal luting protocol can fail at the adhesive interface rather than the restoration itself, leaving the clinician and patient with a replacement case that should not have been necessary. When a porcelain veneer, ceramic inlay, or all-ceramic crown is bonded to a tooth, the adhesive system creates a hybrid zone a microscopically interlocking structure between the resin luting agent and the mineralised tooth structure that provides the bond strength holding the restoration in place. This is a genuinely demanding clinical application the composite must wet and penetrate the adhesive layer, flow into the preparation without voids or inclusions, cure fully under the thickness of the overlying ceramic, and maintain its bond under the thermal cycling and mechanical loading that the restoration will experience over its clinical lifespan. Resin luting composites used for bonding indirect restorations are formulated differently from the composite used for direct restorations. They are typically lower viscosity to allow complete seating of the restoration without hydraulic resistance that would prevent the crown or veneer from fully seating. They are available in multiple shades and opacities that can be selected to influence the final colour of the restoration particularly important for thin, translucent veneers where the cement shade significantly affects the perceived colour of the finished restoration. The surface treatment protocol matters: For the ceramic side, the restoration must be etched (for silica-based ceramics like lithium disilicate and feldspathic porcelain) with hydrofluoric acid and silane-treated to create the chemical and mechanical bond sites that the luting composite will engage. For zirconia restorations, the protocol is different zirconia is acid-resistant and cannot be etched with HF. Bonding to zirconia requires either a phosphate monomer primer or a MDP-containing cement that bonds chemically to the zirconia surface. This is clinically relevant because it means the luting protocol for a zirconia blank-based crown is different from the protocol for a pressed lithium disilicate crown, and using the wrong protocol produces dramatically inferior bond strength. For the tooth side, the preparation must be etched (for enamel, which bonds reliably), and dentine must be treated with an appropriate adhesive system before the luting composite is applied. Total-etch, self-etch, and selective-etch protocols each have their clinical indications depending on the case. How Composite Resin Fits Into the Broader Dental Materials Picture? Understanding composite resin properly means understanding where it stops being the right choice and what material takes over at that point. The clinical hierarchy of restorative materials in modern dentistry follows a principle of structural equivalence: the material you choose should match the structural demands of the clinical situation. For small defects, composite resin handles the load adequately. As defect size increases and load-bearing requirements grow, the case moves toward materials with higher structural performance. For medium posterior defects involving cusp replacement or multi-surface involvement, ceramic inlays and onlays fabricated from lithium disilicate or pressed ceramic offer higher strength and better wear resistance than direct composite while still preserving significant tooth structure relative to a full-coverage crown. For large defects, multi-unit bridges, implant crowns, and any restoration under high masticatory load in a posterior position, the current clinical standard is zirconia. The zirconia blocks dental material used to mill these restorations delivers flexural strength between 600 and 1,200 MPa depending on the formulation a performance level that no composite resin approaches. Dental zirconia blanks in their various grades monolithic, pre-shaded, and multilayer cover the full range of esthetic and functional requirements from high-strength posterior crowns to translucent anterior single units. Labs supplying zirconia blocks to dental practices understand this material hierarchy at a practical level. When a case comes in for a large posterior crown on a patient with a heavy bite and bruxism history, the material prescription is not composite. It is high-strength monolithic zirconia from a reputable dental lab material supplier. When a case comes in for an upper left central incisor that needs a single-unit restoration with maximum esthetics and the load is primarily compressive with no heavy lateral contacts, lithium disilicate conversation begins. Composite resin supports this hierarchy in the luting role bonding the indirect ceramic or zirconia restoration to the tooth once it leaves the lab but does not compete with high-strength ceramics for the permanent structural role in demanding posterior cases. Composite Resin vs. Other Tooth-Coloured Options Patients and clinicians frequently face a choice between composite resin and alternative tooth-coloured restorative options. Here is how those comparisons actually break down: Composite vs. Amalgam — Amalgam is stronger, more wear-resistant in large posterior cavities, and easier to place in a technique-independent way. Composite is tooth-coloured, requires no healthy tooth reduction for retention (relies on bonding rather than undercuts), and is the preferred aesthetic option. In most practices, composite has replaced amalgam for new restorations based on patient preference and improved composite formulations, though amalgam still has niche clinical applications. Composite vs. Glass Ionomer — Glass ionomer releases fluoride (a caries-prevention benefit), bonds chemically to tooth structure without etching, and is moisture-tolerant during placement making it suitable for areas where rubber dam isolation is difficult. Composite is stronger, more polishable, and more color-stable. The choice depends on the patient's caries risk profile and the clinical situation. Composite vs. Porcelain Veneers — As discussed in the bonding section: composite bonding is conservative, reversible, and fast; porcelain veneers are more colour-stable, more durable, and more luminescent. Both have their place the choice depends on the extent of the case and patient priorities. Composite vs. Milled Zirconia Crowns — For full-coverage crowns, milled zirconia from high-quality zirconia dental blanks is the dominant material for both posterior and (with multilayer formulations) anterior cases. Composite full-coverage crowns are used as temporaries and provisionals but not as definitive long-term restorations in high-load cases. The Three Uses and What They Tell You Composite resin earns its place in dentistry because it does something no other material does quite the same way: it can be placed directly in the mouth, shaped in real time to whatever form the clinical situation requires, and cured in under a minute to a stable, tooth-coloured, bonded restoration. That combination of properties direct placement, immediate shaping, immediate curing, adhesive bonding, and tooth colour is uniquely suited to three clinical applications that together represent an enormous portion of restorative and cosmetic dental practice. Tooth-coloured fillings are where it is used most. Cosmetic bonding is where it is used most creatively. Luting of indirect restorations is where it is used most critically without getting the credit it deserves. In all three, understanding the material's properties its strengths and its limits is what allows clinicians to use it appropriately and get the best outcomes for their patients. When the clinical situation exceeds composite's limits, the answer is ceramic or zirconia and that transition, made at the right time in the right cases, is what delivers long-term restorative success.
Learn more
What Are the Benefits of Composite Resin in Dental?
Composite resin has been used in dentistry since the 1960s and is now the most widely placed restorative material in clinical practice worldwide. Its dominance isn't accidental composite resin offers a combination of properties that no single alternative matches across the full range of direct restorative applications. Understanding those properties, and equally understanding the limitations, is what allows clinicians and dental labs to use composite resin correctly rather than reflexively. This guide covers composite resin from a clinician and lab perspective what it's made of, what its genuine benefits are, where its limits lie, the different types available, and how it fits alongside indirect restorative materials like zirconia and ceramic in a complete practice workflow. What composite resin is made of? Understanding the composition of composite resin for teeth explains most of its clinical behaviour. Modern dental composite resin is a three-component system: Resin matrix — the organic binder that holds the restoration together. Most modern composites use bisphenol A-glycidyl methacrylate (Bis-GMA) or urethane dimethacrylate (UDMA) as the primary matrix monomer, combined with lower-viscosity diluent monomers (TEGDMA, HEMA) that improve handling and reduce stiffness. The matrix polymerises under blue light at approximately 470nm from a curing lamp, converting from a viscous paste to a solid polymer network. Inorganic filler — glass, quartz, or ceramic particles that reinforce the resin matrix and provide the mechanical properties needed for restorative function. Filler particle size, shape, and loading percentage vary between composite types and determine the final mechanical performance and surface finish characteristics. Higher filler loading generally produces better wear resistance and lower polymerisation shrinkage. Silane coupling agent — a chemical bridge that bonds the filler particles to the resin matrix. Without adequate silane coupling, the filler particles debond from the matrix under mechanical loading, accelerating wear and reducing fracture resistance. The quality of silane coupling is one of the less visible but more clinically significant differences between composite formulations. The genuine benefits of composite resin Aesthetics the primary clinical advantage Composite resin's most immediately apparent benefit is aesthetic. It can be formulated and shaded to match any natural tooth colour, and its translucency can be adjusted to mimic the optical behaviour of enamel versus dentine. A skilled clinician with good composite technique can produce restorations in anterior positions that are genuinely difficult to distinguish from surrounding natural tooth structure. This replaced the functional but visually unacceptable amalgam filling as the standard for anterior restorations decades ago, and has since expanded into posterior direct restorations where aesthetic expectations have risen among patients. The ability to shade-match precisely, layer different translucencies, and characterise the surface is what makes composite the material of choice for direct aesthetic work. Tooth conservation less preparation required Composite resin bonds micromechanically to etched enamel and chemically to dentine through adhesive bonding systems. This bonding mechanism means that retentive preparation geometry the undercuts and box forms required to mechanically retain amalgam is not necessary for composite. The restoration retains itself through adhesion rather than mechanical lock. The practical result is more conservative cavity preparation. For small to medium cavities, a composite restoration removes less healthy tooth structure than an equivalent amalgam. Over a patient's lifetime through successive replacement cycles as restorations wear this cumulative conservation matters. Preserving more tooth structure at each intervention improves the long-term prognosis of the restored tooth. Versatility across indications Very few dental materials are clinically useful across as wide a range of indications as composite resin. A single material handles direct posterior fillings, anterior fillings, composite bonding for chipped or fractured teeth, composite veneers, diastema closure, surface characterisation of indirect restorations, core buildups under crowns, and cementation of some indirect restorations. This versatility reduces the number of materials a practice needs to maintain and master. Direct placement single appointment delivery Because composite is placed directly in the mouth and light-cured in situ, it produces a complete restoration in a single appointment without laboratory involvement. For patients who need a functional, aesthetic restoration delivered quickly and for practices that want to offer single-appointment restorative care composite's direct placement capability is a genuine clinical and commercial advantage. Repairability When a composite restoration is damaged by fracture, wear, or marginal breakdown it can usually be repaired by adding fresh composite to the affected area after re-roughening and re-bonding the surface. This is possible because the same adhesive chemistry that bonds composite to tooth enamel also bonds fresh composite to existing composite. A ceramic or zirconia crown that fractures requires complete replacement. A composite filling that chips can often be repaired chairside in minutes. Reduced post-operative sensitivity compared to amalgam Metal amalgam restorations conduct thermal changes from hot and cold foods directly to the pulp through the metallic substructure. Composite resin is a thermal insulator it doesn't conduct temperature in the same way, which reduces sensitivity to thermal stimuli after restoration placement. For patients with existing dentinal sensitivity, this is a clinically meaningful advantage. The limitations clinicians should communicate honestly Composite resin's benefits are real, but presenting them without the limitations does patients a disservice. A clinician who understands both sides can help patients make genuinely informed decisions. Longevity is lower than indirect restorations.Published data consistently shows that composite restorations in posterior positions last an average of 5–7 years before requiring replacement or repair. Indirect ceramic or zirconia crowns in appropriate indications last 10–15 years. For a young patient with decades of dental treatment ahead, the cumulative number of replacement cycles on a composite restoration and the tooth structure lost with each one is a clinically relevant consideration. Technique sensitivity.The success of a composite restoration depends substantially on operator technique. Moisture contamination during placement degrades adhesive bonding. Inadequate curing depth leaves unreacted monomer in the deeper layers. Insufficient incremental placement produces internal voids and inadequate polymerisation throughout the restoration. These are controllable with good technique, but they represent a significant variable that doesn't affect equally technique-insensitive materials like amalgam. Polymerisation shrinkage.All light-cured composite resins shrink during polymerisation — typically 1–5% volumetrically depending on the formulation. This shrinkage creates stress at the tooth-restoration interface and can contribute to marginal gap formation and post-operative sensitivity if not managed with proper incremental technique and appropriate matrix systems. Staining over time.The resin matrix of composite is more susceptible to staining from pigmented foods, beverages, and tobacco than ceramic or zirconia surfaces. Modern composites have improved substantially in stain resistance compared to earlier formulations, but the surface still requires polishing maintenance and shows more colour change over time than a glazed ceramic restoration. Types of dental composite resin Not all composite resins are the same product. The clinical application determines which formulation is appropriate. Hybrid composites - combine large and small filler particles providing a balance of strength and aesthetic quality that makes them suitable for both anterior and posterior restorations. Most modern universal composites are hybrid formulations. Microhybrid composites - use smaller average filler particle sizes than traditional hybrids, producing a smoother surface finish while maintaining adequate strength for posterior use. These are among the most widely used formulations in general practice. Nanofilled and nanohybrid composites - incorporate nanoparticle fillers (40–50 nm) that produce very smooth, highly polishable surfaces with good aesthetic longevity. Suitable for anterior restorations where surface finish is the priority, and in nanohybrid formulation for posterior use as well. Bulk-fill composites - are formulated with modified photoinitiator systems and filler geometries that allow deeper light penetration enabling placement in increments up to 4–5mm rather than the 2mm increments required for conventional composite. This reduces placement time in posterior restorations where deep cavities are common. Flowable composites - have reduced filler loading and lower viscosity they flow into complex cavity geometries and undercuts that packed composites can't reach. Used as liner materials, in small Class III cavities, and for repair work rather than as primary restorative materials in load-bearing positions. Where composite ends and indirect restorations begin? Understanding composite resin's limits is inseparable from understanding when indirect restorations crowns, onlays, inlays are the more appropriate specification. The distinction isn't always obvious to patients, and it's worth clarifying in clinical communication. When a tooth has lost more than 50% of its coronal structure, composite restoration alone typically produces inadequate results the remaining tooth structure can't adequately support or retain the restoration, and fracture risk is high. An indirect restoration that envelopes the remaining tooth structure a ceramic or zirconia crown provides superior protection and longevity. For posterior implant-supported restorations, composite resin has no role as a permanent material. Implants transfer bite forces directly to the restoration without the cushioning of a periodontal ligament, and composite's mechanical properties are inadequate for sustained loading in this context. Zirconia is the clinical standard whether as a zirconium dental material milled from zirconia blanks or dental zirconia discs for multi-unit production runs, its 900–1,200 MPa strength is what the clinical situation demands. For labs supplying practices that run both composite direct restorations and indirect ceramic or zirconia restorations, having a reliable source for both types of dental lab materials is operationally valuable. The dental zirconia discs and zirconia block range from UPCERA covers the indirect zirconia workflow from high-strength 3Y posterior work through zirconia multilayer anterior aesthetics while the Aidite zirconia range adds further breadth for labs needing pre-shaded, high-translucency, and full-arch material options. Zirconia blocks price varies by grade and format but is consistently appropriate for permanent indirect restorations with 10–15 year expected lifespan a different economic and clinical calculation from composite direct restorations at lower upfront cost but shorter replacement cycles. Both have their place; the key is using each in the right indication. As a North American dental lab material supplier covering both zirconia and complementary dental lab materials, get in touch with the Zirconia Guys team to discuss which products suit your lab's or practice's restorative workflow.
Learn more
Everything You Need to Know About Composite Resin Veneers
Composite resin veneers have become one of the most requested cosmetic dental procedures in the United States and one of the most misunderstood. Patients who walk into a consultation often have a vague id and one of the most misunderstood. Patients who walk into a consultation often have a vague idea that they want veneers, but a limited understanding of what composite resin actually is, how it differs from porcelain or zirconia options, what they can realistically expect in terms of results and longevity, and when it makes clinical sense to choose it over the alternatives. This guide covers all of it. Whether you are a patient researching your options, a dentist looking for a thorough resource to share with your practice, or a lab technician who wants to understand where composite fits in the broader restorative materials landscape this article gives you the complete picture. What Is a Composite Resin Veneer? A composite resin veneer is a thin layer of tooth-coloured composite material applied directly to the front surface of a tooth to improve its appearance. The composite itself is a blend of acrylic resin the polymer matrix and fine ceramic or glass filler particles. The filler particles give the material its hardness, wear resistance, and ability to reflect light in a way that mimics natural enamel. The resin matrix holds the composite together and allows it to be shaped and worked before curing. The material is applied to the tooth in layers, sculpted to the desired shape and contour by the clinician, and then hardened using a curing light that activates a photoinitiator within the resin. Once cured, the composite bonds to the tooth structure and the surface is polished to a smooth, natural finish. What distinguishes composite veneers from porcelain veneers is that the entire procedure happens chairside in the dental chair, during a single appointment in most cases. There is no impression taken, no lab fabrication, no temporary veneer to wear between visits. The dentist applies the material directly and shapes it in real time. This makes composite veneers faster and significantly more affordable than their porcelain counterparts, though the trade-offs in durability and longevity are real and worth understanding clearly. The Two Main Types of Composite Resin Veneer Direct composite veneers are the most common type. The composite is applied, built up, and sculpted freehand by the dentist during the appointment. The quality of the outcome is heavily dependent on the clinician's artistic skill and experience with the material. A skilled cosmetic dentist can produce stunning results with direct composite but the technique sensitivity is high and the consistency between cases varies more than with lab-fabricated restorations. Indirect composite veneers are made outside the mouth, either in a dental laboratory or with in-office milling technology, then bonded to the tooth at a second appointment. The fabrication environment allows for more controlled shaping, finishing, and characterisation than direct chairside application. Indirect composites also typically undergo additional curing under heat and pressure, which improves their mechanical properties higher hardness, better wear resistance, and reduced polymerisation shrinkage compared to direct composite. The trade-off is added cost and an additional appointment, though still significantly less expensive than full porcelain veneers. What Problems Can Composite Resin Veneers Fix? Composite veneers are well suited to a specific range of cosmetic concerns. Understanding where the material performs best and where it reaches its limits is essential for setting realistic patient expectations. Chips and minor fractures — composite resin is excellent at restoring chipped incisal edges and small fractures. It bonds directly to enamel through adhesive bonding protocols and can restore the original tooth contour accurately. Repairs to existing composite can also be made chairside without replacing the entire veneer. Tooth discolouration — composite can mask surface staining and intrinsic discolouration that does not respond to whitening treatment. It is particularly useful for tetracycline-stained teeth or teeth with fluorosis, where the discolouration extends through the tooth structure and cannot be addressed with bleaching. Gaps between teeth — small diastemas, particularly the central incisor gap, can be closed with composite resin build-up on the mesial surfaces of adjacent teeth. This is one of the most common applications and one of the most immediately impactful in terms of smile transformation. Tooth shape and proportion — teeth that are too short, too narrow, or irregularly shaped can be contoured with composite to improve proportion and harmony within the smile. Minor misalignment — teeth that appear slightly rotated or positioned unevenly can sometimes be optically corrected with composite, avoiding orthodontic treatment for patients with mild concerns. What composite veneers cannot effectively address? severely worn dentition, large restorative deficits, significant malocclusion, or cases where multiple teeth require substantial reconstruction are better served by more durable restorative options. When the clinical case requires a material that will handle high occlusal loads for ten or more years, composite resin is not the right starting point. Composite Resin Veneers vs. Porcelain Veneers This comparison is where patients and clinicians spend most of their decision-making energy, and it is worth going through methodically rather than with a simple bullet point summary. Appearance — both materials can produce beautiful, natural-looking results. Porcelain has an inherent advantage in light transmission it is a ceramic material whose optical behaviour more closely resembles natural enamel, with a depth and translucency that composite resin cannot fully replicate. High-quality composite applied by a skilled clinician can come very close, particularly in photographs, but side-by-side with natural teeth under clinical lighting, an experienced eye will often distinguish composite from ceramic. Durability and wear — this is the most significant practical difference. High-quality dental porcelain is extremely hard and resistant to abrasion. It does not stain from coffee, tea, red wine, or tobacco in the way that composite does. Porcelain veneers, when properly bonded and occlusally positioned, routinely last twelve to twenty years. Composite resin veneers are softer, more susceptible to surface staining, and more prone to chipping under occlusal stress. A well-maintained composite veneer in a low-stress occlusal environment might last seven to ten years before needing significant repair or replacement. In a patient who grinds or has heavy posterior contacts loading the anterior teeth, that lifespan shortens considerably. Repairability — this is composite's clinical advantage over porcelain. A chipped composite veneer can almost always be repaired chairside without replacing the entire restoration. A chipped porcelain veneer often requires a complete remake a new impression, new lab fabrication, a new delivery appointment, and significantly more cost. For patients who are concerned about long-term maintenance costs or who have habits that put their restorations at risk, the repairability of composite is a meaningful advantage. Cost — composite veneers are consistently less expensive than porcelain veneers, both because the material itself costs less and because the fabrication workflow is simpler. Direct composite avoids lab fees entirely. Even indirect composite veneers are significantly less expensive than feldspathic or pressed ceramic equivalents. Tooth preparation — composite veneers typically require little to no enamel removal. In many cases they can be applied to unprepared enamel surfaces, making the procedure fully reversible. Porcelain veneers, particularly conventional thickness veneers, require the removal of a small but permanent amount of enamel to create space for the ceramic shell. Once enamel is removed for porcelain veneers, the tooth is committed to being covered by a restoration indefinitely. Composite Resin Veneers vs. Zirconia Restorations A complete guide to veneer options in 2025 needs to address the broader restorative materials landscape, not just composite versus porcelain. Zirconia has become a dominant material in dental restoration and is increasingly used for esthetic anterior cases, not just posterior crowns. This is where the perspective of a dental lab materials supplier is valuable. Understanding what these materials are not just what they produce clinically gives patients and clinicians better tools for making decisions. What composite resin is at the material level? composite resin for teeth is a polymer-ceramic hybrid. The resin matrix is typically a dimethacrylate compound (most commonly BisGMA or UDMA), and the filler particles are barium glass, silica, or similar ceramic compounds. The filler loading — the percentage of filler by weight or volume — determines the material's mechanical properties. Higher filler loading means harder, more wear-resistant composite with better polishability. Nanofilled and nanohybrid composites represent the current generation of direct dental composites with the finest particle sizes and the best surface finish characteristics. What zirconia is at the material level? zirconia is zirconium dioxide, a crystalline ceramic oxide. It is processed in pre-sintered disc or block form zirconia blocks dental material that is loaded into a CAD/CAM milling machine, cut to shape, then sintered at high temperature to achieve its final density and strength. The flexural strength of sintered zirconia ranges from approximately 600 MPa in high-translucency formulations to over 1,200 MPa in high-strength grades roughly three to five times harder than conventional dental porcelain, and far beyond the mechanical performance of any composite resin. When does zirconia become relevant in veneer-adjacent cases? when the clinical situation moves beyond pure cosmetics into territory where durability and structural integrity matter. A patient with significant tooth wear, a history of porcelain fractures, or high occlusal forces who also wants anterior esthetic improvement is not ideally served by composite or even conventional porcelain. Thin, highly translucent zirconia crowns or veneers milled from high-translucency zirconia dental blanks can provide the esthetic result the patient wants with the durability that composite cannot deliver. Developments in ultra-translucent zirconia formulations, including 5Y-PSZ materials with translucency approaching lithium disilicate, have made zirconia viable for anterior esthetic restorations in ways that were not possible a decade ago. The zirconia blank that a lab technician loads into the milling machine for an anterior zirconia crown is the starting point for a restoration that can serve that patient for fifteen to twenty-five years. For a patient who has already gone through one or two cycles of composite veneer repair and replacement and wants a long-term solution, this conversation is worth having. What Actually Happens? Consultation and shade selection — the first appointment focuses on establishing the clinical goals. The dentist examines the teeth, evaluates the existing occlusion, and discusses the patient's expectations in specific terms. Shade selection is done with the tooth wet and before any tooth isolation, since enamel dehydrates under rubber dam or cotton roll isolation and appears lighter than it actually is. Photographs are taken as a reference. Enamel conditioning — if any minimal preparation is needed, it is performed at this stage. For most direct composite veneers, preparation is minimal or absent. The tooth surface is then cleaned, and an acid etch is applied to create microporosity in the enamel surface — the microscopic roughening that allows the bonding agent to penetrate and create mechanical retention. Bonding agent application — a dental adhesive is applied to the etched surface, worked into the enamel with a brush, air-thinned, and light-cured. This creates the bonded interface between the tooth and the composite. Layered composite application — the composite is applied in layers rather than as a single bulk mass. This is important for two reasons: controlling polymerisation shrinkage (each layer shrinks slightly as it cures; layering distributes this stress) and achieving the optical depth that makes composite look natural. A skilled clinician will typically place a more opaque dentine-shade layer first to establish value, then apply progressively more translucent enamel-shade composite toward the incisal edge to replicate the optical gradation of natural tooth structure. Shaping and curing — each layer is sculpted to the desired contour before curing. The clinician uses brushes, modelling instruments, and mylar strips at the interproximal contacts to shape the composite precisely. Each layer is cured for the time specified by the manufacturer. Finishing and polishing — once the full build-up is cured, the restoration is finished with fine diamond burs and polishing discs to remove excess material, refine contours, and achieve the final surface finish. Polishing is not a cosmetic step — it is a clinical one. A well-polished composite surface resists staining and plaque accumulation far better than a rough one. Occlusal check — the final step before the patient leaves. Articulating paper is used to check that the composite does not carry premature occlusal contacts in centric relation or on excursive movements. High spots are adjusted and re-polished. How Long Do Composite Resin Veneers Last? The honest answer is that composite veneer longevity varies substantially based on three factors: the quality of the composite material, the skill of the clinician, and the patient's habits and occlusal situation. Under ideal conditions high-quality nanofilled composite, excellent technique, low-stress occlusion, good patient compliance with care instructions composite veneers can remain functional and esthetic for eight to twelve years before replacement or major repair is warranted. Under less favourable conditions heavy grinding, staining habits, high occlusal loading on anterior teeth the same restoration may show significant wear, staining, or marginal degradation within three to five years. Research published in the Journal of Dentistry suggests that composite veneers have a survival rate of approximately 80–90% at five years and 60–75% at ten years when factoring in both minor repairs and complete replacement. These numbers are respectable for a material in this cost range, but they are clearly inferior to the survival data for ceramic restorations, where ten-year survival rates above 90% are routinely reported in the literature. The practical implication for patients is this: composite veneers are a commitment to an ongoing maintenance relationship with their dentist. They will likely need polishing at every hygiene appointment, may need small repairs periodically, and will eventually need replacement. Patients who understand and accept this — and who see the lower upfront cost as appropriate for a medium-term solution — are ideal composite veneer candidates. Patients who want to do the work once and be done for twenty years should be counselled toward ceramic or zirconia options. What Patients Need to Know? Oral hygiene — composite veneers require the same basic oral hygiene as natural teeth, with some specific considerations. Abrasive toothpastes including whitening toothpastes with high RDA values will scratch composite surfaces and accelerate staining. A smooth-surface, low-abrasive toothpaste is the right choice. Flossing is safe around composite veneers and should not be avoided. Dietary habits — composite is more susceptible to staining than ceramic. Coffee, tea, red wine, tomato sauce, and berries will stain composite over time, particularly if the surface loses its high polish. This does not mean these foods must be avoided entirely, but rinsing with water after consuming them helps. Smoking or tobacco use will stain composite significantly and quickly. Habits and parafunctions — nail biting, pen chewing, and ice chewing will chip composite veneers. Patients who grind or clench at night should be provided with a night guard to protect both the composite veneers and the opposing dentition. Regular professional maintenance — composite veneers should be polished at every hygiene appointment. A professional polish restores the surface finish that resists staining, and early detection of marginal degradation or wear facets allows small issues to be addressed before they become large repairs. Where Composite Resin Fits in the Restorative Materials Ecosystem? For dental professionals and labs, composite resin veneers represent one end of a spectrum of esthetic restorative options that extends through ceramic to zirconia. Understanding the full spectrum matters because patients who start with composite sometimes progress to ceramic or zirconia options as their needs change and the lab that handles their zirconia restorations needs to supply consistently high-quality material. Composite resin for teeth and milled zirconia are not competing materials they serve different clinical needs and different patient populations. A lab that stocks both high-quality zirconia dental blanks for permanent ceramic restorations and appropriate composite or resin materials for their full range of clinical cases is positioned to serve the complete restorative workflow. At ZirconiaGuys, we supply dental labs across the United States with premium UPCERA and Aidite zirconia discs and blocks alongside the complete Keystone and Whip Mix resin ranges. Our team is available Monday through Friday to help labs source the right materials for every application from composite-adjacent digital lab workflows to high-strength multilayer zirconia for demanding full-arch restorations. Is a Composite Resin Veneer the Right Choice? Composite resin veneers are an excellent solution for patients with specific, modest cosmetic goals closing small gaps, repairing chips, improving tooth colour and shape who want a faster and more affordable treatment with minimal tooth reduction. They are a genuine clinical option, not simply a lower-quality alternative to porcelain. They are not, however, the right choice for every patient or every clinical situation. Heavy occlusal loading, significant tooth loss, severe discolouration, and the desire for a very long-term solution all favour ceramic or zirconia restorations. The conversation between clinician and patient should be specific and honest about what composite resin can and cannot deliver and should include a discussion of when a more durable material makes better long-term clinical and financial sense. The materials are well understood. The decisions are clinical. And for the lab producing the restorations that follow composite veneers whether that is a zirconia crown, a pressed ceramic bridge, or a full-arch implant prosthesis sourcing consistently high-quality dental materials from a trusted supplier makes every case stronger from the start.
Learn more
How to Choose the Best Dental Resin for 3D Printing?
Every dental lab running a 3D printer eventually hits the same wall. The printer is up and running, the software is working, the files are printing and then a case comes out wrong. The model warped slightly. The surgical guide doesn't seat cleanly. The night guard is too stiff for the patient to wear comfortably. The try-in denture fractured during the appointment. In almost every one of these situations, the root cause is not the printer. It is the resin. Either the wrong material was used for the application, or the right material was used without a full understanding of how to get the best out of it. Dental 3D printing resin is not a commodity it is a family of highly differentiated materials, each formulated for a specific set of clinical requirements. Treating them as interchangeable is the single most common mistake labs make when they first move into digital workflows. This guide covers everything a dental professional needs to know to choose the right resin for every application: the key properties that matter clinically, the questions to ask before selecting a material, how different resin types compare, and how resins fit into the broader context of a complete digital lab workflow that also includes milled zirconia restorations. Why Resin Choice Matters More Than Most Labs Realise? The dental 3D printing market is now large enough that there are dozens of resins available for what looks like the same application. Two model resins from different manufacturers might both be marketed as "high accuracy dental model resin" but one might have significantly tighter dimensional tolerance, a better surface finish, and more consistent batch-to-batch performance than the other. The same is true across every category. Two splint resins might look identical on a spec sheet but behave very differently at the chair one staying flexible at room temperature and becoming more rigid under occlusal load, the other remaining uniformly stiff in a way that leads to patient non-compliance. Getting resin selection right is not about finding the most expensive or the most heavily marketed material. It is about understanding the specific requirements of each clinical application and matching the resin formulation to those requirements. That understanding starts with knowing what properties actually drive clinical performance. The Six Properties That Actually Drive Clinical Performance Before getting into specific resin categories, these are the material properties that determine whether a resin will perform well for a given application. These are the properties to evaluate — not the marketing claims around them. Dimensional accuracy and shrinkage — all photopolymer resins shrink slightly when they cure, because polymerisation involves a reduction in molecular volume. The magnitude of that shrinkage, and how uniformly it occurs across the part, determines how closely the finished print matches the design file. For working models, surgical guides, and aligner models, this accuracy is critical. A resin with high shrinkage or non-uniform cure behaviour produces parts that drift from the intended dimensions and every downstream clinical decision made using that model or guide inherits the error. Surface finish — the smoothness and detail resolution of the cured surface. This matters most for working models and surgical guides where fine anatomical features margin lines, tissue contours, contact areas need to be legible. A rough, pixelated, or wavy surface obscures this information and produces unreliable clinical output. Mechanical properties at the application — strength, hardness, flexibility, and fracture resistance. The right combination varies by application. A surgical guide needs rigidity and dimensional stability. A splint for a light bruxer needs comfortable flexibility. A castable resin needs clean burnout, not strength. Using a material optimised for one mechanical profile in an application that demands another is a common source of clinical failure. Biocompatibility classification — any resin intended for intraoral contact must carry the appropriate biocompatibility certification for its specific use. In the United States, this means FDA clearance as a medical device appropriate for the application. The classification is not a general claim a Class I device clearance for a surgical guide does not automatically apply to a denture base or a permanent crown. Each intraoral application has its own regulatory requirement. Model resins and casting resins that never contact the patient do not need biocompatibility certification, but anything placed in the mouth even temporarily does. Printer and wavelength compatibility — dental 3D printing resins are typically formulated for either 385nm or 405nm UV wavelengths, or dual compatibility with both. Using a resin outside its validated wavelength range produces unreliable cure depth, mechanical inconsistency, and potential surface tackiness. Before selecting any resin, confirm it is validated for your specific printer model and wavelength configuration. Shelf life and storage — photopolymers degrade with exposure to light, heat, and time. Resins stored incorrectly, used past their shelf life, or consistently exposed to ambient UV light before printing will behave inconsistently curing unevenly, producing brittle parts, or failing to reach full polymerisation even with correct print settings. How to Choose: Application-by-Application The most reliable approach to resin selection is to start with the clinical application and work backward to the material requirements. Here is how that process works for each major dental resin category. Choosing a Model Resin The requirement for a model resin is straightforward: it needs to produce a dimensionally accurate, surface-smooth physical representation of the digital scan data. The technician working from that model designing a crown, fitting an aligner, evaluating a bite needs to be able to trust what the model tells them. Key selection criteria: Dimensional accuracyLook for published accuracy specifications from the manufacturer, ideally validated on a printer configuration similar to yours. Deviation from nominal dimensions of more than 50–75 microns in critical areas is significant for crown and bridge workflows. Surface finishIs closely related to accuracy but specifically affects readability. Warm-toned model resins golden brown, grey provide better visual contrast for margin reading under typical lab lighting than white or ivory options, which can wash out under direct overhead light. Consistency across batchesMatters more for high-volume labs than small practices. A resin that prints perfectly for three months and then produces visibly different results with a new batch creates invisible accuracy problems that are hard to diagnose. Model resins do not need biocompatibility certification. They are never placed in the patient's mouth. This typically makes them more affordable than biocompatible resins of comparable dimensional performance. Choosing a Surgical Guide Resin Surgical guide selection has a non-negotiable requirement that model resin selection does not: biocompatibility for intraoral use, with the appropriate regulatory clearance for the application. Beyond biocompatibility, surgical guide resins must be clear or highly translucent. The surgeon uses the guide during an active surgical procedure and needs visual confirmation that it is fully and correctly seated before drilling begins. Opacity eliminates this visual check. Dimensional accuracy is critical in a way that goes beyond aesthetics the guide translates a digitally planned implant position from planning software into physical drill angulation and depth at the bone. A guide that distorts during printing, post-cure, or sterilisation introduces an error into the surgical execution of the digital plan. Autoclave compatibility is also essential. Sterilisation of the guide prior to surgery is the standard of care. The resin must maintain dimensional stability and biocompatibility through standard autoclave cycles. Many general-purpose resins lose dimensional integrity at autoclave temperatures, which is why surgical guide resins are specifically formulated to withstand the sterilisation process. Choosing a Splint or Night Guard Resin The soft clear resin for dental appliances category is one of the most commonly misunderstood in dental 3D printing. Many labs default to hard acrylic-type resins for all splint fabrication because hard splints are the clinical standard for bruxism management. But patient compliance is a real clinical variable a patient who finds their appliance uncomfortable will stop wearing it, and an unworn appliance protects nothing. Hard splint resins cure to a firm, dimensionally stable surface that provides a defined occlusal table for bite registration and force redistribution. They are appropriate for heavy bruxers, patients requiring TMD stabilisation therapy, and any case where a hard acrylic surface is clinically indicated. Semi-flexible or soft splint resins produce appliances with a degree of resilience and cushioning that many patients find more comfortable to wear particularly in the initial adjustment period. They are less appropriate for heavy parafunctional habits where the flexibility allows deformation under load, but for lighter occlusal habits or comfort-focused indications they often produce better clinical outcomes because patients actually use them. Both categories require biocompatibility clearance for intraoral use. The biocompatibility certification is specific to the resin a model resin that happens to be soft is not a night guard resin. Choosing a Castable or Burnout Resin Castable resin selection is driven by one property above almost all others: burnout behaviour. The resin must eliminate completely at standard furnace temperatures, leaving no residue, no carbon, and no contamination in the investment mould. Incomplete burnout produces casting defects porosity, inclusions, and surface roughness in the final metal casting or pressed ceramic restoration. Secondary to burnout, castable resins need sufficient surface definition to accurately print the fine marginal and anatomical detail that will carry through to the final casting. The investment captures what the printed pattern shows, and the final casting reproduces what the investment captured. Detail loss at any stage propagates through to the finished restoration. Castable resins are not biocompatible because they are never placed in the patient's mouth they are burned out in a furnace before any clinical use. This gives the formulation more flexibility to optimise for printability and burnout behaviour without the constraints of biocompatibility chemistry. Choosing a Try-In Resin Try-in resins need to be biocompatible for temporary intraoral contact but they do not need the long-term durability or mechanical performance of a final denture material. They need enough strength to survive the try-in appointment intact, shade accuracy that reflects the intended final shade, and biocompatibility that makes them safe for the brief period they are in the patient's mouth. The main clinical risk with try-in resins is shade mismatch. If the resin shade does not accurately reflect the intended shade of the final prosthetic, the patient's aesthetic feedback at the try-in appointment is based on the wrong information, and their approval does not reliably predict their satisfaction with the final result. Choosing a try-in resin that corresponds accurately to VITA shade references prevents this problem. What Resin Cannot Do And Why Zirconia Is Still Essential? One of the most important things to understand when building a digital lab workflow around 3D printing is where resin ends and where milled ceramics begin. This is not an either/or choice between technologies it is a clear division of labour based on material performance limits. Dental 3D printing resin even the most advanced biocompatible formulations currently available has a flexural strength ceiling in the range of 80–200 MPa for most clinical applications. The exact number varies significantly by formulation and application, but the category maximum is well below what posterior permanent restorations require. Milled zirconia starts where resin ends. Standard zirconia blocks dental material in the 3Y-TZP formulation has a flexural strength of 900–1,100 MPa. High-strength posterior grades exceed 1,200 MPa. Multilayer aesthetic grades, which balance translucency with strength, still deliver 600–900 MPa at the incisal zone. This is four to ten times the strength of any photopolymer resin currently used clinically. For a posterior crown that needs to withstand masticatory forces for a decade or more, there is no resin substitute for a sintered zirconia restoration milled from high-quality dental zirconia blanks. The workflow implication is straightforward. Resin handles everything that supports and surrounds the permanent restoration: working models for design verification, diagnostic models for treatment planning, try-in appliances for clinical evaluation, surgical guides for implant placement, and protective occlusal appliances for post-restoration management. The permanent restoration itself is milled from zirconia blocks and sintered to full ceramic density in a furnace. Both materials are active in every complex case they serve different roles, and neither replaces the other. Biocompatibility The Decision You Cannot Skip The competitor guides on this topic typically list biocompatibility as one of ten considerations. In practice, for any intraoral application, it is the first consideration and a hard filter not a weighted factor. A resin that is not cleared for the specific intraoral application you are using it for is not an option for that application regardless of how attractive its dimensional accuracy, surface finish, or price point might be. The regulatory landscape in the United States requires FDA clearance for dental devices intended for intraoral use. The classification matters: Class I, Class II, and Class III each represent different levels of regulatory scrutiny and different intended use definitions. A surgical guide resin carries a Class I clearance for its specific application. A denture base resin has a different classification and different compliance documentation. These are not interchangeable. Printer Validation The Factor Most Guides Skip The same resin will produce different results on different printers, even if both printers operate at the same wavelength. This is because curing behaviour depends on the interaction between the resin chemistry and the specific light source intensity, layer exposure time, lift speed, and build platform characteristics of a given printer model. Resins that have been validated and optimised for a specific printer configuration will consistently outperform resins used without validated settings on the same machine. Most professional dental resin manufacturers publish validated print profiles for specific printer models. Before selecting a resin, confirm that validated settings exist for your printer. If they do not, factor in the time and material cost of developing and validating settings yourself which is achievable but adds meaningful setup time. For labs considering sourcing zirconia dental blanks alongside their resin inventory, the same principle applies: validated milling parameters for specific mill-resin combinations produce better marginal accuracy and surface quality than default settings. What to Look For While Choosing a Supplier? Choosing the right resin is inseparable from choosing the right supplier. The resin category is not immune to the quality variation common to dental lab materials generally, and buying from a supplier with strong quality control, consistent batch performance, and genuine technical support matters practically. The qualities to look for in a dental lab material supplier for 3D printing resins: Verified regulatory status — the supplier should be able to provide FDA clearance documentation for their intraoral resins. This is not optional. Batch consistency — ask specifically about batch-to-batch colour, viscosity, and mechanical property consistency. In high-volume labs running hundreds of cases per month, batch variation creates downstream problems that are expensive to troubleshoot. Validated printer profiles — a supplier that has invested in validating their resins across multiple printer platforms is easier to work with and produces more predictable results than one that simply states 385/405nm compatibility without validated settings. Technical support — when print problems arise and they will, particularly during workflow setup or when introducing a new resin access to knowledgeable technical support that can help diagnose the issue quickly is genuinely valuable. Full portfolio — labs benefit from being able to source model resins, splint resins, surgical guide resins, and castable resins from a single supplier with consistent product standards. Managing multiple supplier relationships for different resin categories adds administrative overhead and introduces the risk of compatibility issues between different workflow components. ZirconiaGuys stocks the complete Keystone KeyPrint and Whip Mix VeriRESIN lines alongside zirconia blank and zirconia block materials from UPCERA and Aidite covering the full range of resin and milled material needs for a complete digital lab workflow from a single US-based supplier.
Learn more
What Is Dental Resin for 3D Printing? A Beginner’s Guide
3D printing has moved from a novelty to a standard production tool in dental labs faster than most expected. And at the centre of every dental 3D printing workflow is the resin the photosensitive liquid material that the printer converts, layer by layer, into a finished appliance or model. If you're new to 3D printing in dentistry or evaluating whether to add it to an existing milling workflow, understanding what dental resin is and how it works is the right starting point. This guide covers the fundamentals clearly what dental resin is, how it cures, the different types and what each one is for, how printing compares to milling, and what the post-processing requirements look like. It's written for lab technicians, lab owners, and clinicians who want a practical understanding rather than a product pitch. What dental resin for 3D printing actually is? Dental resin for 3D printing is a photopolymer a liquid monomer mixture that undergoes polymerisation (chain-linking into a solid polymer network) when exposed to light at a specific wavelength, typically 385nm or 405nm UV-visible light. The printer exposes the liquid resin in precise patterns, curing it layer by layer until the complete three-dimensional object is formed. The base chemistry of most dental resins involves methacrylate monomers the same monomer family used in conventional dental acrylics combined with photoinitiators that trigger polymerisation on light exposure, diluent monomers that control viscosity and handling properties, and inorganic fillers that improve mechanical properties in higher-performance formulations. What distinguishes dental resins from general-purpose 3D printing resins is biocompatibility formulation, clinical-grade accuracy requirements, and regulatory compliance. Dental resins used for intraoral applications temporary crowns, surgical guides, splints must meet biocompatibility standards (ISO 10993) and in the US market, FDA 510(k) clearance for the specific clinical indication. Not all 3D printing resins marketed to dental labs meet these requirements, and the distinction matters clinically. How dental 3D printing works: SLA vs. DLP Most dental 3D printers use one of two light-curing technologies. Understanding the difference helps when evaluating which platform suits a lab's workflow. SLA (stereolithography) uses a single laser point that traces each layer precisely across the resin surface. The point-source nature of the laser produces very fine detail and smooth surfaces particularly valuable for surgical guides and diagnostic models where marginal accuracy is the primary criterion. Formlabs' Form 3B is the most widely used SLA dental printer, with 25-micron XY resolution. The tradeoff is speed tracing each layer point-by-point is slower than curing an entire layer at once. DLP (digital light processing) projects a complete image of each layer onto the resin surface simultaneously, curing the entire layer at once. This makes DLP significantly faster than SLA a meaningful production advantage in labs running multiple units daily. The image projection can introduce slight edge distortion at the boundary of the build platform, which makes calibration and build platform positioning more important than in SLA systems. Most high-volume dental lab printers use DLP. For most dental lab applications models, temporaries, splints both technologies produce clinically acceptable results when calibrated correctly. The accuracy difference matters most in surgical guide applications where implant angulation tolerances are tight. The main types of dental resin and what each is for This is where beginner confusion is most common. "Dental resin" isn't a single material it's a product category covering several formulations with very different properties, indications, and regulatory status. Model resin The most widely used resin in dental labs. 3D printing dental model resin is formulated for producing accurate diagnostic casts, study models, aligner models, and working models for removable appliance fabrication. The primary requirements are dimensional accuracy, surface detail, and hardness the model needs to survive handling and thermoforming without deforming. Model resins are not biocompatible for intraoral use they're designed for indirect contact only. Using a model resin to produce a temporary crown or splint is a clinical error that labs new to 3D printing sometimes make. The biocompatibility status of every resin should be verified against its intended use before clinical application. Surgical guide resin Surgical guide resins are biocompatible formulations designed for guides placed intraorally during implant surgery to control drill angulation and depth. These resins must be optically clear the surgeon needs to verify drill positioning visually and mechanically rigid enough to maintain guide accuracy under surgical drilling forces. Regulatory clearance for intraoral use is mandatory. Most clinical protocols also require sterilisation compatibility, which should be verified for the specific resin before clinical use. Temporary crown and bridge resin Temporary C&B resins are biocompatible formulations for short-to-medium-term intraoral wear temporary crowns and bridges during healing or waiting periods. They need adequate flexural strength (typically 80–120 MPa for most temporary applications), shade availability across standard prescriptions, and surface finish that resists staining over the wearing period. It's worth noting that milled PMMA from industrial-grade pre-polymerised blanks produces better mechanical properties and lower porosity than most 3D-printed temporary resins particularly in fatigue resistance and surface hardness. For longer-term temporaries worn during implant integration (three to six months), milled PMMA is clinically the more durable choice. 3D-printed temporary resins have a throughput advantage for batch production of short-term temporaries. Splint and night guard resin Splint resins produce occlusal appliances night guards, occlusal splints, and bruxism appliances. They need to balance hardness (to resist wear under parafunctional load) with some flexibility (to allow chairside adjustments without fracturing). Some formulations are available in hard and soft variants for different clinical requirements. Denture resin Denture base resins produce the acrylic base of full and partial dentures. The requirements include tissue-matching gingival shades, dimensional stability during post-processing, and mechanical properties adequate for long-term prosthetic use. For labs running denture workflows in both 3D printing and milling, the Aidite Denture Base PMMA milling disc is an alternative approach producing denture bases with lower porosity and better dimensional accuracy than most printed alternatives in labs with existing CAD/CAM milling capability. Clear and diagnostic resin Clear resins serve diagnostic and orthodontic applications whitening trays, thermoforming templates, clear retainer models, and diagnostic mockups where optical transparency is required. For labs needing a clear milled alternative, the Aidite Clear PMMA disc provides a transparent milling option compatible with standard open-system CAD/CAM platforms. Post-processing: the step labs underestimate A printed dental resin part is not finished when it comes off the printer. Every photopolymer resin used in dental 3D printing requires two post-processing steps before clinical use, and skipping or shortchanging either produces inferior results and potential biocompatibility issues. Washing removes uncured liquid resin from the surface and interior of the printed part. This is typically done in isopropyl alcohol (IPA) or a purpose-formulated resin wash solution, using a dedicated wash unit for consistent results. Insufficient washing leaves residual monomer on the surface in biocompatible applications, this creates tissue sensitivity risk. It also affects surface finish and adhesion of characterisation materials. Post-curing uses UV light exposure in a dedicated curing unit to complete polymerisation throughout the part. Without post-curing, the printed resin retains a proportion of unreacted monomer that reduces mechanical properties flexural strength, hardness, and wear resistance all increase with proper post-curing. Most manufacturers specify the curing time and light intensity required for their resin, and those parameters should be followed exactly. Overcuring can cause colour shift and brittleness in some formulations; undercuring leaves the part mechanically and biologically suboptimal. 3D printing vs. milling: how they fit together in a dental lab For labs evaluating whether to add 3D printing to an existing zirconia milling workflow, the right frame is complementarity rather than competition. Each technology handles different parts of the production spectrum better than the other. Milling from zirconia dental material whether a zirconium block for single units or a zirconia disc for multi-unit production produces permanent restorations with mechanical properties that no current 3D-printed resin approaches. High-strength 3Y-TZP zirconia reaches 900–1,200 MPa. Even the best 3D-printed crown resin reaches 150–200 MPa. For permanent crowns, bridges, and implant prostheses, zirconia blanks milled via CAD/CAM remain the clinical standard and zirconia blocks price is appropriate for a permanent restoration with a 10-15 year expected lifespan. 3D printing adds value in the applications that milling handles less efficiently: high volumes of diagnostic models where batch production overnight is more efficient than individual milling cycles; complex surgical guides with internal channels that milling tools can't reach; orthodontic models at scale for aligner fabrication; and multi-unit temporary appliances where the speed of printing and the complexity of form suits additive manufacturing better than subtractive. The practical implication for most digital labs: milling handles permanent restorations (zirconia multilayer for anterior aesthetic work, high-strength zirconia for posterior and implant cases), and 3D printing handles models, guides, temporaries at volume, and orthodontic applications. Stocking both workflows zirconia blanks in the milling system and appropriate resins in a validated printer covers the complete clinical range of a modern digital dental lab. Regulatory and biocompatibility basics every lab should know Every dental resin used for patient-contact applications in the US requires FDA 510(k) clearance for that specific indication. "Biocompatible" on a product label is not the same as FDA-cleared for intraoral use the regulatory documentation should specify the cleared indication explicitly. In practice, this means labs should verify the regulatory status of each resin product for each application before clinical use. A model resin cleared for indirect contact is not cleared for use as a temporary crown. A surgical guide resin cleared for single-use intraoral application may not be cleared for sterilisation-dependent reuse. These distinctions are the lab's clinical and legal responsibility, not just the resin manufacturer's. Getting started: what labs need to evaluate For labs new to 3D printing, the evaluation sequence that makes sense is: define which applications the printer will serve; select a printer platform validated for those applications; then select resins validated for that printer and those clinical indications not the other way around. Printer compatibility constraints often narrow resin choices significantly, which is one reason open-system printers (those that accept third-party resins with appropriate exposure profiles) provide more sourcing flexibility than closed systems tied to proprietary resin lines. For labs with existing milling capability, 3D printing can be added incrementally. Start with model printing the lowest regulatory barrier, the most forgiving application, and the one that creates immediate workflow value for aligner and removable appliance cases. Once the printing and post-processing workflow is consistent, expand to more demanding applications with appropriate resin validation. Zirconia Guys supplies both Aidite zirconia and resin-adjacent PMMA materials including milled PMMA alternatives for labs that want to run temporary and denture workflows on existing milling equipment rather than adding a separate printing system. Get in touch with the team to discuss which combination of milling materials and printing resins suits your lab's case mix and current equipment.
Learn more