

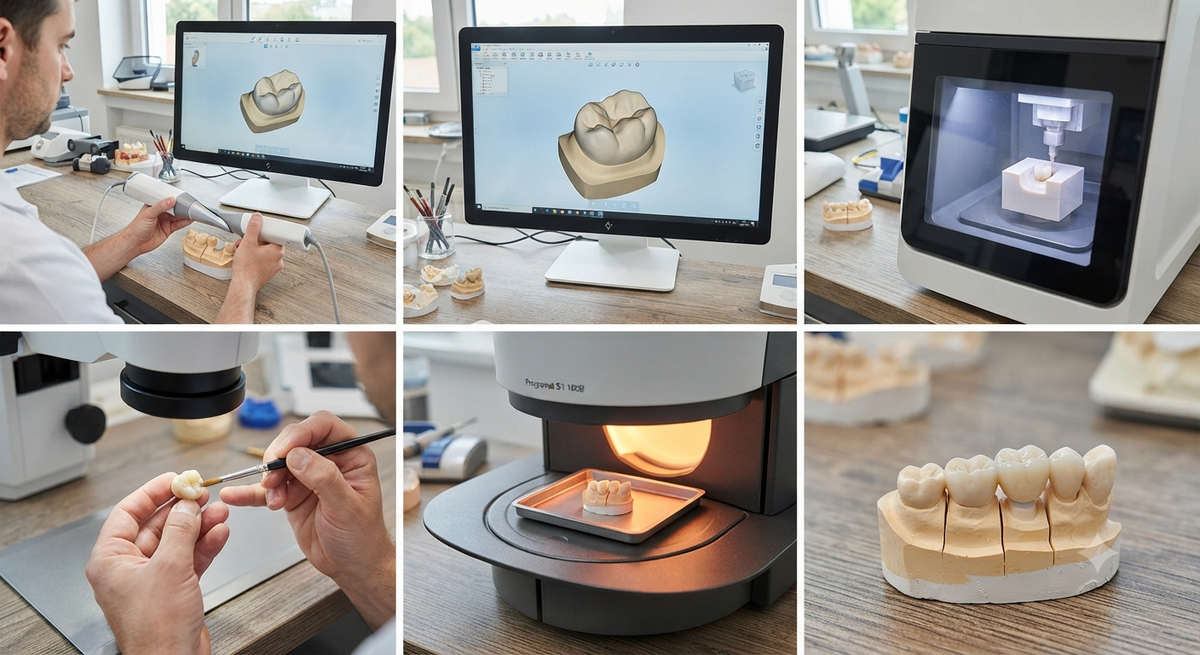
A zirconia crown looks simple when it arrives in the box, but a lot happens between the patient's mouth and that finished restoration. Whether you are a dentist wondering why a case takes the time it does, or a technician fine-tuning your own routine, knowing each step helps you catch problems early. Here is how a typical zirconia dental lab takes a case from digital scan to final crown.
What Happens Before the Mill Starts
Everything begins with the scan. Most cases now arrive as an intraoral scan, though some labs still scan a traditional impression or stone model. Either way, the lab needs a clean record of the prepared tooth, the margin, the neighboring teeth and the opposing arch.
The quality of that file sets the ceiling for everything that follows. Bubbles, missing margin areas or a blurry contact point cannot be fixed at the milling stage, so a careful technician reviews the scan first and contacts the dentist if something looks unclear. A quick message at this point costs far less than a remake.
Designing the Crown on Screen
Next, the technician designs the crown in CAD software. They mark the margin line, set the cement gap, shape the anatomy, and adjust contacts and occlusion against the opposing teeth. Wall thickness is checked here too, because zirconia needs enough material to stay strong in function.
Material choice is decided at this stage as well. Back teeth under heavy bite load usually call for a stronger, more opaque grade, while front teeth often use a more translucent one. Labs that stock Aidite dental zirconia in several grades can match the material to the tooth instead of using one disc for every case.
Milling the Pre-Sintered Disc
Once the design is approved, CAM software nests the crown inside a zirconia disc and generates the toolpaths. The disc is still in its pre-sintered state, which is chalky and soft enough to mill quickly. The design is also enlarged on purpose, by roughly 20 to 25 percent depending on the material, because the zirconia will shrink during sintering.
The mill cuts the crown out of the disc and leaves it attached by a thin sprue. The technician then removes it, brushes away the dust and smooths the sprue mark. At this point the crown looks like an oversized, chalky version of the final restoration.
Sintering: Where the Crown Gets Its Strength
Sintering is the furnace stage that turns the soft crown into dense, hard ceramic. The furnace heats the crown to somewhere around 1,450 to 1,550 degrees Celsius, depending on the material, and holds it there following the manufacturer's program. During this time the crown shrinks to its true size and reaches its full strength and translucency.
Two things matter most: using the right program for that specific disc, and letting the furnace cool as directed. Rushing a cycle or borrowing settings from a different brand can cause warping, cloudiness or weak spots. Pre-shaded discs come out of the furnace already colored, while white discs may be shaded with liquids before sintering.
Staining, Glazing and Final Checks
After sintering, the technician tries the crown on the model, checks the margins under magnification and adjusts the contacts. Then comes the aesthetic work. Some crowns are fully monolithic and need only a light stain and glaze to add character, while others are cut back and layered with porcelain for a more custom look.
A glaze firing seals the surface, and a last quality check confirms fit, contacts, occlusion and finish. Before shipping, many labs also compare the case against the prescription: tooth number, shade, material and any special notes from the dentist.
Why Material Quality Shows Up in the Final Crown
Every step above depends on consistent material. A disc with uneven density can mill unpredictably or shrink unevenly, and no amount of skill fully hides that. This is why a good zirconia dental lab tends to stick with brands it trusts.
If you are building or refreshing your crown range, it is worth exploring how Aidite zirconia crowns perform in your own workflow, including multilayer and pre-shaded options, to see which grades suit your typical case mix.
A Quick Checklist for Dentists Sending Cases
• Send a complete scan with clear margins and the opposing arch.
• Specify the shade, including the stump shade if the prepared tooth is discolored.
• Mention special requests such as tight contacts or matching a neighboring crown.
• Include a photo of the adjacent teeth for shade reference.
A clear case from the start is the easiest way to get a crown that fits the first time, and it helps your zirconia dental lab deliver faster.


