

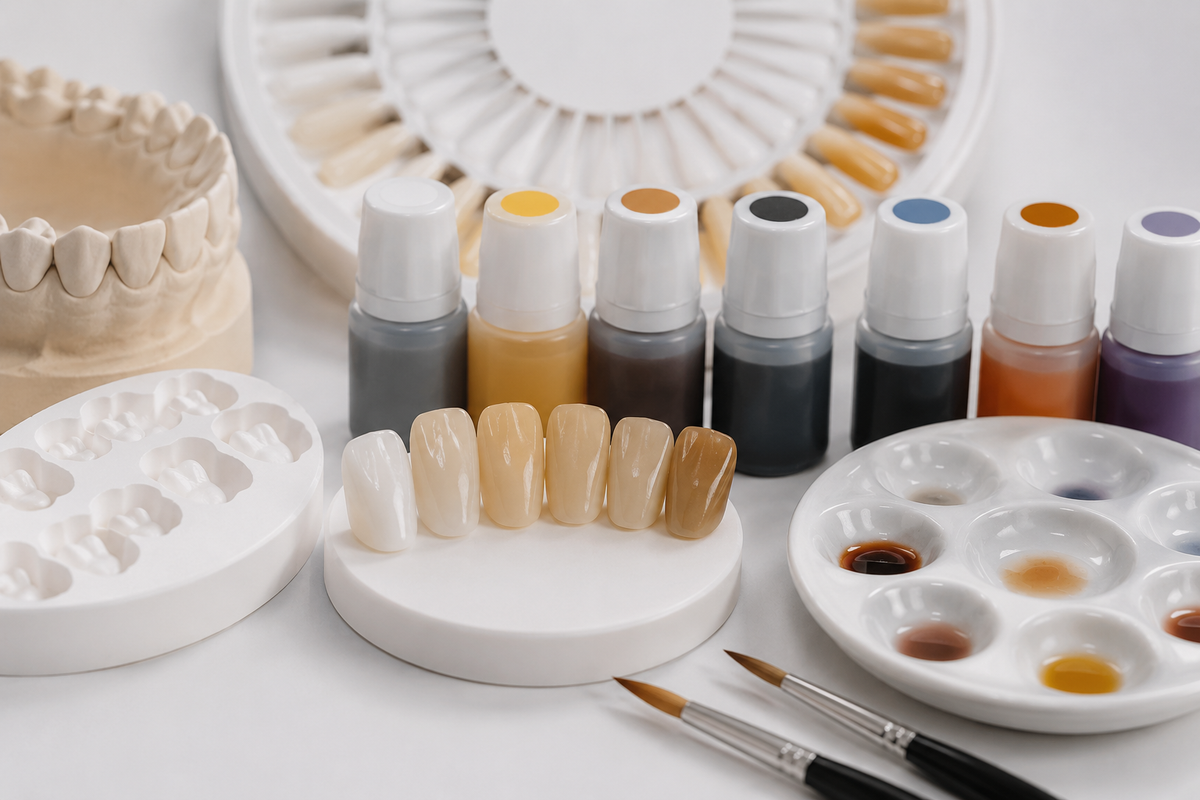
Staining zirconia is one of those lab skills that looks straightforward until the results come back inconsistent. The fired shade reads too orange under the operatory light. The cervical characterization is too heavy on the A2 case but too light on the A3. The incisal halo disappears entirely after the second firing. These are not random failures they are the predictable result of applying stain without a systematic understanding of how zirconia grade, disc format, stain concentration, and firing temperature interact to produce the final optical outcome.
Aidite's Biomic stain and glaze system is one of the most widely used surface finishing systems for Aidite zirconia in US dental labs. It is designed to work specifically with Aidite's zirconia formulations Aizir, HonorZir, Superfect Zir, and the 3D Pro multilayer range and produces predictable results when the application protocol is matched to the specific disc grade and shade target. Getting that matching right is what this guide covers.
Why Zirconia Grade Changes Everything About Stain Selection?
The first variable that determines your stain protocol is the zirconia grade not the shade. A technician who uses the same stain concentration on a 3Y white disc that they use on a 5Y pre-shaded multilayer disc will produce two completely different results, even if the target shade is identical. Understanding why requires understanding what each disc is bringing to the table before any stain is applied.
A 3Y white zirconia blank enters the staining workflow with zero pre-existing chroma. It is a neutral, bright white starting point. The full shade all chroma, all value, all characterization must come from the stain. This means higher stain concentrations, more layering passes, and more aggressive firing protocols to build the shade from nothing.
A pre-shaded 4Y or 5Y dental zirconia discs format has the primary shade gradient already embedded in the material. The incisal translucency is built in. The cervical warmth is built in. Staining on this format is supplementary you are refining and characterizing, not building from scratch. Applying 3Y-level stain concentrations to a pre-shaded disc produces over-saturation that pushes the shade dark and makes the restoration look muddy under indirect lighting.
The stain selection decision therefore starts with one question: is this a white disc case or a pre-shaded disc case? The answer determines your entire application protocol before you open a single stain pot.
The full aidite stain and glaze range is available at ZirconiaGuys from US inventory covering shade stains, cervical characterization stains, incisal effect stains, and compatible glaze across all Aidite zirconia product lines.
Shade Mapping: Matching Biomic Stain Colors to VITA Targets
Aidite Biomic stain is a ceramic-based surface stain system with a range of base shades, modifiers, and effect stains. For technicians new to the system, the shade mapping below provides a practical starting framework. These are starting points your specific furnace, layer thickness, and dilution ratio will require calibration against a test piece before clinical production.
A-shade range (A1–A4):
A shades require yellow-brown chroma building with a warm modifier at the cervical. For A1 targets on white zirconia blocks, begin with a diluted body stain at 30–40% of standard concentration and build in two light layers rather than one heavy application. For A3–A4 on white discs, body stain concentration increases to 60–70% with a cervical orange modifier at the gingival third. On pre-shaded A-shade discs, body stain reduces to 15–25% for standard A cases the disc is already carrying most of the chroma.
B-shade range (B1–B4):
B shades require a yellow-dominant mix. Biomic's yellow modifier is the primary tool here. B1 is among the most technically demanding shades in the VITA range the yellow warmth must be present without tipping into the orange register of A shades. Test firing is strongly recommended before committing B-shade cases to a production protocol.
C-shade range (C1–C4):
C shades require gray-green desaturation. Biomic's gray modifier reduces the warmth of the base stain to produce the cool, slightly grayish character of natural C-shade dentition. Over-application of gray modifier produces restorations that look flat and lifeless use it in 10–15% additions to your base mix and evaluate at each layer.
D-shade range:
D shades require the strongest brown modifier. D4 in particular is one of the most stain-intensive targets in the standard VITA range. For D-shade cases on white zirconia blocks dental, plan for three staining-and-firing cycles rather than attempting to achieve the shade in one or two passes.
For white disc cases where staining flexibility is the primary requirement, aidite zirconia for staining & coloring the HonorZir SHT White disc is specifically formulated to accept external stain evenly and predictably, with a high-translucency composition that produces natural optical depth after firing. It is the correct white disc format for demanding shade-matching cases in the anterior zone.
Understanding which zirconia grade to specify before staining begins is covered in full detail in the Guide to Materials & Strengths of Zirconia Dental Restorations the grade selection decision (3Y, 4Y, 5Y) is the upstream decision that determines how aggressively you need to stain.
Cervical Characterization: The Most Common Application Error
Cervical over-staining is the most frequently reported stain application error in zirconia production and the most visible one at delivery. A cervical zone that is too dark, too orange, or too abrupt in its transition from body shade creates a restoration that reads as artificial even when the overall shade is technically correct.
The cause is almost always the same: applying cervical characterization stain at full concentration, or extending the cervical stain zone too far incisally, or failing to blend the cervical-body transition with a diluted intermediate layer.
Correct cervical application protocol:
Apply cervical stain at 20–30% of standard concentration for the first pass. Fire. Evaluate under mixed lighting not just the dental operatory light. The cervical zone should appear warmer and slightly more saturated than the body, but the transition should be gradual rather than a hard demarcation line.
If the cervical requires more depth after the first firing, add a second application at the same diluted concentration rather than increasing concentration on the first pass. Building shade in controlled layers produces a smoother gradient than one heavy application, and it is correctable an over-stained cervical after a single heavy application requires grinding and re-firing, which adds significant bench time.
Incisal Effects: Translucency, Halo, and Opalescence
The incisal zone is where stain technique most directly affects how natural a restoration looks under social and outdoor lighting. Biomic's incisal effect stains include translucency enhancers, blue-white incisal stains for halo effects, and opalescence modifiers that mimic the light scattering of natural enamel.
The most common incisal stain error is applying these effects on pre-shaded multilayer discs that already carry incisal translucency in the material. Adding incisal translucency stain on top of a 5Y incisal zone produces excessive translucency that reads as grey or washed-out under direct overhead lighting. On pre-shaded multilayer discs, incisal effect stains should be applied at 10–20% of standard concentration just enough to enhance the material's existing gradient without overwriting it.
On white disc cases, incisal effect stains work differently the white starting composition of the disc means the incisal zone needs translucency built from the stain rather than supplemented. For white disc anterior cases, apply incisal stain at 40–50% concentration in a thin, feathered application that covers the incisal 20–25% of the crown.
The aidite surface finishing solutions including the Superfect Zir SHT White disc designed for the highest-translucency anterior cases work with Biomic's incisal stains to deliver a controlled optical baseline for staining. When maximum incisal translucency is required and white disc flexibility is needed simultaneously, the Superfect Zir SHT White is the disc format where Biomic's incisal effects perform most predictably.
Firing Protocols: Temperature, Atmosphere, and Cycle Count
Stain firing parameters are as important as application technique. The same stain application produces different results at different firing temperatures a variable that is often overlooked when labs troubleshoot inconsistent shade outcomes.
Standard firing range for Aidite Biomic stain: 750–850°C peak hold, depending on the specific stain pot and furnace type. Biomic stains are ceramic oxide-based and require adequate firing temperature to develop their full color and bond to the zirconia surface. Under-fired stain (below 740°C peak) produces a matte, slightly powdery surface that wipes off under polishing. Over-fired stain (above 870°C on most furnaces) causes color shift reds and oranges shift warmer, blues flatten, and the overall shade can read 0.5–1 VITA step darker than intended.
Firing cycle count: Each stain-and-fire cycle produces cumulative changes in surface texture and optical character. Most Biomic stain protocols require 1–3 firing cycles for standard cases and up to 4–5 cycles for complex full-characterization anterior cases. After 5 firings, most zirconia surfaces show measurable changes in surface hardness and glaze adhesion plan your characterization in as few cycles as the case allows.
Furnace calibration: If your stain results are consistently off-shade despite correct application technique, the first variable to check is furnace temperature calibration. Dental furnaces drift over time a furnace reading 800°C may be firing at 770°C or 820°C if it has not been calibrated against a reference thermocouple within the past 6 months. A 30°C furnace error produces significant shade shift in ceramic stains.
Building a Stain Reference System for Your Lab
The most efficient improvement a dental lab can make to its staining consistency is building a physical stain reference a set of fired test pieces on known disc formats at known stain concentrations that document exactly what each Biomic stain produces at your furnace's actual parameters.
How to build one:
Cut uniform test tiles from your most-used disc formats one set from your standard white disc, one set from your most-used pre-shaded format. Apply each body shade, modifier, and effect stain at three concentrations: 25%, 50%, and 75% of your working dilution. Fire at your standard protocol. Label each tile with the stain identity, concentration, disc format, and firing parameters. Store in a reference binder at the staining bench.
This reference system eliminates the guesswork from shade correction decisions and dramatically reduces the back-and-forth with the prescribing clinician that results from inconsistent shade outcomes. Once built, it takes 15 minutes to update when Biomic releases a new stain formulation or when you switch to a new disc batch.
For aidite zirconia discs for dental labs across the full Aidite range HonorZir, Superfect Zir, Aizir, and 3D Pro multilayer ZirconiaGuys stocks consistent US inventory with full batch documentation, enabling labs to build stain references against a reliable material baseline rather than compensating for batch variation.
Common Problems and Fixes
Shade fires too dark overall: Reduce body stain concentration by 15–20% and check furnace calibration against a reference thermocouple.
Cervical-body transition too abrupt: Add a blending layer at 10% concentration between the cervical and body zones. Fire before adding body stain on the next pass.
Incisal effect disappears after glaze firing: Incisal stain was applied too thin or at too low a concentration for the disc format. Increase incisal stain concentration by 10–15% and apply before glaze firing rather than under it.
Glaze surface crazes after firing: Over-fired glaze or furnace temperature too high. Reduce peak temperature by 20°C and extend the hold time at the lower temperature rather than spiking to the higher temperature.
Stain chips or flakes in the mouth: Under-fired stain peak temperature not reached. Check furnace thermocouple calibration and increase peak hold time by 1–2 minutes.
Consistent stain results on zirconia dental blanks and dental zirconia discs require systematic application not guesswork. The right Aidite Biomic stain for a given case is determined by the disc grade, the shade target, and a calibrated firing protocol, applied through a documented technique that your lab can reproduce across technicians and across batches of zirconia blank stock. Zirconia blocks and zirconia blocks dental format decisions upstream of the staining bench directly determine how aggressively you need to stain and building that connection between disc selection and stain protocol into your lab's standard operating procedure is what produces consistent clinical outcomes at production volume. The zirconia glaze and stain aidite system performs best when it is used systematically, not intuitively.


