This blog explains a complete and practical workflow for milling PMMA discs in dental laboratories.
Precision in temporary dental work begins with a clear and reliable process. From scan to finish polish, each step follows a set order; laboratories adhere to this path. That way, repairs stay steady, feel good, and look right. Well-built temporary restorations let people move through care without worry. Additionally, they provide dentists with real-time feedback on how things fit, work, and appear before creating the permanent version.
A steady milling routine leads to solid results. Every stage affects how strong, good-looking, or long-lasting the piece turns out. If labs get the method and how materials react, things go more smoothly. A smooth run keeps work moving fast without hiccups. Fewer do-overs happen while precision stays high - even on tricky jobs.
Understanding the Material
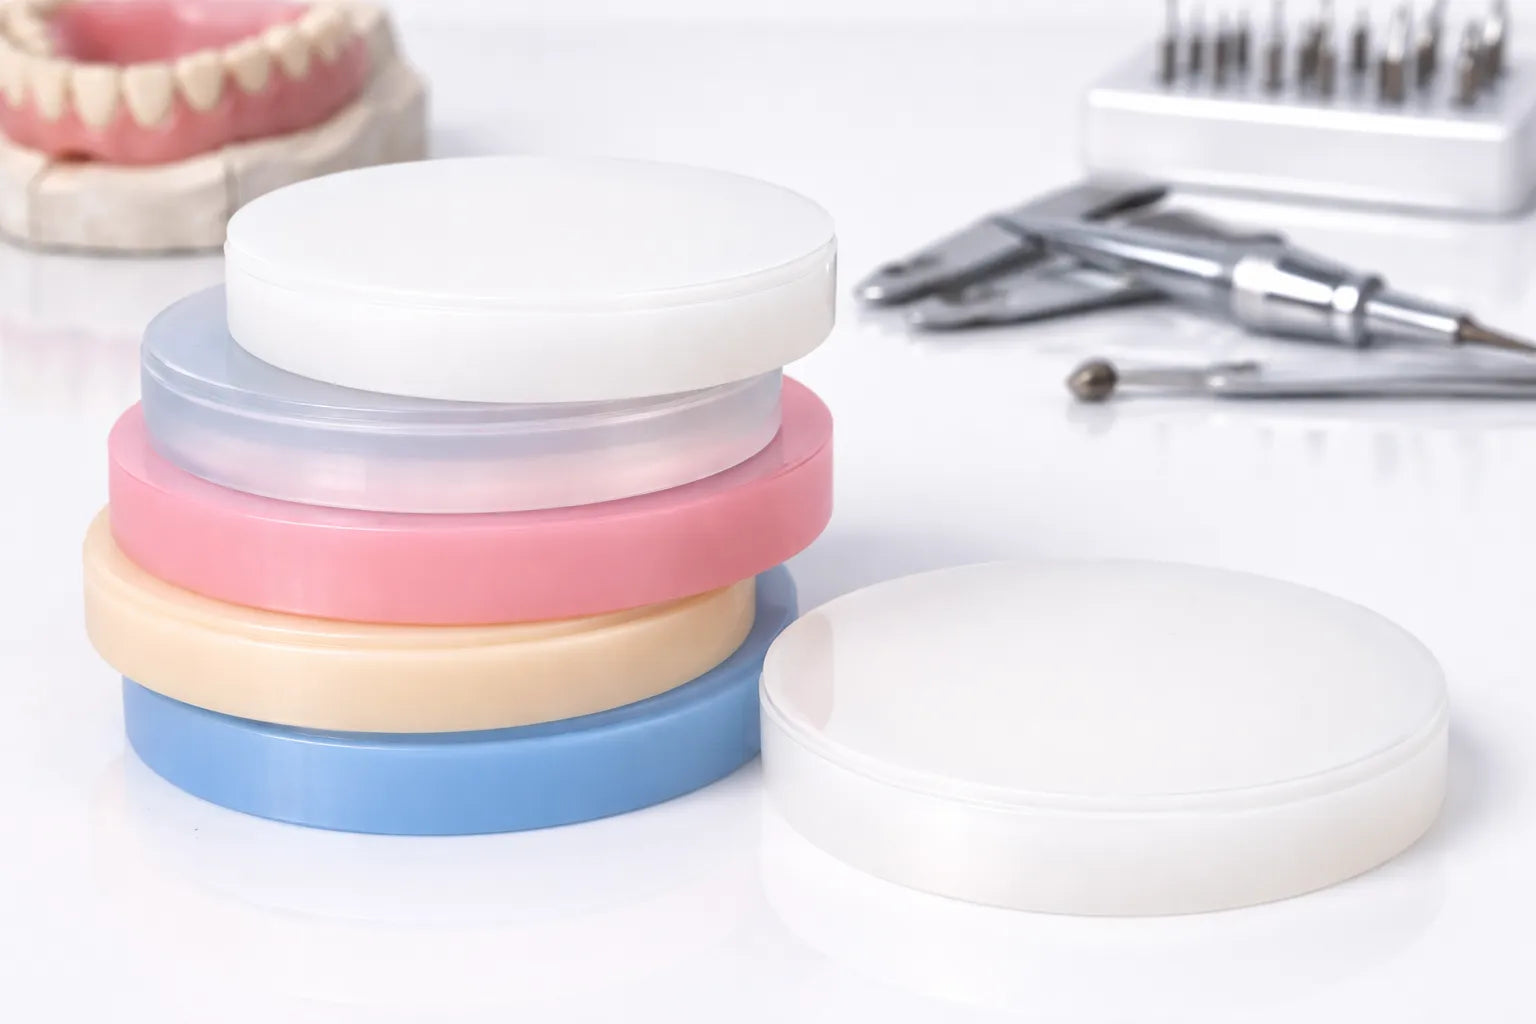
PMMA discs are widely used for temporary restorations. Their toughness stands out - also, they are pretty well, plus they come in tones close to real teeth. A variety of dental workshops utilise multilayer PMMA blocks and aidite chunks, as colours shift smoothly from one to another, blending seamlessly into actual tooth shades without fuss. That soft blend reduces the need for handwork tweaks later on. Moreover, it helps entire sets appear cohesive.
Because layers stay steady, cutting stays smooth. That way, the tool glides evenly across zones, with no abrupt shifts in thickness. Sharp edges come out clearer. Thanks to a uniform core, aidite PMMA multilayer handles fine shapes well. Moreover, its look flows naturally, which helps full-arch trials fit visually.
Preparing the Design File
A good digital setup helps ensure accurate results. Clear scans matter a lot. Edges need sharp detail. Neighbouring teeth should show no warping. Proper files lower the chances of cutting mistakes. Bigger ones, like temporary crowns aidite PMMA, need proper wall depth plus even support links.
Technicians should verify:
- Clear lines showing exact edges
- Same thickness throughout each section, also keeps things steady from end to end
- Consistent plug designs
- Enough space for biting surfaces
- Overall anatomical harmony
These tests make the outcome more solid while reducing the need for adjustments.
Selecting the Right Milling Strategy
Milling ways determine the precision of the final piece. First, rough cuts remove most of the material. Then, pre-finish work starts to shape edges more clearly. Final passes bring out delicate parts. Step-by-step steps keep inner layer shifts safe in multilayer PMMA blocks aidite discs. Neat cutting lines, lower pressure, while avoiding corner breaks.
Picking the right tool matters just as much. Bigger burs handle initial shaping safely. Meanwhile, finer ones detail narrow grooves. Consistent adjustments maintain the balance of the aidite PMMA multilayer during milling. Clean edges reduce resistance. Besides that, they help preserve PMMA’s transparency and finish quality.
Securing the Disc for Milling
Disc stability plays a significant role in determining the precision of the outcome. If it’s not placed right, shaking might happen instead. That could mess up the colour blend, too. Workers need to secure the disc tightly before they begin. Doing this keeps the tint smooth, particularly when working on temporary crowns aidite PMMA restorations.
Important checks include:
- Secure hold on the disc’s casing
- Make sure the shade layers face the right way
- Consistent spin while cutting
These steps prevent flaws while maintaining even colours.
Executing the Milling Process
While milling, keep an ear out for strange noises, plus watch how the machine moves and cuts. If it shakes more than usual, that might mean the tool’s worn down or off-centre. Running at a steady pace helps avoid overheating. Too much heat harms the finish on the material. Moreover, it makes polishing take longer.
Roughing sets the general shape. Then pre-finishing clears out leftover bumps. After that, finishing fine-tunes key features. Because each step respects layer depth, it maintains the smooth color flow in multilayer PMMA blocks aidite blocks. As a result, the final look feels real and lifelike.
Post-milling Refinement
Careful removal of the milled part stops cracks from forming. Use light pressure when trimming - it keeps things strong. That’s how aidite PMMA multilayer stays stable over time. Polish regularly but softly for a better shine and a clear finish.
A reliable buffing process goes like this:
- Fine carbide trimming
- Roller rubber finish
- A last-step shine booster that smooths out tiny scratches while adding a wet-looking finish
This creates a finish similar to real tooth enamel, while boosting defence against stains in the short term.
Quality Checks and Fitting Accuracy
Each repair needs to match perfectly. While checking inside placement, use either a 3D-printed version or an electronic guide. Connections ought to feel solid - never forced. A flat biting surface spreads pressure across all teeth. Such tweaks make temporary crowns aidite PMMA work better.
Check shade match carefully. Smooth shifts show the disc is facing the right way. Good positioning looks better, so patients feel happier.
Enhancing Durability
Durability hinges on the precision of the design or how gently it's used. Right-sized connectors help prevent cracks. Gradual shifts in shape ease inner strain. A polished finish resists plaque buildup or light damage. Even the smallest features still impact how long it lasts. Stacked layers boost durability - yet careful detailing still matters most. As every stage follows solid engineering logic, repairs stay dependable during care.
Common Mistakes to Avoid
Some mistakes mess up the result. Too much milling leaves spots too thin. High force when cutting can lead to tiny cracks. Off-centre discs disrupt colour blending. Not calibrating throws off accuracy. No margin check causes fitting problems. Old tools can become hot, which can compromise precision. Fixing those errors boosts speed while maintaining steady results.
Optimizing Lab Efficiency
Efficiency is boosted when things are kept in order. Keeping burs and tools neatly stored reduces wasted time. Machines run smoothly if they’re cleaned often. Digital files that stay current help designs hit the mark. When standard setups are documented, trainees can easily pick them up. Fewer mix-ups happen when designers talk clearly with mill workers - so jobs move faster. Since routines stay steady, staff pay closer attention to look and fit.
A Stronger Pathway Forward
Structured workflows yield steady, precise, and visually appealing results. Knowing how things work helps techs up their game. Set moves let labs nail temp crowns that look real, last longer, and feel right. With focus and smart teamwork, each aidite PMMA multilayer restoration gains better hold and sharper edges.
Closing Insights
A solid routine helps labs give consistent outcomes. Not only does it boost accuracy, but it also enhances appearance while fostering confidence among dental professionals. Here at Zirconia Guys, we understand the value of strong backing when labs aim to refine their skills and maintain top-level work. If you're seeking advice, a better understanding of materials, or straightforward tech tips, working with seasoned allies like us makes a real difference in everyday dental restoration.


