Dental implant placement looks deceptively straightforward in a diagram. A titanium fixture goes into the jaw at a specific angle, in a specific position, to a specific depth and a crown follows. In practice, the bone beneath the gingiva is invisible to the naked eye, the anatomy varies significantly between patients, and a placement error of even one or two millimeters can compromise the final restoration, damage adjacent structures, or require revision surgery. Precision matters in implant dentistry more than in almost any other restorative procedure.
The surgical guide exists to solve this problem. It is a patient-specific device that constrains the drill path during implant surgery physically guiding the clinician's instrumentation to the position, angle, and depth determined during digital planning. This guide does not replace clinical skill. It transfers the precision of digital planning into the surgical environment, where biological and anatomical complexity makes freehand placement inherently less accurate. Understanding what surgical guides are, how they are made, and what materials they require is essential knowledge for any dental lab operating in the implant workflow.
What Is a Dental Implant Surgical Guide?
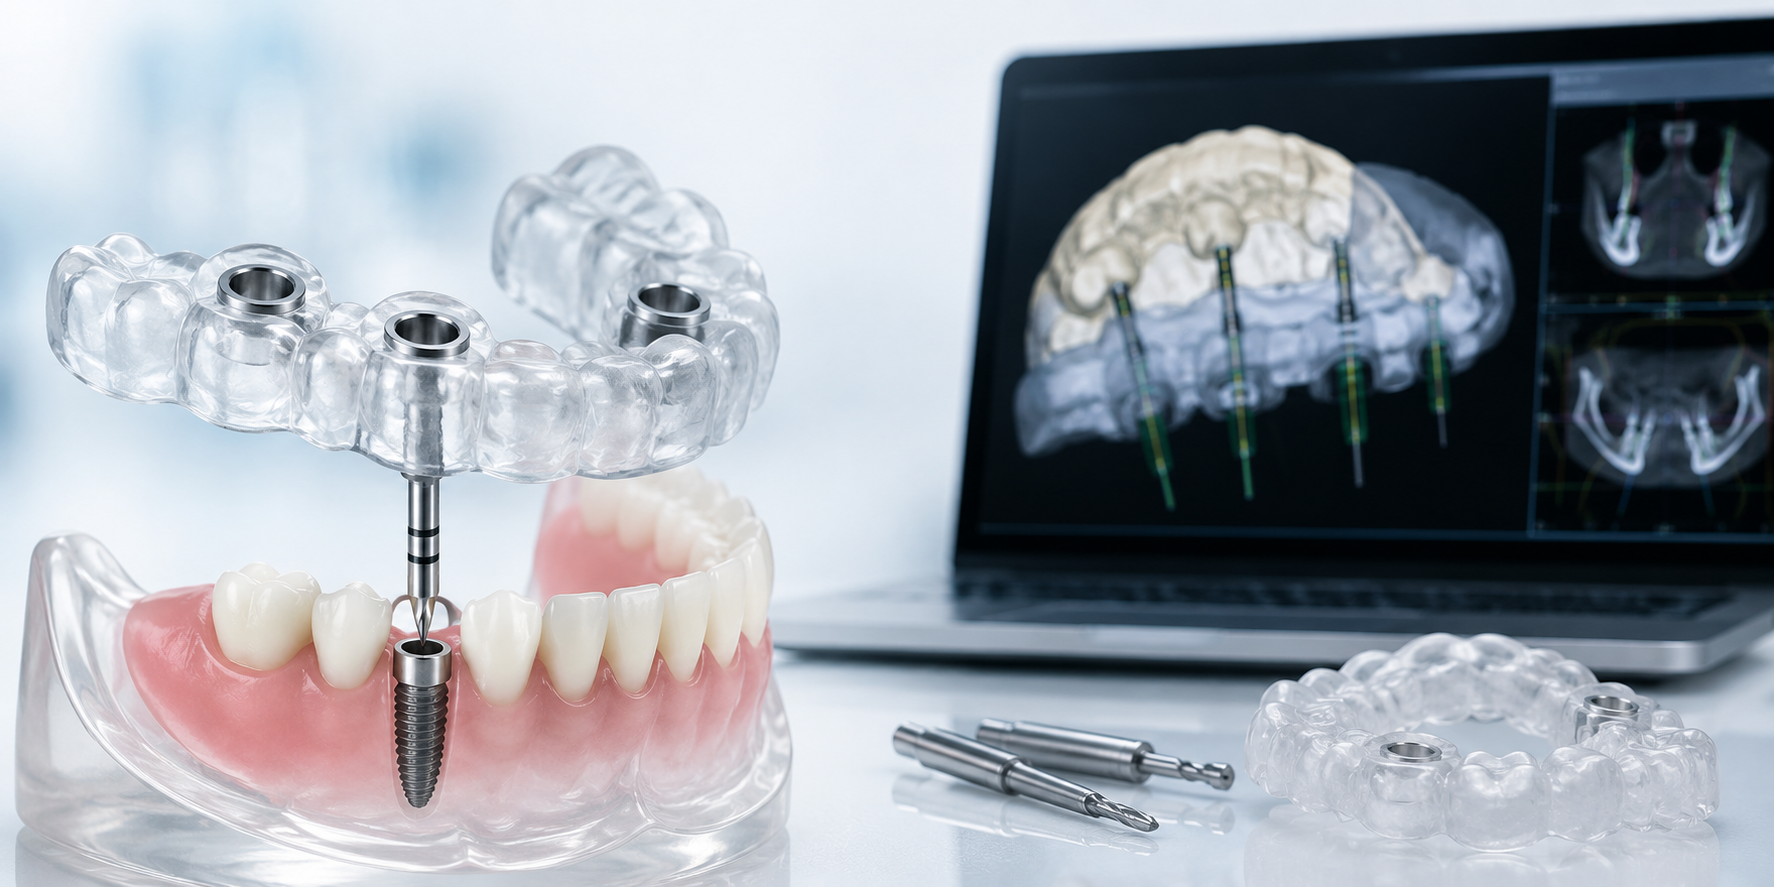
A dental implant surgical guide is a custom-fabricated appliance that fits over the patient's teeth, soft tissue, or bone and contains one or more metal sleeves called drill bushings or guide tubes positioned at the planned implant site. During surgery, the clinician inserts the drill through the bushing, which constrains the drilling angle and positions the drill at the precise location determined during preoperative digital planning.
The guide is fabricated from a digital workflow that begins with intraoral scanning or impression-taking to capture the soft tissue anatomy, combined with a cone beam CT scan (CBCT) that captures the underlying bone volume, density, and structure. These two data sets the surface scan and the volumetric CBCT are merged in implant planning software. The clinician then plans the virtual implant position within this merged dataset, optimizing placement for bone volume, emergence profile, proximity to anatomical structures, and the planned restorative outcome.
Once the implant positions are finalized and approved, the surgical guide design is exported from the planning software and sent to the dental lab or in-office fabrication unit for manufacturing. The guide is either 3D printed from biocompatible resin or milled from a PMMA blank, depending on the lab's equipment and the clinical requirements of the case.
The guide fits over the patient's existing dentition, residual ridge, or bone surface providing a stable, indexed reference that makes the planned implant position physically reproducible in the surgical field.
Types of Dental Implant Surgical Guides
Surgical guides are classified by their support mechanism how the guide is stabilized in the mouth during surgery. Each support type has distinct clinical indications and fabrication requirements.
Tooth-supported guides rest on the remaining natural dentition adjacent to the implant site. They are the most accurate guide type because natural teeth provide stable, rigid support with precise positional indexing. Tooth-supported guides are the standard choice for partially edentulous patients with adequate adjacent dentition. They are straightforward to design, require no additional fixation hardware, and are well-suited to single-implant and short-span multiple-implant cases.
Mucosa-supported guides rest on the soft tissue of the edentulous ridge. They are used when no adjacent teeth are available for support typically in fully edentulous patients who are not yet in final dentures, or in cases where the existing denture is used as the guide foundation. Mucosa-supported guides carry inherent accuracy risk because soft tissue can compress and shift under load, introducing positional variability during drilling. Fixation pins are commonly used with this guide type to stabilize the guide against tissue movement during surgery.
Bone-supported guides are placed directly on the exposed cortical bone after full-thickness flap elevation. They eliminate the variable of soft tissue compression entirely and are therefore used in cases where maximum positional accuracy is required — typically full-arch immediate-load cases, complex multi-implant reconstructions, or patients with severely resorbed ridges. Bone-supported guides require surgical exposure to place and are more technically demanding to fabricate accurately from imaging data alone.
Static vs. dynamic guidance is a separate classification that cuts across support type. Static guides physically constrain the drill through a fixed bushing once fabricated, the implant position is locked into the guide. Dynamic navigation systems use real-time tracking to guide freehand drilling with visual feedback on a monitor. Static guides are the dominant format in dental lab production because they integrate directly into existing CAD/CAM fabrication workflows.
Materials Used for Surgical Guide Fabrication
The material selection for surgical guide fabrication directly affects fit accuracy, biocompatibility, sterilizability, and dimensional stability during the surgical procedure. Two primary fabrication methods are in widespread use: 3D printing from photopolymer resin and CAD/CAM milling from PMMA blanks.
3D-printed surgical guides are the most common format in modern digital implant workflows. The guide is designed digitally and printed from a biocompatible, light-curing resin using SLA (stereolithography), DLP (digital light processing), or MSLA (masked SLA) printing technology. The primary advantage of 3D printing for surgical guides is geometric freedom the printing process can produce the undercuts, tissue-contact contours, and complex indexing geometries that milling cannot achieve. Print accuracy has improved substantially with modern desktop printers, making 3D-printed guides clinically reliable for standard implant cases.
The surgical guide dental resin used for 3D-printed guides must meet specific clinical requirements: biocompatibility for intraoral use, sufficient rigidity to resist deformation under drilling forces, dimensional stability through autoclave sterilization cycles, and adequate translucency to allow visual verification of seating during placement. Not all 3D printing resins meet these requirements. Dedicated surgical guide resins are formulated specifically for this application with higher modulus of elasticity than standard model resins and biocompatibility certification for temporary intraoral contact.
Milled PMMA surgical guides are produced by CAD/CAM milling from pre-polymerized PMMA discs. Milling produces excellent fit accuracy from the smooth, homogeneous PMMA matrix and is well-suited for tooth-supported guides where the indexing surfaces can be milled precisely from a digital model. Milled guides are slightly less geometrically flexible than printed guides but deliver outstanding dimensional stability and are easier to polish to a smooth, tissue-compatible surface finish.
How the Lab Produces a Surgical Guide: Step by Step
For dental labs in the implant workflow, surgical guide production is a digital fabrication process that begins with receiving the finalized guide design file from the clinician or planning bureau.
The key guide resin used in printed surgical guide production is classified as a dedicated implant guide material distinct from model resins, splint resins, and tray resins in its mechanical and biocompatibility requirements. Labs that stock a range of Keystone dental resins for different 3D printing applications should maintain surgical guide resin as a separate SKU from their model and splint materials.
Step 1 — Receive and verify the design file.
The implant planning software exports an STL or similar file representing the surgical guide geometry with drill tube positions. Verify that bushing diameters match the implant system specified and that the guide design includes adequate indexing surfaces for the support type.
Step 2 — Orient and support for printing.
Surgical guides require careful support placement to maintain accuracy at the drill tube locations. Tube orientations should be supported to prevent Z-axis deflection during printing. Most guide resins have recommended layer thicknesses and exposure settings — always print per the resin manufacturer's validated parameters.
Step 3 — Post-process correctly.
Surgical guide resins require thorough post-cure at specified wavelength and duration to achieve full mechanical properties. Under-cured guides will deform under drilling forces. Wash cycles in IPA or dedicated cleaning solution must be completed before post-curing to remove uncured resin from internal surfaces, particularly inside the drill tube recesses.
Step 4 — Insert metal guide sleeves.
After printing and post-cure, metal drill bushings are press-fit or bonded into the guide tube recesses. Bushing dimensions must match the implant system's drill protocol — confirm compatibility with the specific implant brand before fabricating.
Step 5 — Check fit on the model.
Seat the guide on the printed or physical model before delivery and verify complete, passive seating. Any rocking, gap, or resistance indicates a fabrication issue that must be resolved before the guide goes to surgery. For tooth-supported guides, use the key model resinl resin printed working model as the verification reference the accuracy of guide fit evaluation is only as good as the accuracy of the model it is verified against.
Step 6 — Package for sterilization.
Surgical guides must be sterilized before clinical use. Confirm that your guide resin is rated for the sterilization method specified by the clinician most surgical guide resins support chemical (Cidex) sterilization, but not all support autoclave cycles. Provide the clinician with the resin's sterilization protocol documentation.
Accuracy in Guided Implant Surgery: What the Evidence Shows
The clinical rationale for using surgical guides is supported by a consistent body of published literature. Studies measuring the deviation between planned and actual implant positions in guided versus freehand surgery show meaningful accuracy advantages for guided placement across both angular deviation (the tilt difference between planned and placed implant axis) and positional deviation at the implant shoulder and apex.
Angular deviation in freehand implant placement is typically reported in the range of 4–6 degrees. Guided placement using tooth-supported static guides reduces this to 1.5–3 degrees in most published series. Coronal positional deviation — the distance between the planned and actual implant shoulder position — is typically 1–2 mm freehand and 0.5–1 mm with guided placement.
These accuracy differences translate directly into restorative outcomes. Angular deviation of more than 3–4 degrees from the planned position can require restorative compensations angled abutments, non-standard components, or emergence profile compromises that add cost and complexity to the prosthetic phase. In the anterior zone, where implant angulation directly determines crown emergence and esthetic integration, the difference between guided and freehand placement accuracy is clinically significant.
Surgical Guides in the Context of the Full Implant Workflow
The surgical guide is one component of the implant workflow — not the entire workflow. For dental labs that supply implant-related materials and services, understanding the surrounding workflow helps identify where material selection decisions connect.
For labs that serve as a zirconia materials distributor USA supplying both implant guide materials and final restoration materials, the workflow connection is direct: the surgical guide determines implant position, and implant position determines the restorative challenge for the final crown. Accurate guided placement reduces the complexity of the prosthetic phase, which reduces remake risk on the final zirconia crown.
The final implant crown is typically fabricated from one of two materials depending on the esthetic zone. For posterior implant crowns, high-strength monolithic zirconia blocks dental grade material (3Y-TZP) is the standard choice — delivering the flexural strength and wear resistance that posterior implant-supported restorations require under functional load. For anterior implant crowns, zirconia dental blanks in 4Y or 5Y multilayer format provide the translucency needed to match adjacent natural dentition in the esthetic zone.
Labs that stock both surgical guide resins and a full range of zirconia blank and dental zirconia discs from a single US supplier are positioned to serve the complete implant case from the planning-phase guide through to the final delivered crown without the supply chain fragmentation that comes from managing multiple vendors for adjacent material categories.
Surgical guides represent one of the clearest examples of digital dentistry delivering measurable clinical improvement over conventional freehand technique. The accuracy advantage is documented, the fabrication workflow is well-established, and the material requirements are specific enough that correct resin selection matters as much as correct design. For dental labs building out or expanding their implant service offering, stocking the right surgical guide dental resin alongside high-quality zirconia blocks for final restoration fabrication positions the lab to serve the complete implant case from planning through permanent delivery.


